> ## Documentation Index
> Fetch the complete documentation index at: https://docs.aisync.link/llms.txt
> Use this file to discover all available pages before exploring further.
# Advanced
#### ⚙️ Advanced tab (user guide)
The **Advanced** tab is where you give your agent **extra abilities** during calls: ending calls on purpose, transferring callers, booking appointments, collecting details after or during a call, joining meetings, using phone menus (press-a-number systems), optional clinic-related options, and connecting custom actions.
You will also find **phone number assignment** for this agent, **tools to test and connect** the agent, and **sender** settings for notifications.
## 📋 Agent Functions (main section)
Under the title **Agent Functions**, a short line explains that you can turn on things like calendar booking and ending calls—read it once; it sets context for everything below.
Below that, a **grid of cards** lets you **open setup** for each type of function. Each card has a title, one line of help text, and a **Configure** button (or a switch in one special case).
## 🔴 End Call
**Purpose:** Tell the agent **when and how** it may end the call after your business goal is finished.
1. Choose **Configure** on the End Call card.
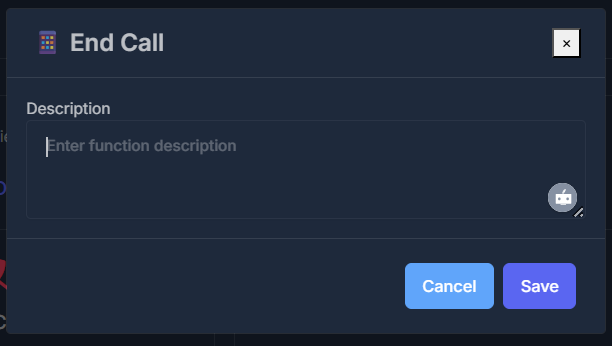
2. A panel opens with a single large text area: **Description**.
3. Write clear instructions in everyday language (for example: after the appointment is booked, end the call politely).
4. Choose **Save**. **Cancel** closes without saving.
*The configure panel is a single **Description** field—similar to this:*
 ## 🔄 Call Transfer
**Empower your callers to reach the right person—instantly.** The **Call Transfer** feature allows your AI agent to intelligently hand off conversations to a real staff member or team whenever personalized human support is needed, a booking must be made, or a specialized department should step in.
1. Click the **Configure** button on the Call Transfer card.
2. Complete a few simple settings—tailored to *your* workflow.
3. Hit **Save** to activate. Use **Cancel** to exit without changes.
### 🔁 Warm Transfer
Decide how callers are routed:
* **Warm Transfer:** Your AI agent smoothly prepares the handoff and connects the caller to a single destination—no awkward transitions!
## 🔄 Call Transfer
**Empower your callers to reach the right person—instantly.** The **Call Transfer** feature allows your AI agent to intelligently hand off conversations to a real staff member or team whenever personalized human support is needed, a booking must be made, or a specialized department should step in.
1. Click the **Configure** button on the Call Transfer card.
2. Complete a few simple settings—tailored to *your* workflow.
3. Hit **Save** to activate. Use **Cancel** to exit without changes.
### 🔁 Warm Transfer
Decide how callers are routed:
* **Warm Transfer:** Your AI agent smoothly prepares the handoff and connects the caller to a single destination—no awkward transitions!
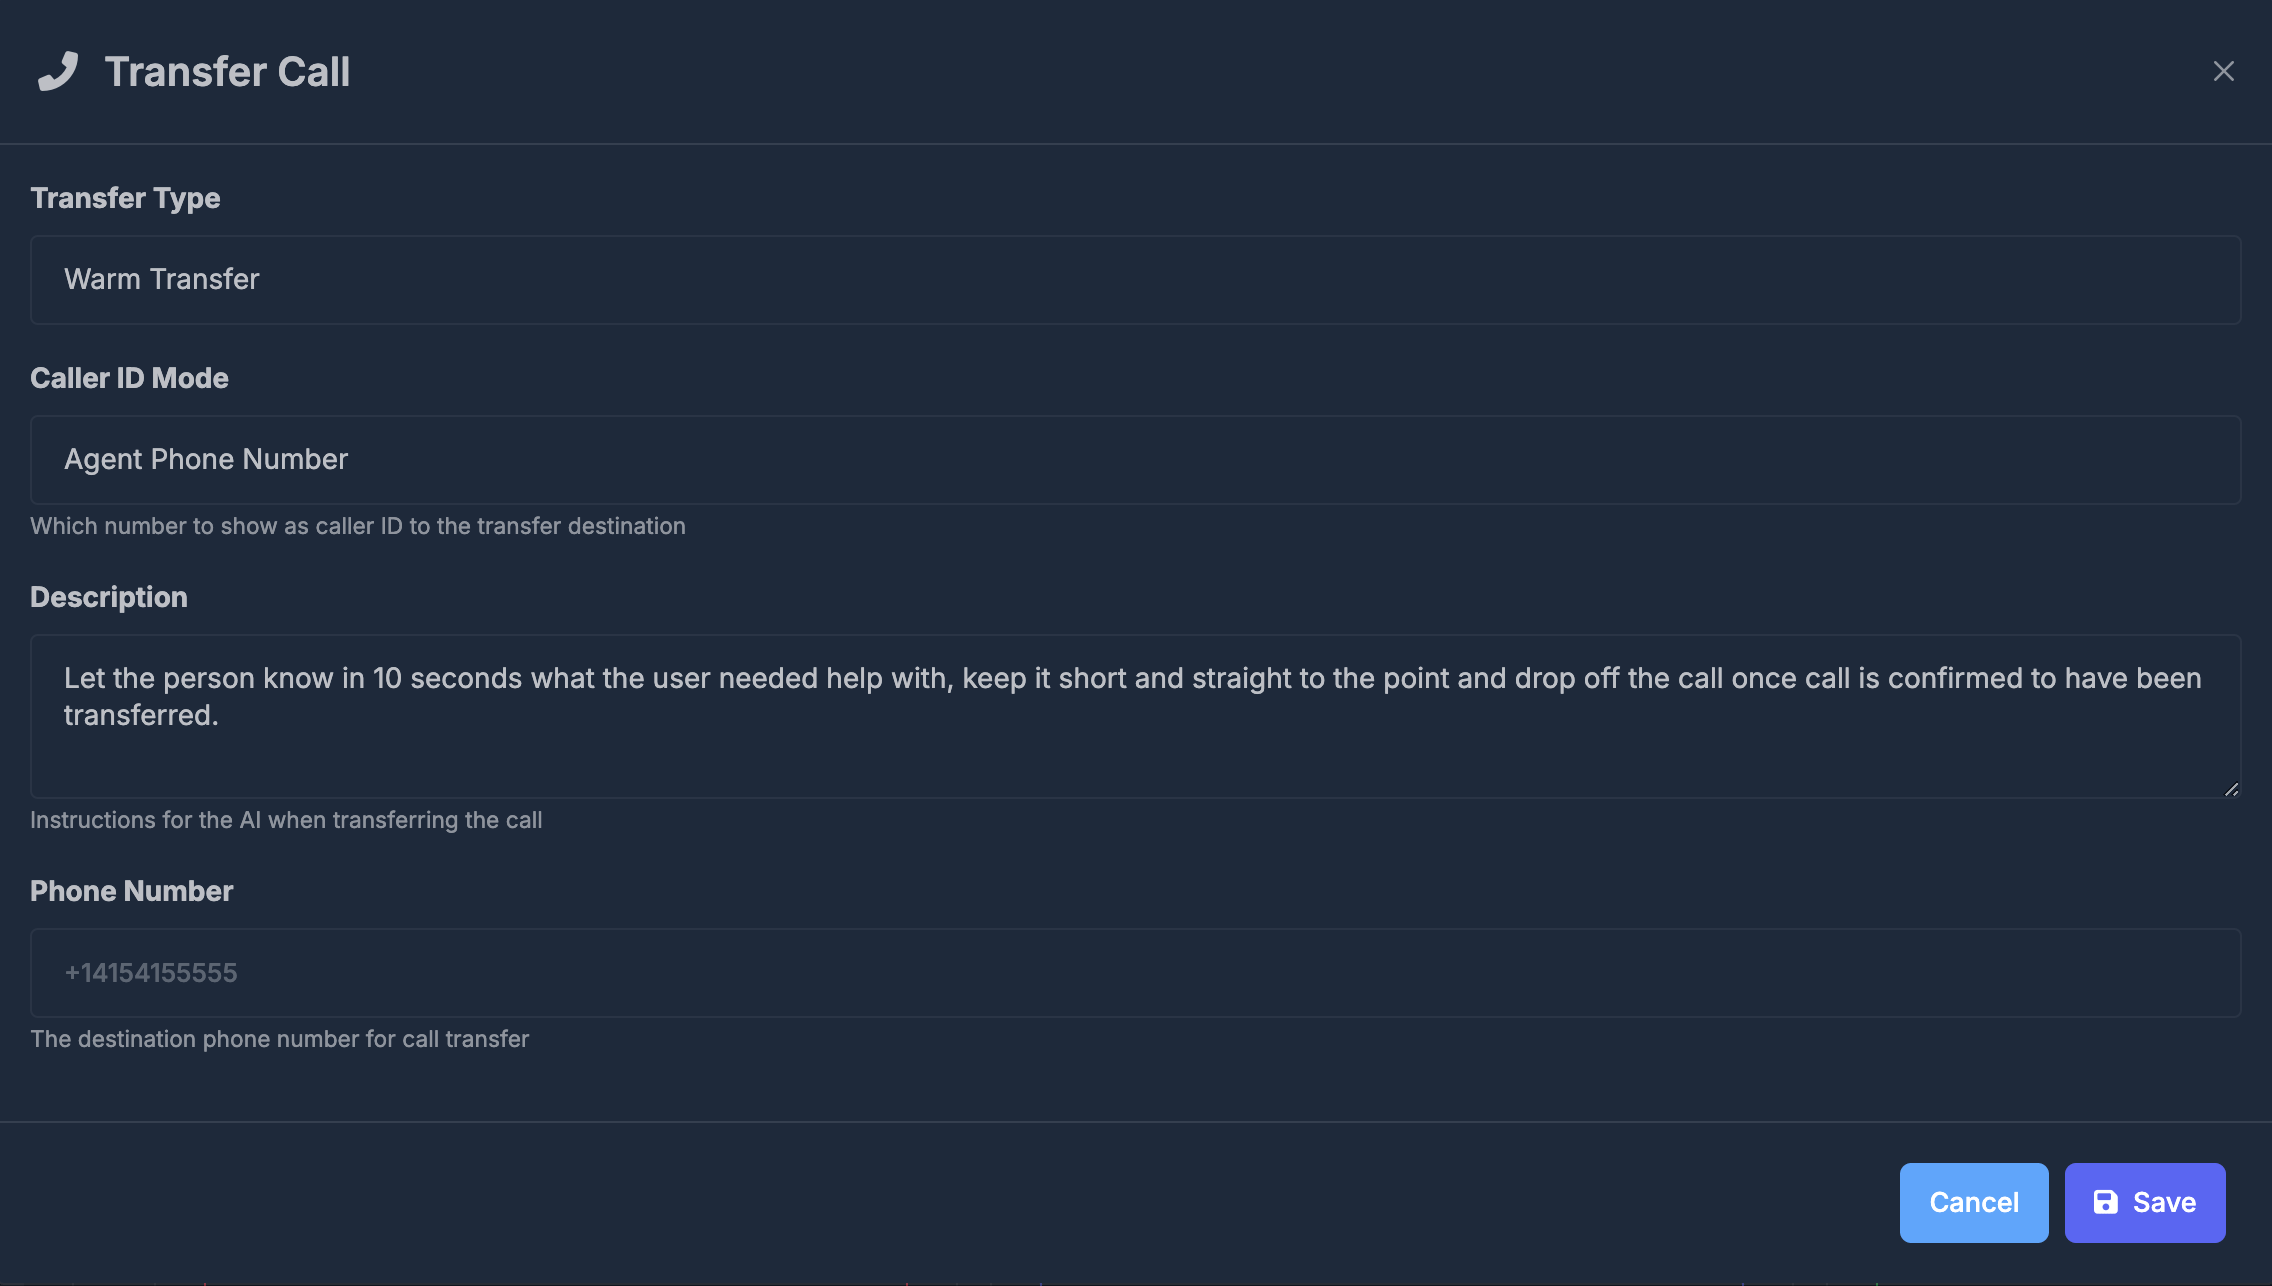 **📞 Caller ID Mode**
Control the number displayed to the receiving party:
| Option | What shows up for the recipient |
| ---------------------- | ------------------------------------ |
| **Agent Phone Number** | The agent's assigned business number |
| **User Phone Number** | The caller’s own phone number |
***
**📝 Description**
Add clear, concise instructions for your AI about what to say during the transfer. *(Example: “Introduce the caller and explain they want to schedule an appointment. Then connect the call.”)*
**☎️ Phone Number**
Designate the **destination number** (in international format, e.g. `+14154155555`).
> ⚠️ If left blank and you save, Call Transfer will be disabled.
### 🗓️ Schedule Transfer
Route callers automatically to different numbers based on business hours, staffing, or special scenarios.
**📞 Caller ID Mode**
Control the number displayed to the receiving party:
| Option | What shows up for the recipient |
| ---------------------- | ------------------------------------ |
| **Agent Phone Number** | The agent's assigned business number |
| **User Phone Number** | The caller’s own phone number |
***
**📝 Description**
Add clear, concise instructions for your AI about what to say during the transfer. *(Example: “Introduce the caller and explain they want to schedule an appointment. Then connect the call.”)*
**☎️ Phone Number**
Designate the **destination number** (in international format, e.g. `+14154155555`).
> ⚠️ If left blank and you save, Call Transfer will be disabled.
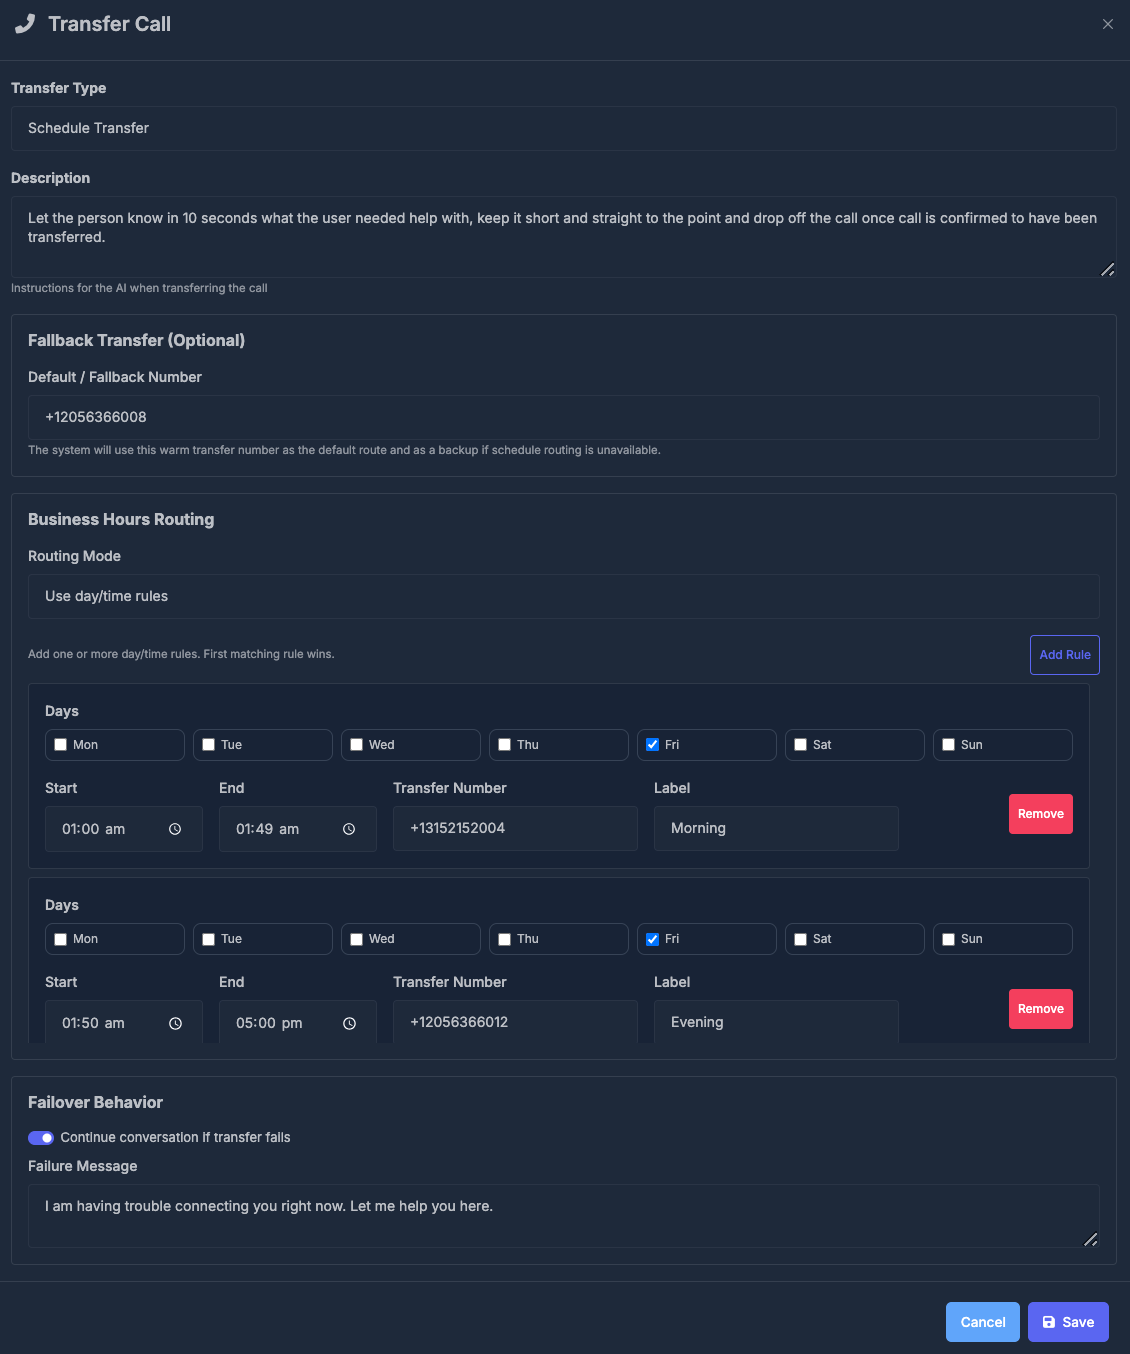
### 🗓️ Schedule Transfer
Route callers automatically to different numbers based on business hours, staffing, or special scenarios.
 **🌟 Features:**
* **Description:** What should your AI say during the handoff? (Think: a quick summary and polite introduction.)
* **Default/Fallback Number:** Used as the primary transfer and as a safety net if all else fails.
* **Business Hours Routing:**
1. Set **Routing Mode** to **Use day/time rules**
2. Click **Add Rule** for blocks like "Weekdays Morning" or "After Hours".
* **Days:** Which weekdays the rule applies to
* **Start/End time:** When is this number active?
* **Transfer Number:** Destination for this time period
* **Label:** Easily recognize the rule (e.g. "Lunch Shift")
* **Remove:** Clear outdated rules in one click
* **Failover Behavior:**\
If the transfer doesn’t connect:
* Enable **Continue conversation if transfer fails**
* Provide a **Failure Message** — what your AI should say instead\
*(Example: “Sorry, I couldn't reach a human right now. Can I help you with something else?”)*
## 📅 Calendar Appointments
**Purpose:** Let your agent **check availability** and **book appointments** using your connected calendar system.
You can integrate your calendar from the **Settings > Integrations** tab. Connect either:
* **Go High Level (GHL)**
* **Calendly**
* **Rizz Dial** (Google Calendar)
> ℹ️ Make sure you've connected your calendar (or Calendly) from the **Integration** tab in your settings before configuration.
*Choosing the booking method and selecting GHL, Calendly, or Google Calendar/Rizz Dial:*
**🌟 Features:**
* **Description:** What should your AI say during the handoff? (Think: a quick summary and polite introduction.)
* **Default/Fallback Number:** Used as the primary transfer and as a safety net if all else fails.
* **Business Hours Routing:**
1. Set **Routing Mode** to **Use day/time rules**
2. Click **Add Rule** for blocks like "Weekdays Morning" or "After Hours".
* **Days:** Which weekdays the rule applies to
* **Start/End time:** When is this number active?
* **Transfer Number:** Destination for this time period
* **Label:** Easily recognize the rule (e.g. "Lunch Shift")
* **Remove:** Clear outdated rules in one click
* **Failover Behavior:**\
If the transfer doesn’t connect:
* Enable **Continue conversation if transfer fails**
* Provide a **Failure Message** — what your AI should say instead\
*(Example: “Sorry, I couldn't reach a human right now. Can I help you with something else?”)*
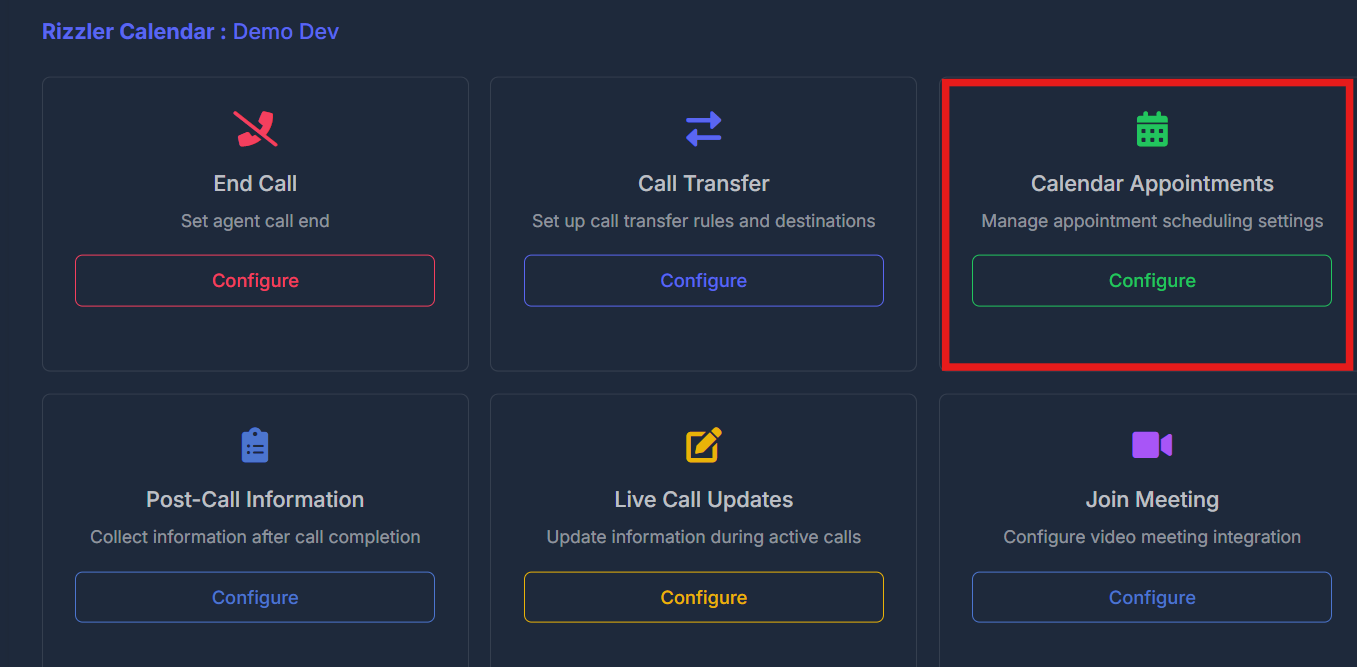
## 📅 Calendar Appointments
**Purpose:** Let your agent **check availability** and **book appointments** using your connected calendar system.
You can integrate your calendar from the **Settings > Integrations** tab. Connect either:
* **Go High Level (GHL)**
* **Calendly**
* **Rizz Dial** (Google Calendar)
> ℹ️ Make sure you've connected your calendar (or Calendly) from the **Integration** tab in your settings before configuration.
*Choosing the booking method and selecting GHL, Calendly, or Google Calendar/Rizz Dial:*
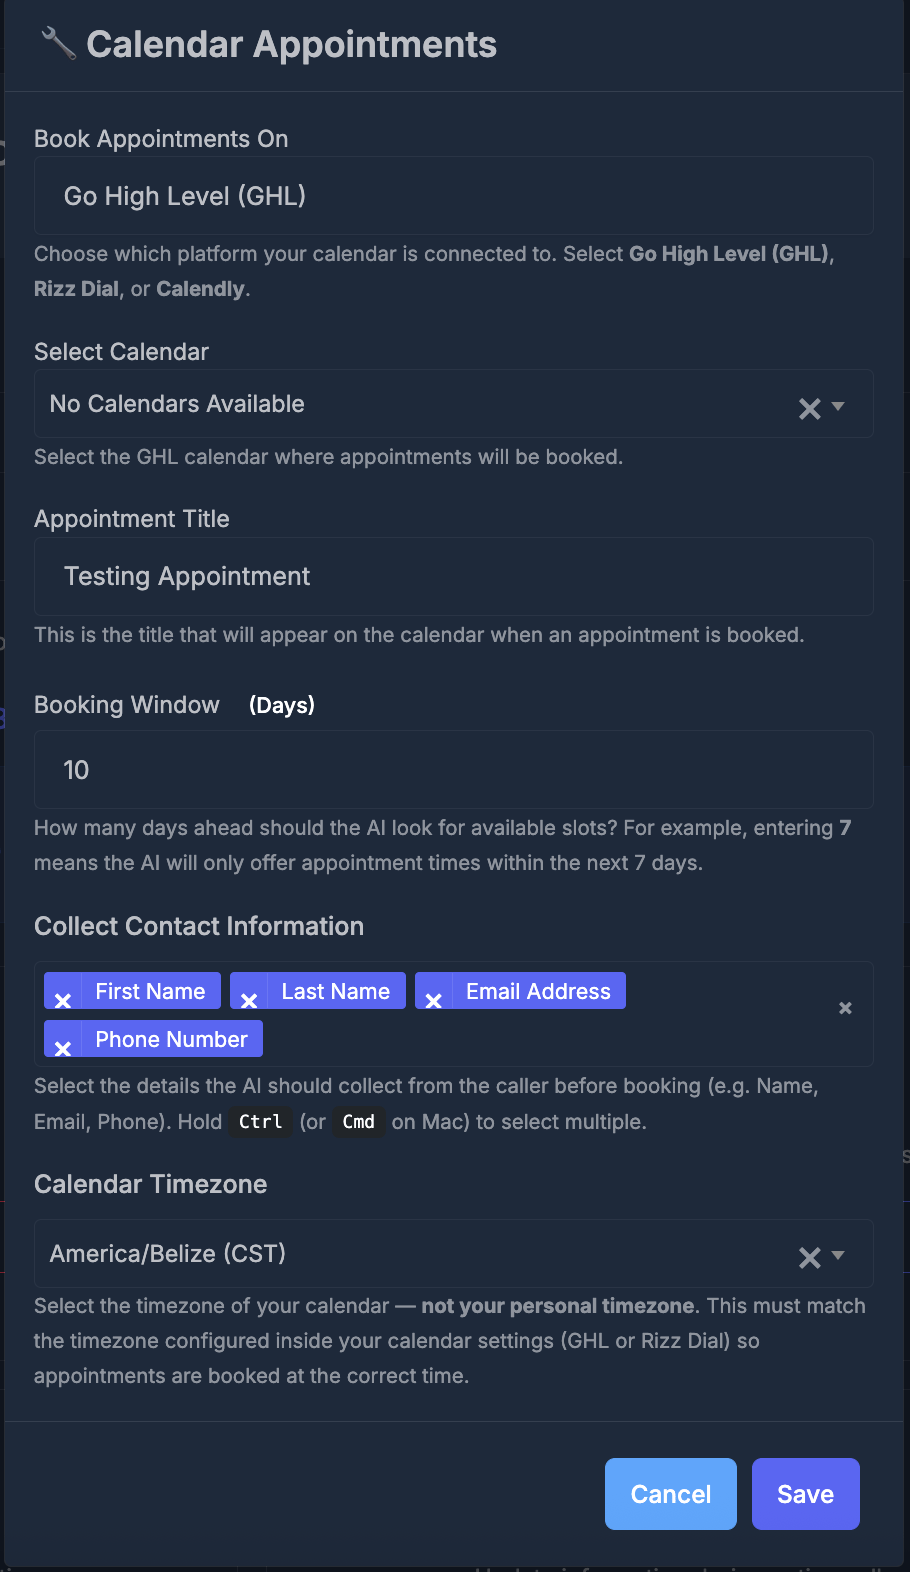
 1. From the **Calendar Appointments** card, click **Configure**.
2. If you select **Direct Calendar Booking**:
* **Select Calendar Platform:** Pick GHL, Calendly, or Google Calendar/Rizz Dial—choose whichever you've already connected.
* **Choose Calendar:** Select the calendar your agent should use for bookings. If no options appear, confirm your integration is properly set up under **Settings > Integrations**.
3. **Appointment Title:** Set the event name shown on the calendar (e.g., “Sales Call”, “Consultation”).
4. **Booking Window:** Set how many **days into the future** your agent can offer appointments (e.g., show only the next 7 days).
5. **Collect Contact Information:** Choose the caller details your agent must collect before booking (options depend on calendar platform).
6. **Calendar Timezone:** Match the calendar’s timezone to your business/location needs.
7. Click **Save** to apply changes or **Cancel** to discard edits.
*Customizing appointment details, contact fields, and extra options:*
1. From the **Calendar Appointments** card, click **Configure**.
2. If you select **Direct Calendar Booking**:
* **Select Calendar Platform:** Pick GHL, Calendly, or Google Calendar/Rizz Dial—choose whichever you've already connected.
* **Choose Calendar:** Select the calendar your agent should use for bookings. If no options appear, confirm your integration is properly set up under **Settings > Integrations**.
3. **Appointment Title:** Set the event name shown on the calendar (e.g., “Sales Call”, “Consultation”).
4. **Booking Window:** Set how many **days into the future** your agent can offer appointments (e.g., show only the next 7 days).
5. **Collect Contact Information:** Choose the caller details your agent must collect before booking (options depend on calendar platform).
6. **Calendar Timezone:** Match the calendar’s timezone to your business/location needs.
7. Click **Save** to apply changes or **Cancel** to discard edits.
*Customizing appointment details, contact fields, and extra options:*
 When your calendar integration is complete and saved, you’ll see a confirmation in **Active Functions**. Otherwise, a message will alert you that no calendar is selected.
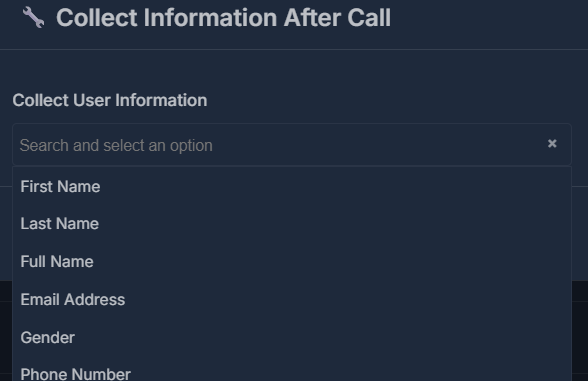
## 📋 Post-Call Information
**Purpose:** After the call ends, have the agent **capture specific information** you care about (aligned with fields your system can store).
1. Choose **Configure** on the Post-Call Information card.
2. Use **Collect User Information** to select one or more items (the list depends on your connected setup).
3. **Save** applies. **Cancel** closes without saving.
*Opening post-call setup from the card:*
When your calendar integration is complete and saved, you’ll see a confirmation in **Active Functions**. Otherwise, a message will alert you that no calendar is selected.
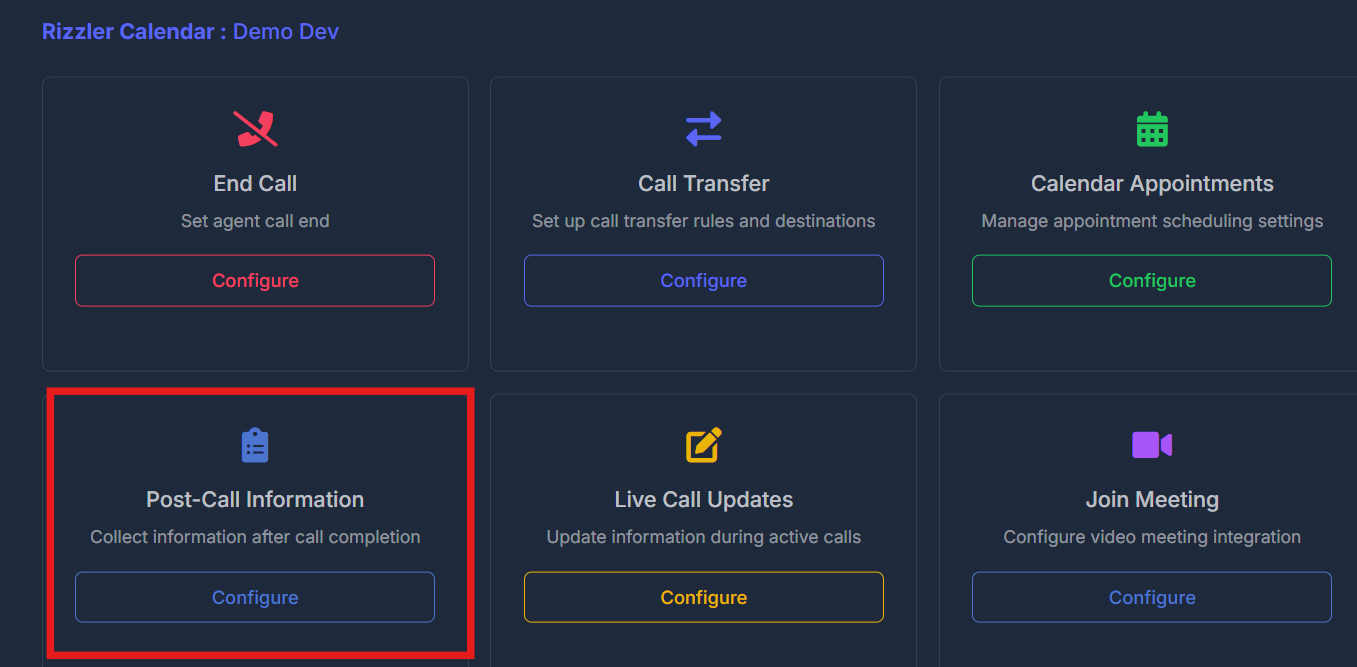
## 📋 Post-Call Information
**Purpose:** After the call ends, have the agent **capture specific information** you care about (aligned with fields your system can store).
1. Choose **Configure** on the Post-Call Information card.
2. Use **Collect User Information** to select one or more items (the list depends on your connected setup).
3. **Save** applies. **Cancel** closes without saving.
*Opening post-call setup from the card:*
 *Selecting which information to collect:*
 Active Functions shows **how many** fields you selected.
## 📝 Live Call Updates
**Purpose:** While the call is still active, update **stored information** when the caller says something relevant.
*What the Live Call Updates function is for:*
Active Functions shows **how many** fields you selected.
## 📝 Live Call Updates
**Purpose:** While the call is still active, update **stored information** when the caller says something relevant.
*What the Live Call Updates function is for:*
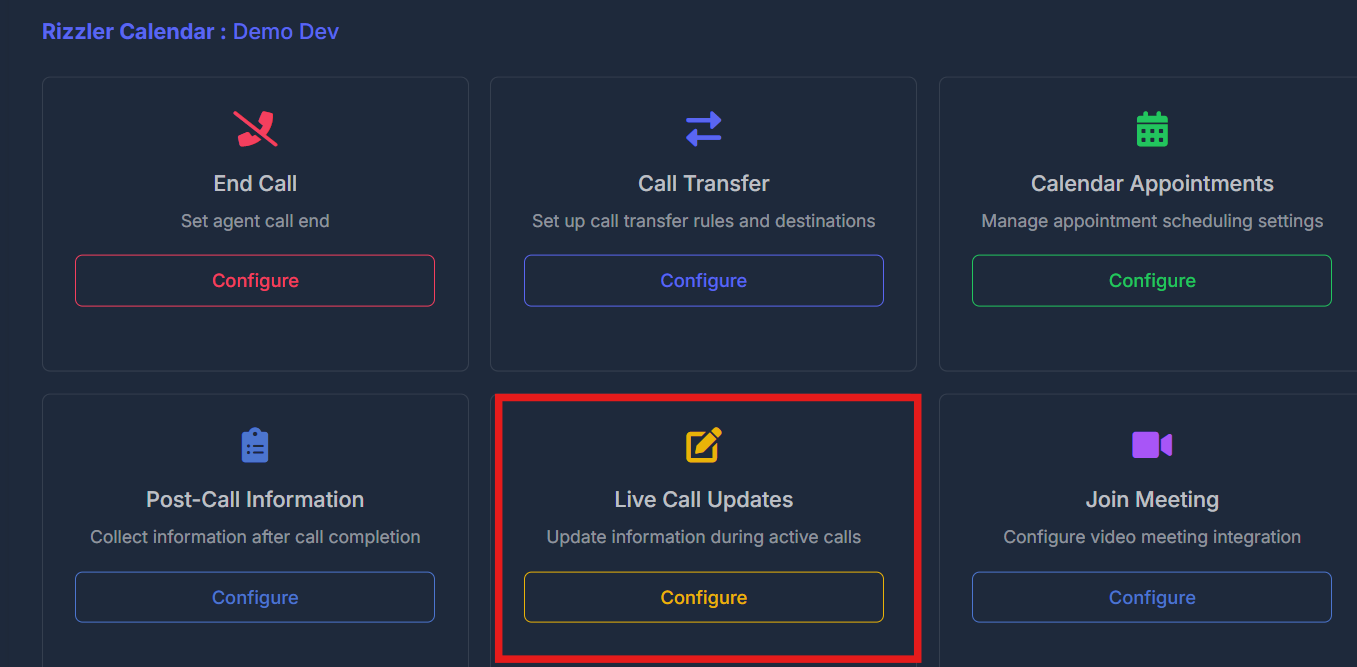 1. Choose **Configure** on the Live Call Updates card.
2. Select the information the agent is allowed to update during the call.
*Choosing which fields can be updated during the call:*
1. Choose **Configure** on the Live Call Updates card.
2. Select the information the agent is allowed to update during the call.
*Choosing which fields can be updated during the call:*
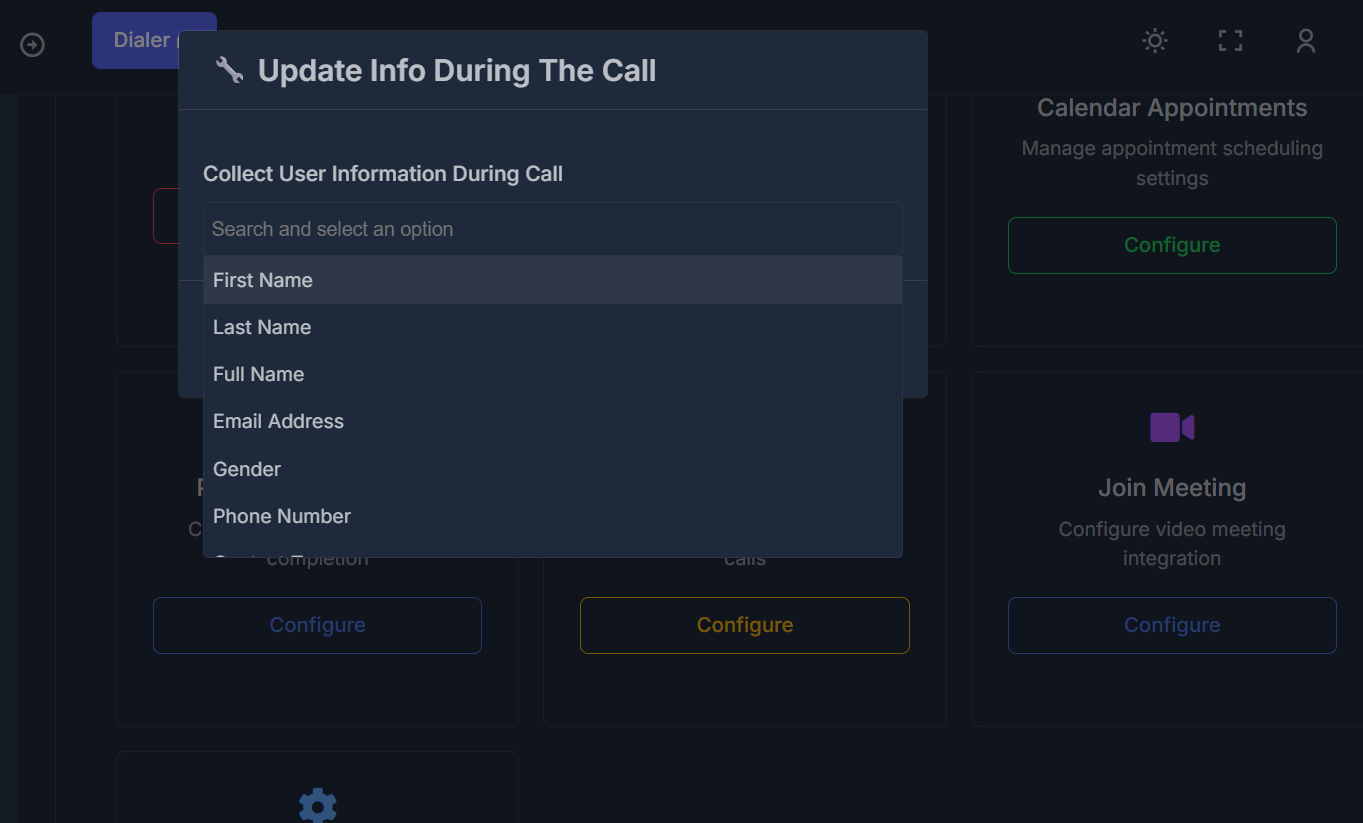 3. **Save** applies.
*Additional options on the same flow (if your screen shows these steps):*
3. **Save** applies.
*Additional options on the same flow (if your screen shows these steps):*
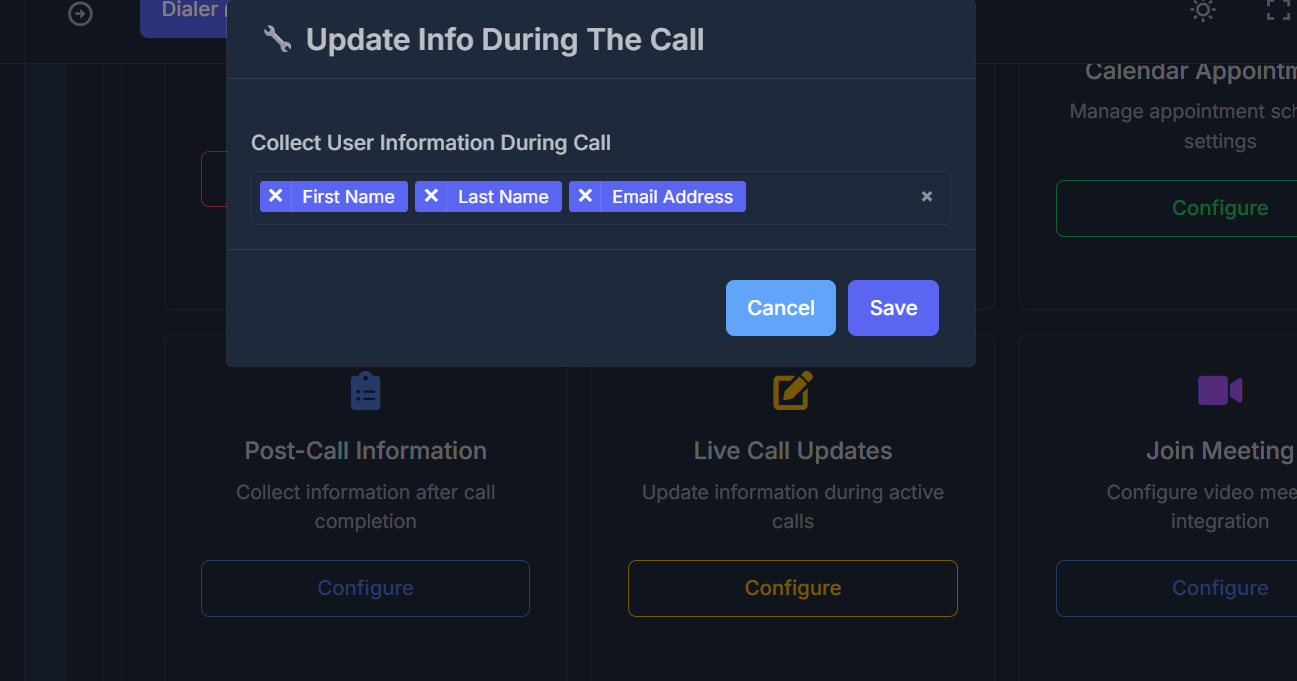 Active Functions shows **how many** fields are in use.
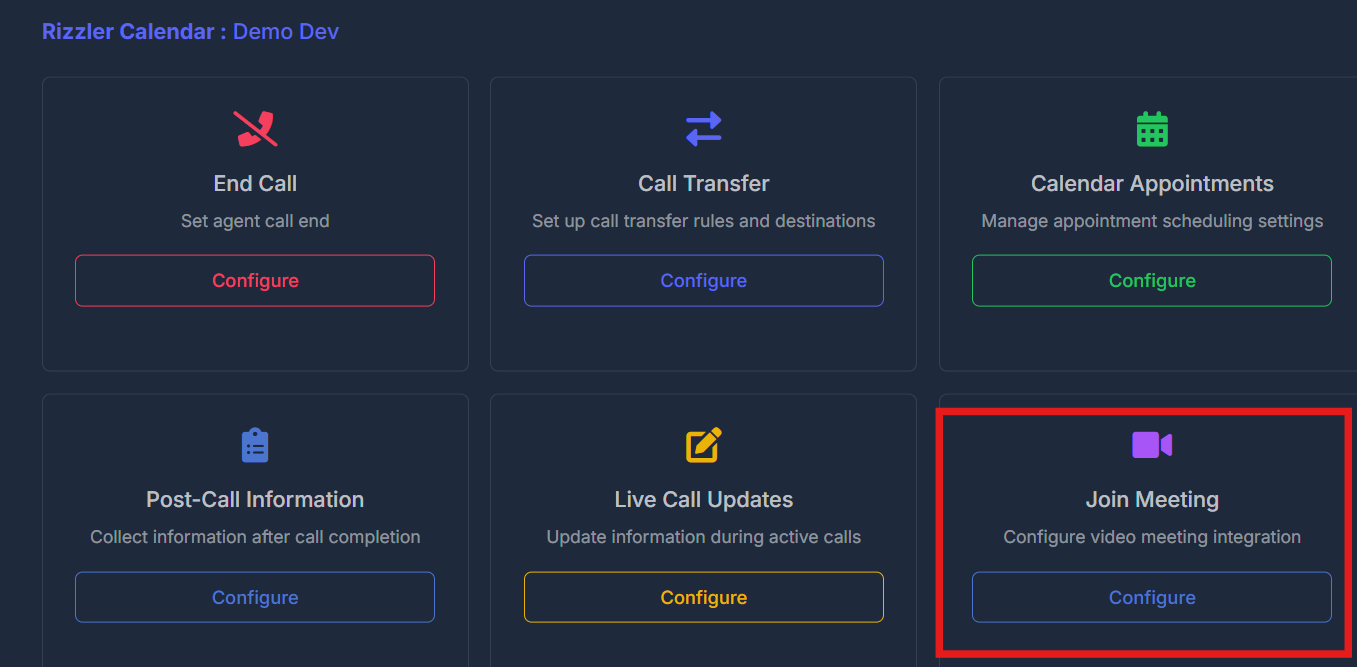
## 🎥 Join Meeting
**Purpose:** Connect **video meeting** behavior so the agent can work with your meeting flow.
1. Choose **Configure** on the Join Meeting card.
2. **Select Google Calendar:** Pick the calendar to use when this applies.
*Calendar selection for join-meeting behavior:*
Active Functions shows **how many** fields are in use.
## 🎥 Join Meeting
**Purpose:** Connect **video meeting** behavior so the agent can work with your meeting flow.
1. Choose **Configure** on the Join Meeting card.
2. **Select Google Calendar:** Pick the calendar to use when this applies.
*Calendar selection for join-meeting behavior:*
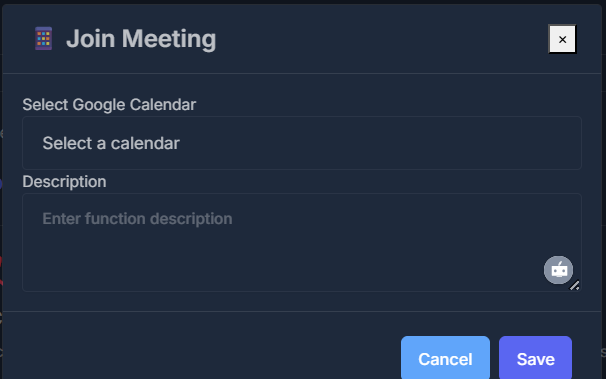
 3. **Description:** Explain when and how the agent should use the meeting action.
4. **Save** applies. **Cancel** closes without saving.
*Description and save—aligned with the fields above:*
3. **Description:** Explain when and how the agent should use the meeting action.
4. **Save** applies. **Cancel** closes without saving.
*Description and save—aligned with the fields above:*
 ## 🏥 Setup Cloud Clinic Integration (only if you see this card)
**Purpose:** Turn clinic-related features on for this agent when your organization uses that integration.
You may see a switch to enable or disable the feature. If your **profile** is missing required clinic connection details, the switch may stay off and a note tells you to add **Source System Id** and **Auth Token** in **Profile Settings** first.
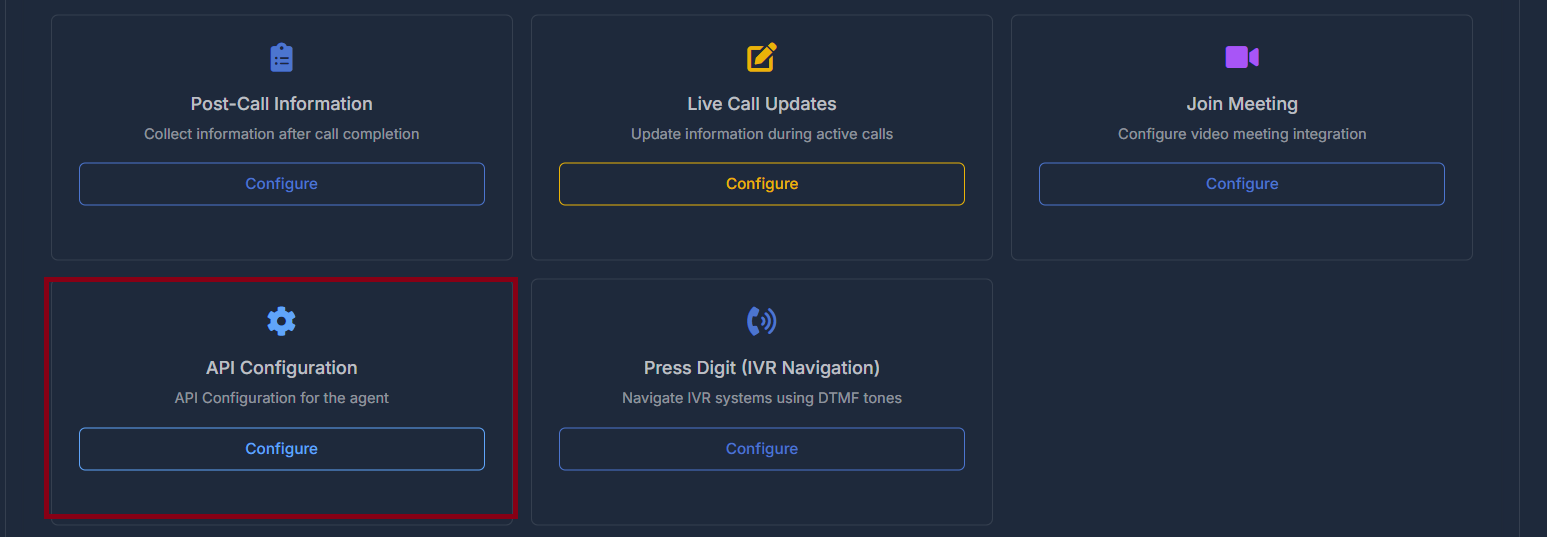
## 🔗 API Configuration
**Purpose:** Set up **custom webhooks and API actions** for your agent, allowing it to interact with your own services in addition to built-in tools like calendar and transfer.
Click **Configure** to manage your API action list. When enabled, these actions appear in **Active Functions** under the **API Configuration** summary, which displays each action’s endpoint, HTTP method, and data format.
*Example view of multiple API actions:*
## 🏥 Setup Cloud Clinic Integration (only if you see this card)
**Purpose:** Turn clinic-related features on for this agent when your organization uses that integration.
You may see a switch to enable or disable the feature. If your **profile** is missing required clinic connection details, the switch may stay off and a note tells you to add **Source System Id** and **Auth Token** in **Profile Settings** first.
## 🔗 API Configuration
**Purpose:** Set up **custom webhooks and API actions** for your agent, allowing it to interact with your own services in addition to built-in tools like calendar and transfer.
Click **Configure** to manage your API action list. When enabled, these actions appear in **Active Functions** under the **API Configuration** summary, which displays each action’s endpoint, HTTP method, and data format.
*Example view of multiple API actions:*
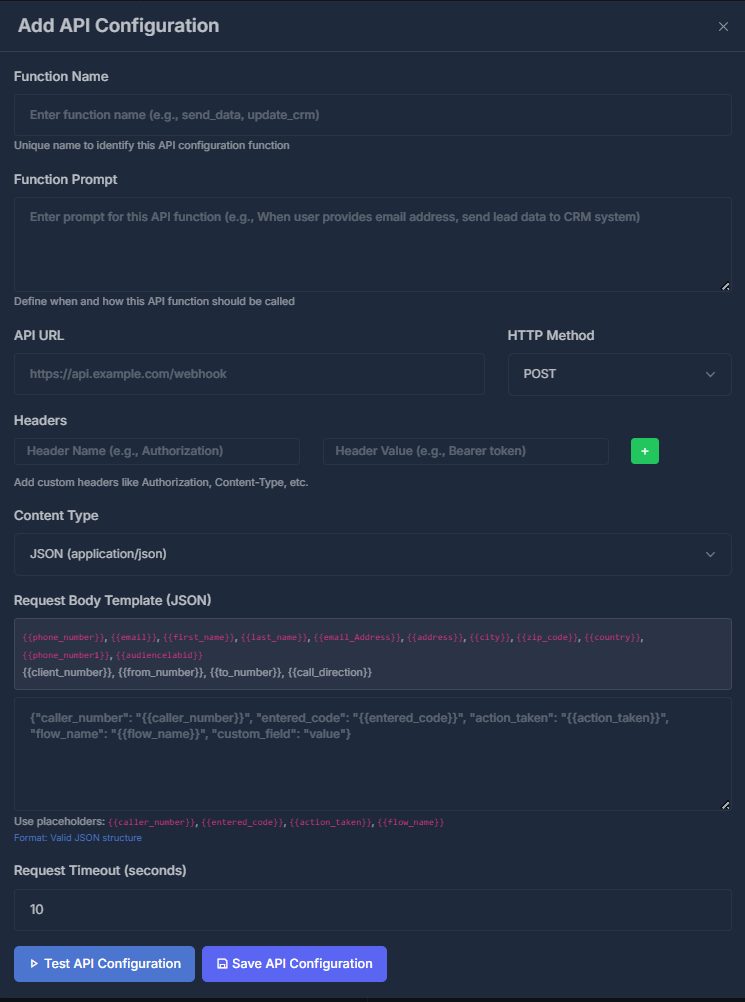
 *Form for adding or editing an API action (fields adjust based on integration details):*
 ## ☎️ Press Digit (IVR Navigation)
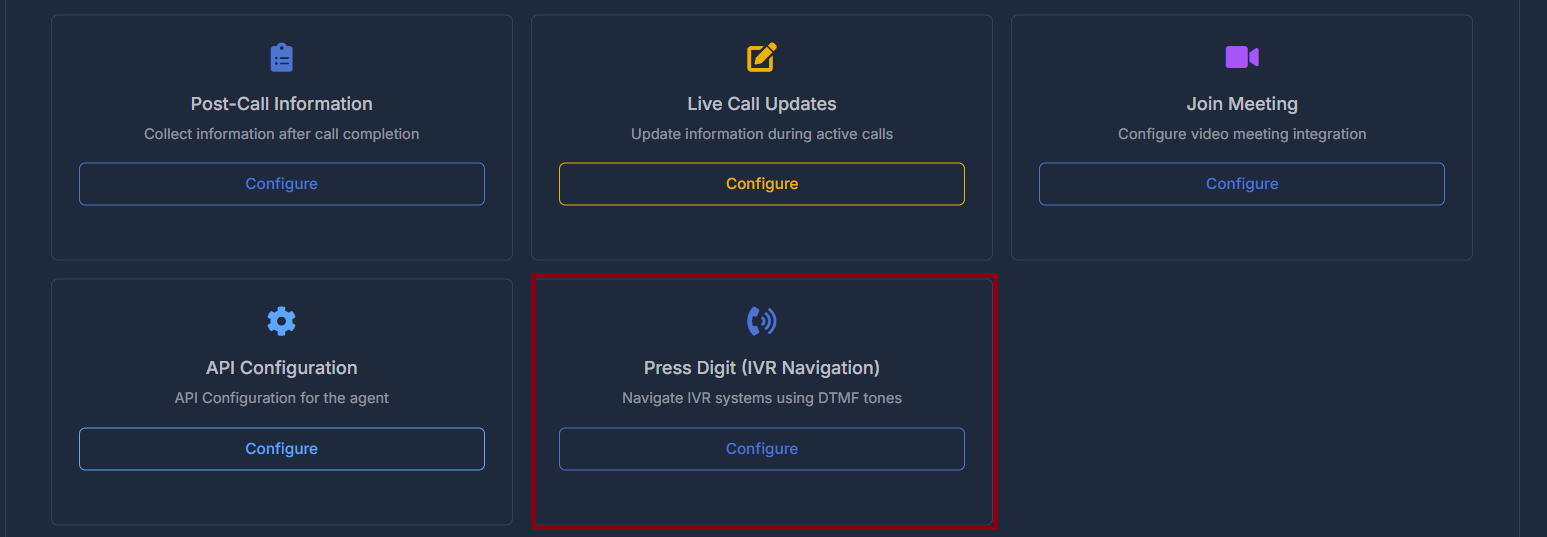
**Purpose:** When the other side uses a **phone tree** (“Press 1 for sales…”), the agent can listen and press the right keys.
*Press Digit as an agent function you can configure:*
## ☎️ Press Digit (IVR Navigation)
**Purpose:** When the other side uses a **phone tree** (“Press 1 for sales…”), the agent can listen and press the right keys.
*Press Digit as an agent function you can configure:*
 1. Choose **Configure** on the Press Digit card.
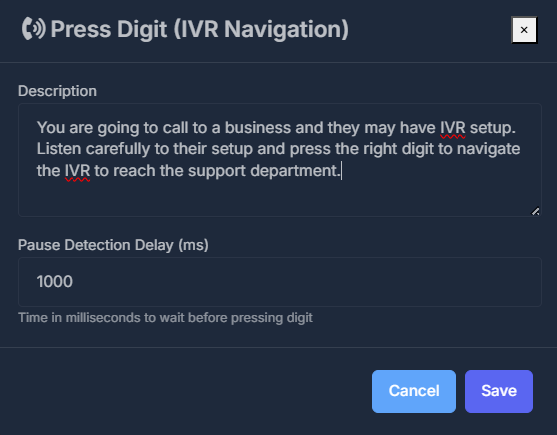
2. **Description:** Explain the situation (for example, navigate to support). Stay within the **character limit** shown under the box.
3. **Pause detection delay:** How long the agent waits before sending each digit—adjust if menus are slow or fast (allowed min/max are on screen).
4. **Save** applies. **Cancel** closes without saving.
*Description field, character limit, and pause delay:*
1. Choose **Configure** on the Press Digit card.
2. **Description:** Explain the situation (for example, navigate to support). Stay within the **character limit** shown under the box.
3. **Pause detection delay:** How long the agent waits before sending each digit—adjust if menus are slow or fast (allowed min/max are on screen).
4. **Save** applies. **Cancel** closes without saving.
*Description field, character limit, and pause delay:*
 ## 📞 Phone Number Configuration
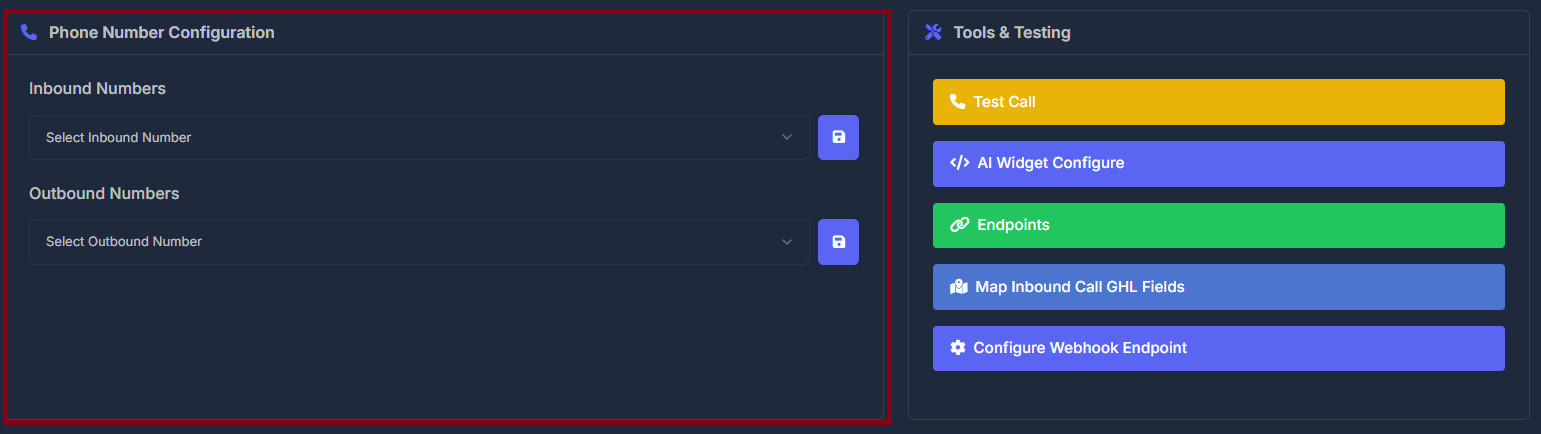
**Purpose:** Choose which **incoming** and **outgoing** phone numbers this agent uses from numbers available to your account.
**Inbound Numbers** — Open the list and pick the number that should receive calls for this agent; use the **save** control next to the list to apply.
**Outbound Numbers** — Pick the number used or shown for outbound calls from this agent; use the **save** control next to the list to apply.
If a number is already used elsewhere, your organization’s rules may limit what appears in the list.
*Inbound and outbound pickers on one screen:*
## 📞 Phone Number Configuration
**Purpose:** Choose which **incoming** and **outgoing** phone numbers this agent uses from numbers available to your account.
**Inbound Numbers** — Open the list and pick the number that should receive calls for this agent; use the **save** control next to the list to apply.
**Outbound Numbers** — Pick the number used or shown for outbound calls from this agent; use the **save** control next to the list to apply.
If a number is already used elsewhere, your organization’s rules may limit what appears in the list.
*Inbound and outbound pickers on one screen:*
 ## 🛠️ Tools & Testing
Shortcuts for **trying the agent** and **technical setup**.
*The row of tool buttons on the agent page:*
## 🛠️ Tools & Testing
Shortcuts for **trying the agent** and **technical setup**.
*The row of tool buttons on the agent page:*
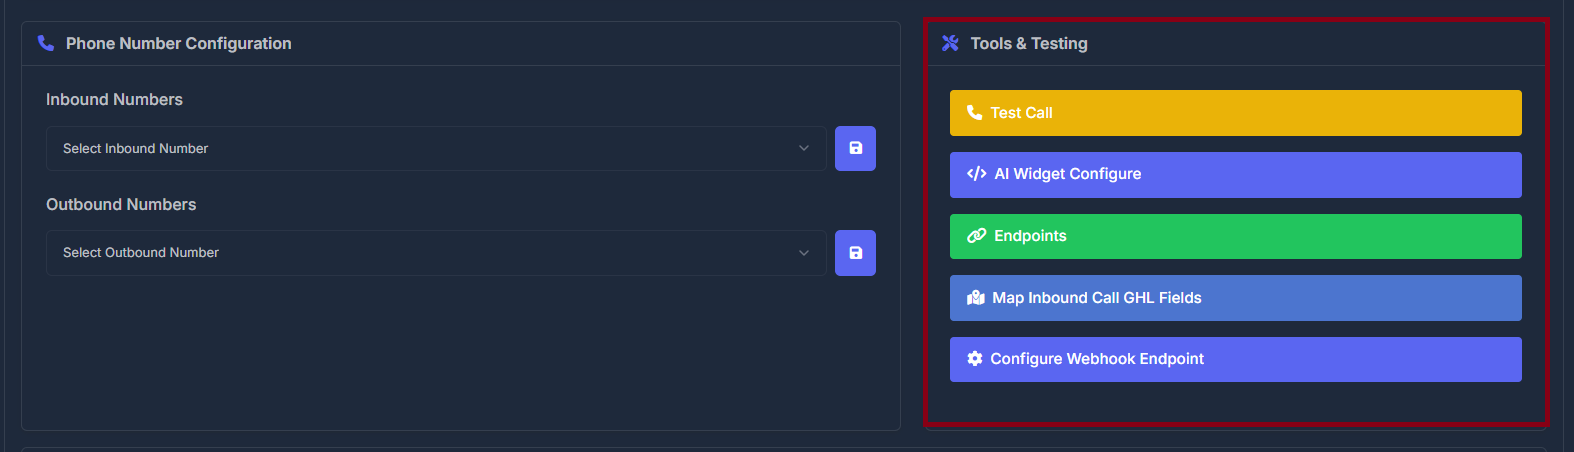 | Button | What it is for |
| ------------------------------- | ----------------------------------------------------------------------- |
| **Test Call** | Start a test call flow so you can hear how the agent behaves. |
| **AI Widget Configure** | Open setup for the chat or web widget tied to this agent. |
| **Endpoints** | View connection addresses and related information for integrations. |
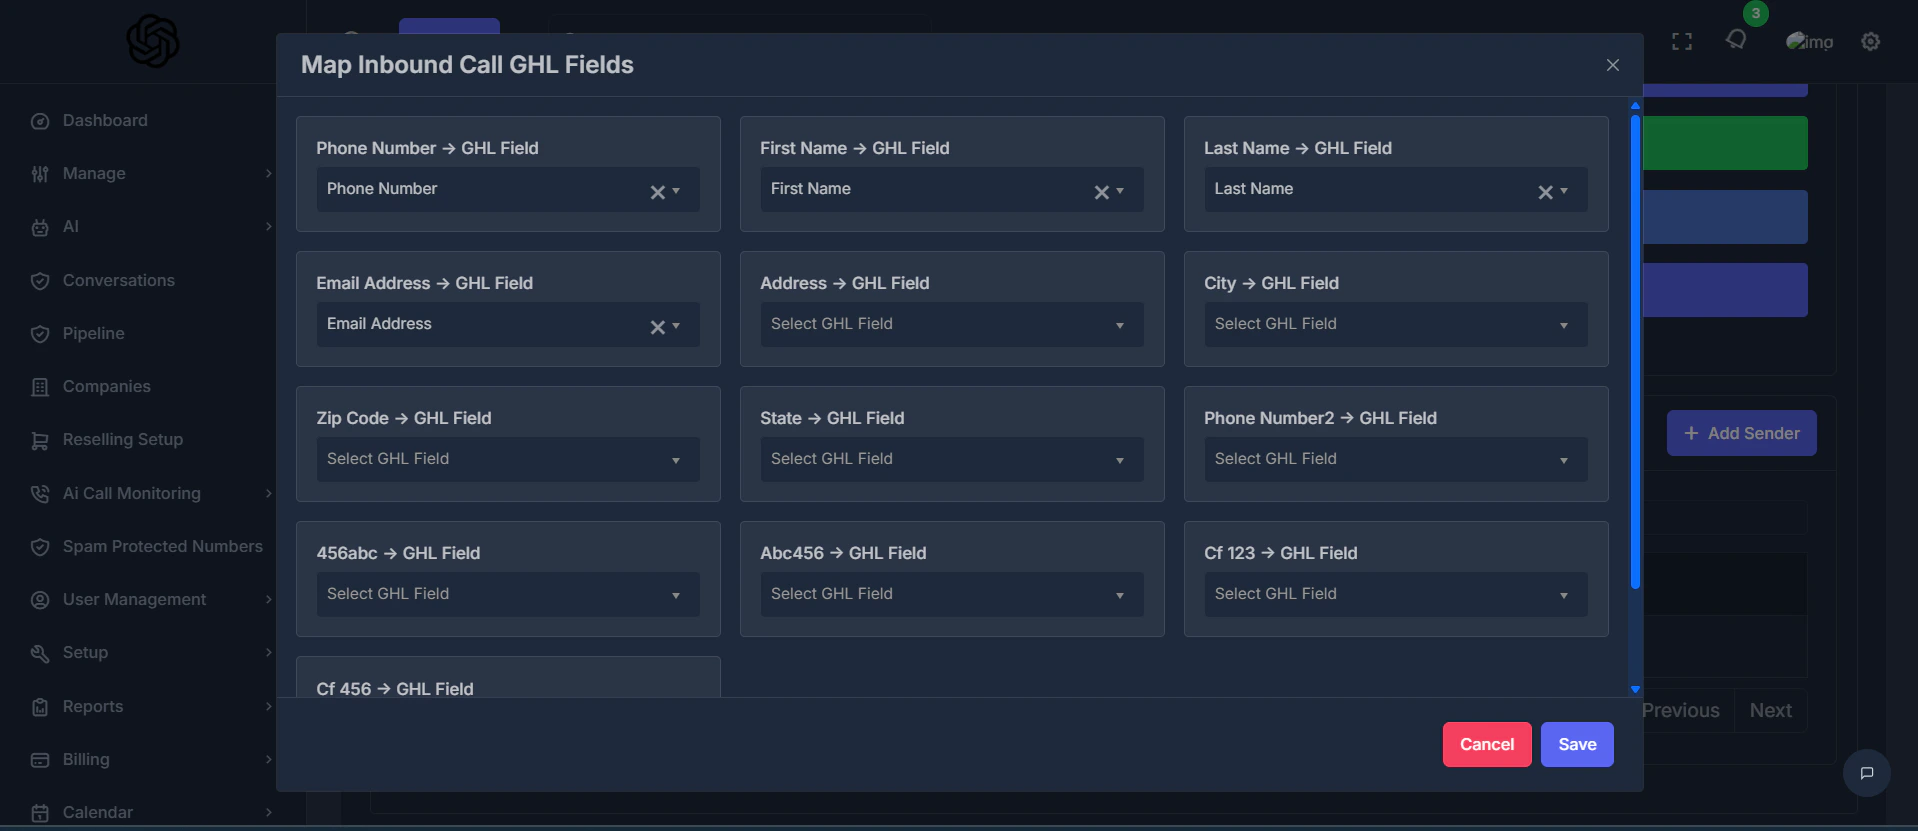
| **Map Inbound Call GHL Fields** | Match incoming call data to fields in your connected business platform. |
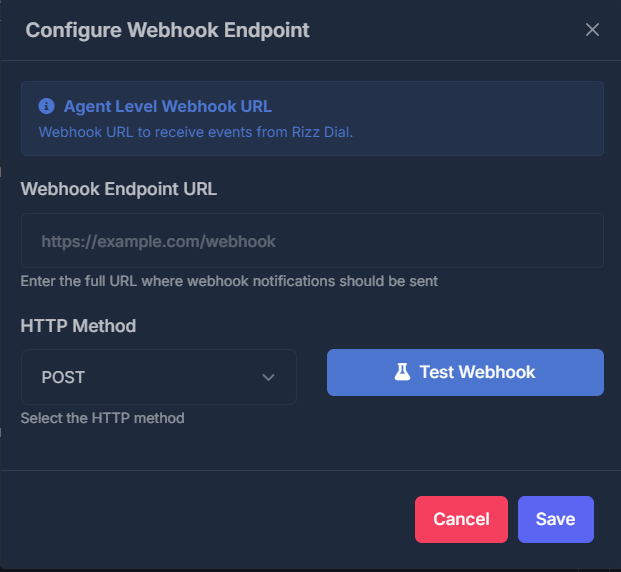
| **Configure Webhook Endpoint** | Set or view where call events can be sent for other systems. |
Open each when you need that task—some panels are for administrators or technical staff.
***Map Inbound Call GHL Fields** opens field mapping similar to this:*
| Button | What it is for |
| ------------------------------- | ----------------------------------------------------------------------- |
| **Test Call** | Start a test call flow so you can hear how the agent behaves. |
| **AI Widget Configure** | Open setup for the chat or web widget tied to this agent. |
| **Endpoints** | View connection addresses and related information for integrations. |
| **Map Inbound Call GHL Fields** | Match incoming call data to fields in your connected business platform. |
| **Configure Webhook Endpoint** | Set or view where call events can be sent for other systems. |
Open each when you need that task—some panels are for administrators or technical staff.
***Map Inbound Call GHL Fields** opens field mapping similar to this:*
 ***Configure Webhook Endpoint** uses a URL and HTTP method like this:*
## ✉️ Sender Management
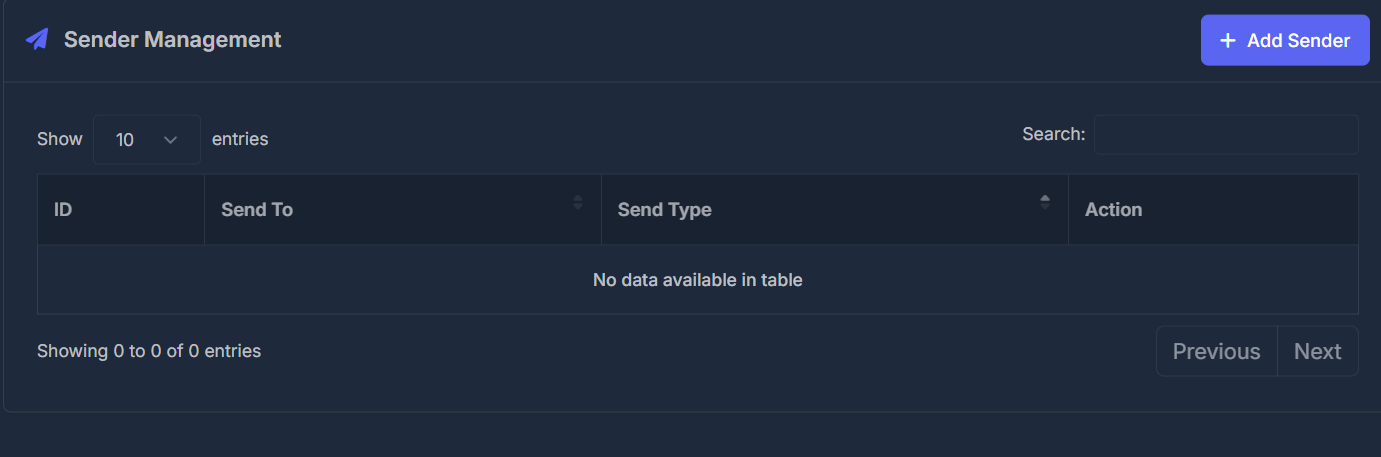
**Purpose:** Manage **where** notifications about this agent can be sent (for example email or text), as rows in a table.
**Add Sender** opens a short form. **Send To:** destination (email or phone, depending on your process). **Send Type:** **Email** or **SMS**. Saving adds a row; the table includes actions to manage existing entries.
*Sender list and Add Sender:*
***Configure Webhook Endpoint** uses a URL and HTTP method like this:*
## ✉️ Sender Management
**Purpose:** Manage **where** notifications about this agent can be sent (for example email or text), as rows in a table.
**Add Sender** opens a short form. **Send To:** destination (email or phone, depending on your process). **Send Type:** **Email** or **SMS**. Saving adds a row; the table includes actions to manage existing entries.
*Sender list and Add Sender:*