

Power Dialer gives each rep their own lines. If several reps share one list,
Predictive pacing hands that decision to the engine.For what “connected” and “answered” actually count, see
How calls actually work.
The Power Dialer automatically dials through your contact lists, eliminating manual dialing delays and helping your team focus on conversations rather than number entry.
🚀 Getting Started
🧭 Accessing the Power Dialer → Navigate to Dialer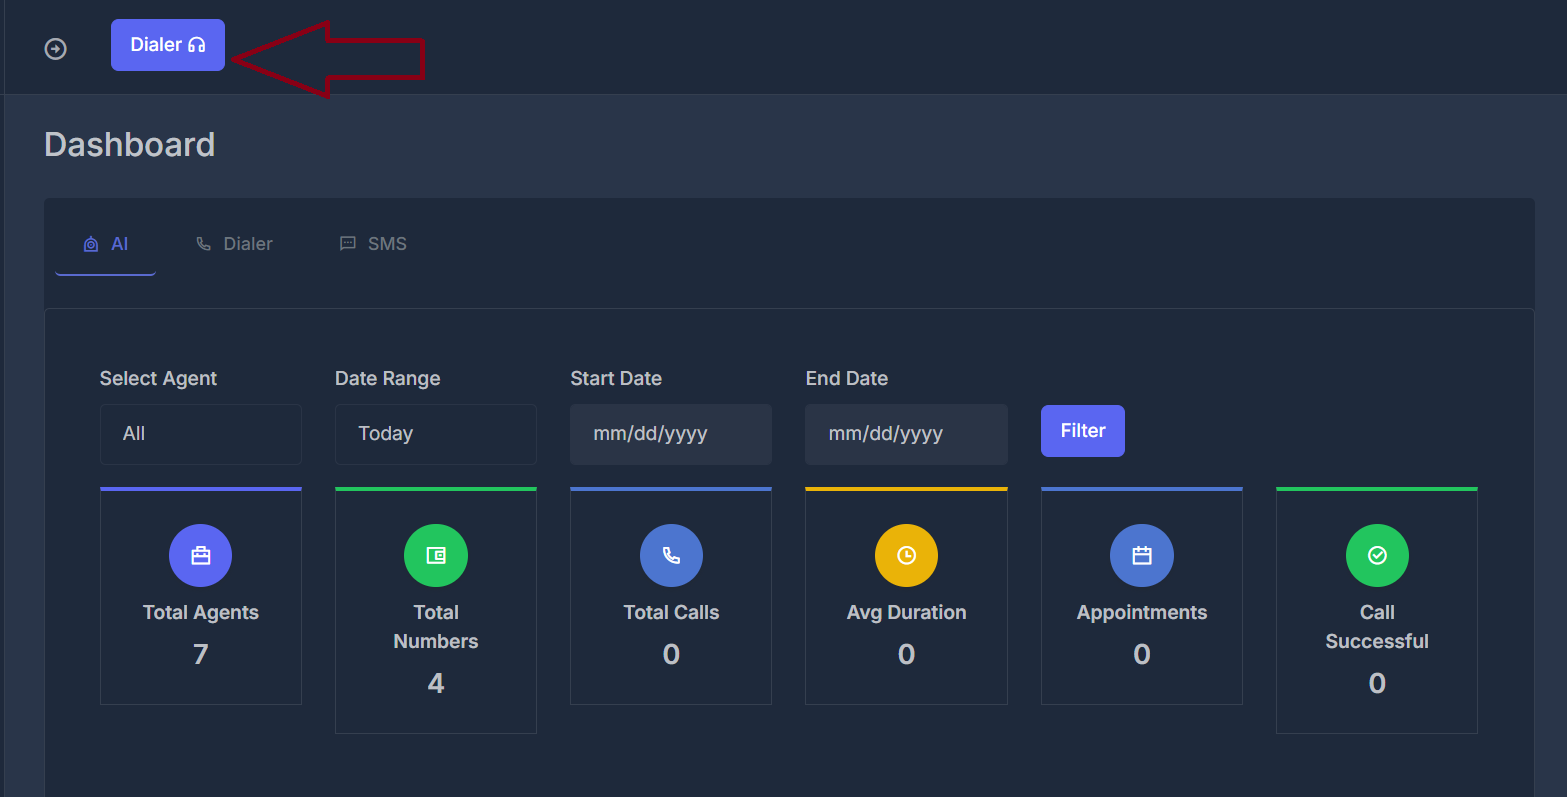
🖥️ Interface Overview
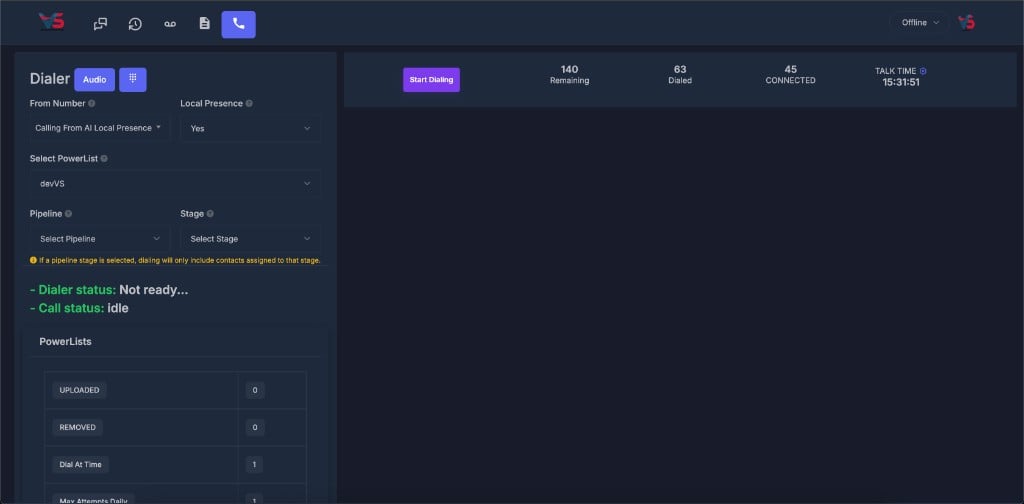
- 🎧 Audio / Keypad — switch between audio settings and the dialpad
- 🏷️ From Number — choose the outbound caller ID line
- 🌎 Local Presence — turn area-code matching on or off
- 📋 Select PowerList — choose which contact list to dial
- 🗂️ Pipeline & Stage — optionally limit dialing to contacts in a pipeline stage
- 📈 PowerList stats — uploaded, removed, dial-at-a-time, and attempt limits
- 🟢 Status — dialer and call readiness
- ▶️ Start Dialing — begin calling from the selected list
- 📊 Remaining / Dialed / Connected — live campaign counts
- ⏱️ Talk Time — total talk duration, with a filter icon to refine how it is calculated
🏷️ From Number & Local Presence
From Number sets the caller ID recipients see when you call.- Choose a specific number, or an option such as Calling From AI Local Presence.
- Your available numbers are the ones purchased and configured on your account.
Yes / No) controls whether the dialer tries to match caller ID to the contact’s area code.
- Yes — use local-style caller ID where available (often with a Local Presence “From Number” option).
- No — use the selected From Number without area-code matching for this session.
For full Local Presence behavior and batching rules, see Outbound Call Routing.
📋 PowerList Selection
The Select PowerList dropdown is your primary tool for choosing which contact list to dial. Agents can switch between campaigns and segments from the left panel. ✔️ How to select a PowerList- Open Select PowerList in the left panel.
- Confirm the selected list name.
- Optionally set Pipeline and Stage (see below).
- Click Start Dialing.
🗂️ Pipeline & Stage
Use Select Pipeline and Select Stage to narrow who gets dialed from the PowerList.- Leave stage empty to dial contacts from the list without stage filtering.
- If a pipeline stage is selected, dialing only includes contacts assigned to that stage.
⏱️ Talk Time Filters
Talk Time on the top bar shows how much time agents have spent connected (talking) for the current filter scope. Next to the TALK TIME label, click the gear / filter icon to open Talk Time Filters.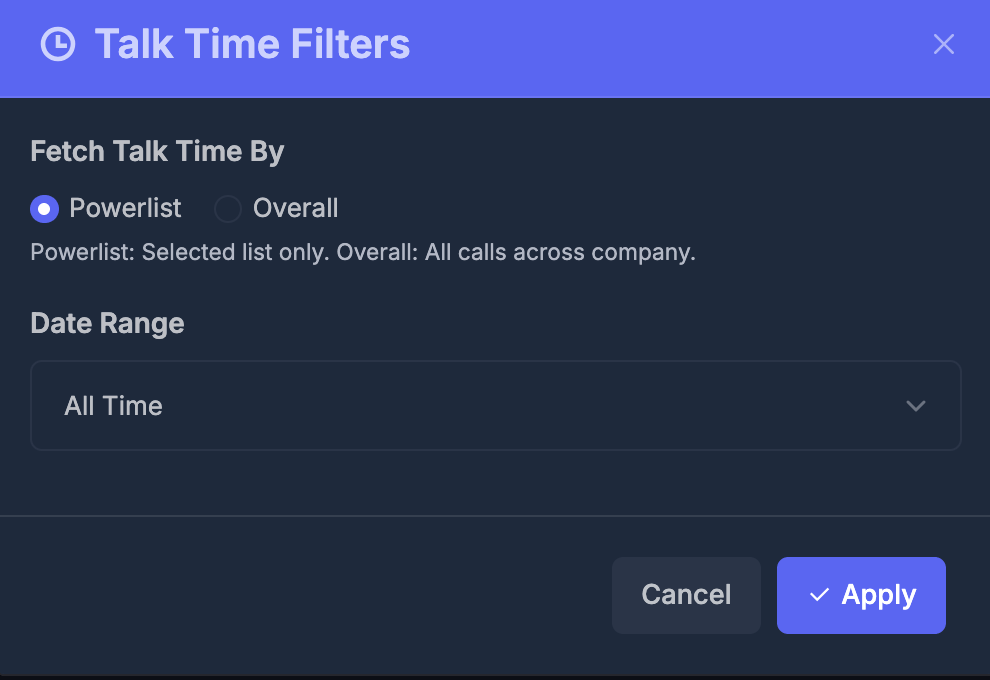
Date Range
Choose the period used when calculating Talk Time (for example All Time, or another range from the dropdown).
Apply / Cancel
- Select Powerlist or Overall.
- Pick a Date Range.
- Click Apply to update the Talk Time display, or Cancel to close without changing filters.
🛠️ PowerList Management Features
- Real-time Updates: Statistics update automatically as you dial
- Quick Switching: Change powerlists without interrupting your workflow
- Campaign Segmentation: Use different lists (and pipeline stages) for different audiences
- Test Campaigns: Use smaller lists for testing before full deployment
- Progress Tracking: Monitor how many contacts remain in your current list
Segment Your Lists
Create separate powerlists for different customer segments, time zones, or campaign types
Test Before Scaling
Use smaller test lists to verify your approach before dialing larger contact lists
Monitor Progress
Keep track of remaining contacts and adjust your strategy based on performance
Compliance Ready
Ensure your powerlists comply with calling regulations and include opt-out mechanisms
⚙️ Campaign Configuration
☎️ Manual Dialing Interface
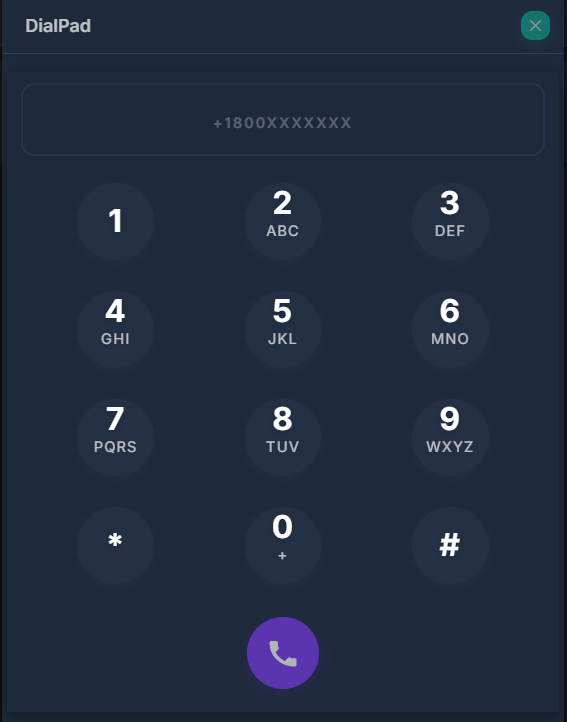
- Priority callbacks: Immediately calling high-value prospects
- Custom numbers: Dialing numbers not in your PowerList
- Testing: Verifying audio setup before campaigns
- Emergency contacts: Quick access to important numbers
- Number Input Field: Enter complete phone numbers (format: +1800XXXXXXX)
- Standard Keypad: Traditional phone layout with alphabetic shortcuts (ABC, DEF, etc.)
- Call Button: Purple call initiation button to start the call
- Number Formatting: Automatic formatting for international and domestic numbers
1
Enter Number
Type or click the phone number in the input field
2
Verify Format
Ensure the number includes country code (+1 for US)
3
Initiate Call
Click the purple call button to start dialing
📋 Call History Management
Open History in the dialer to see every call. Each row shows who you called, the numbers, the outcome, how long you talked, the lead’s sentiment and when it happened.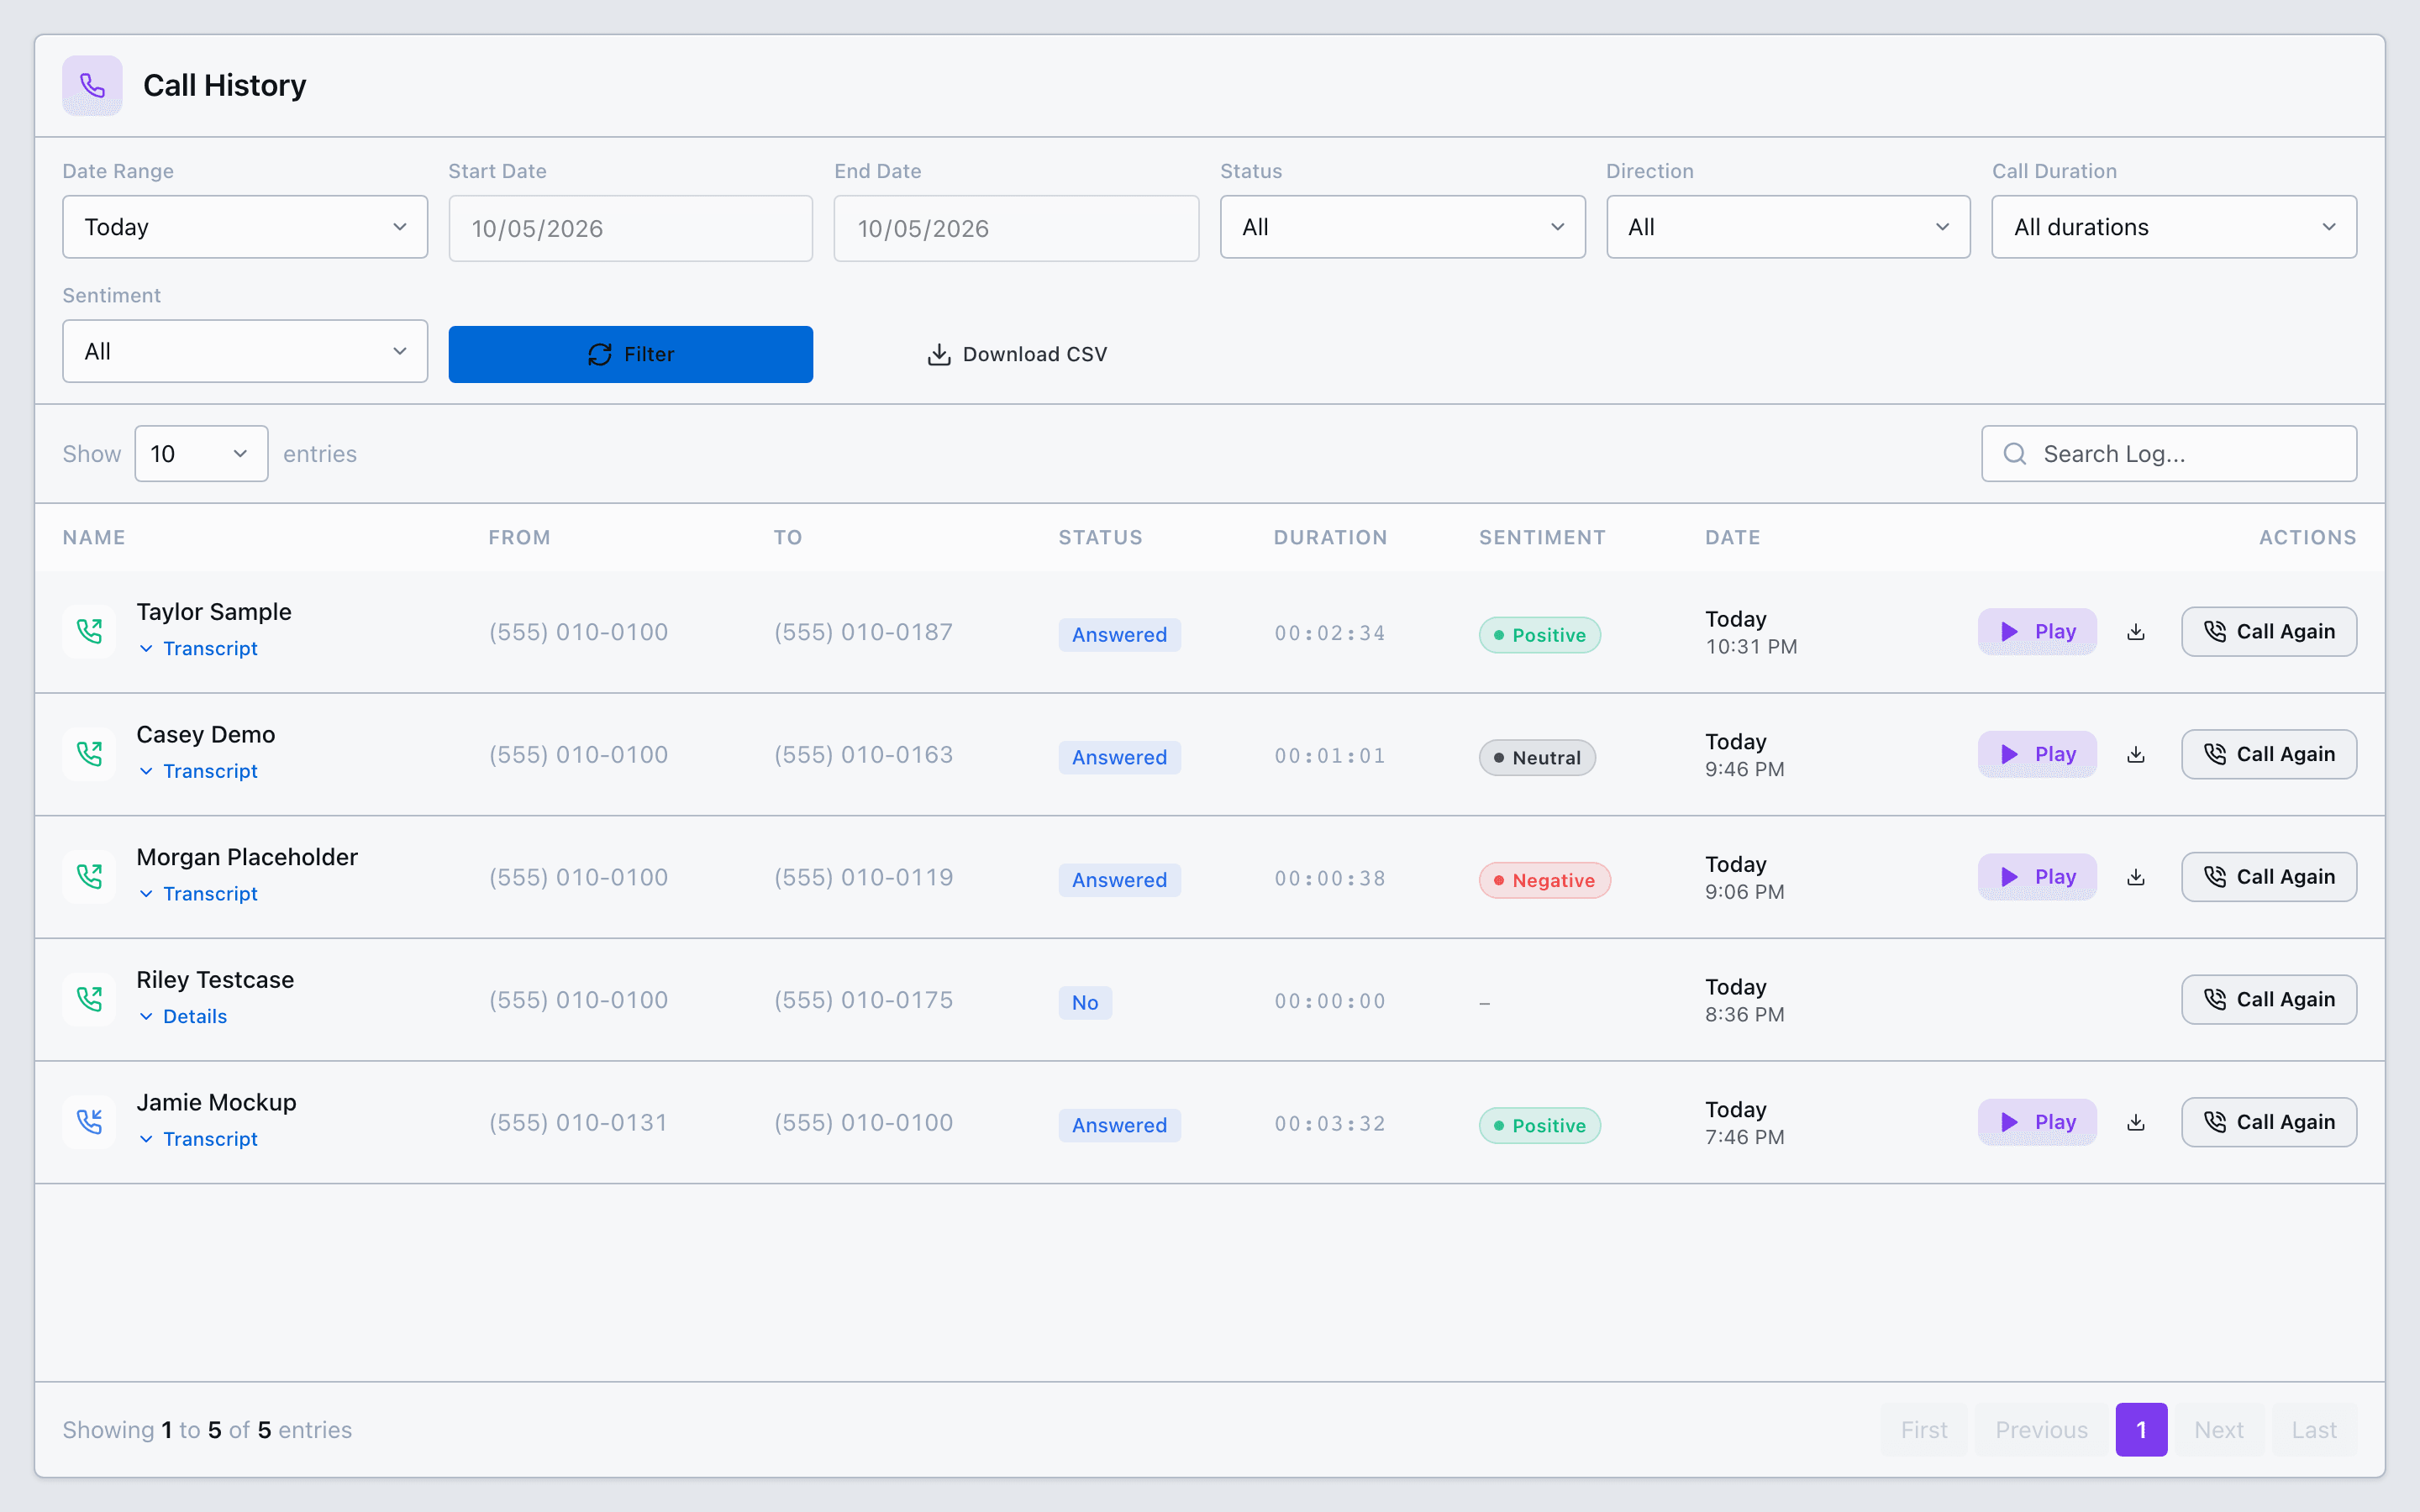
Call history with sentiment pills. Example data.
Read the transcript
Click Transcript under a name to open the call. You’ll see the sentiment, a short summary and the full transcript. Click Hide transcript to close it. Calls without a recording show Details instead.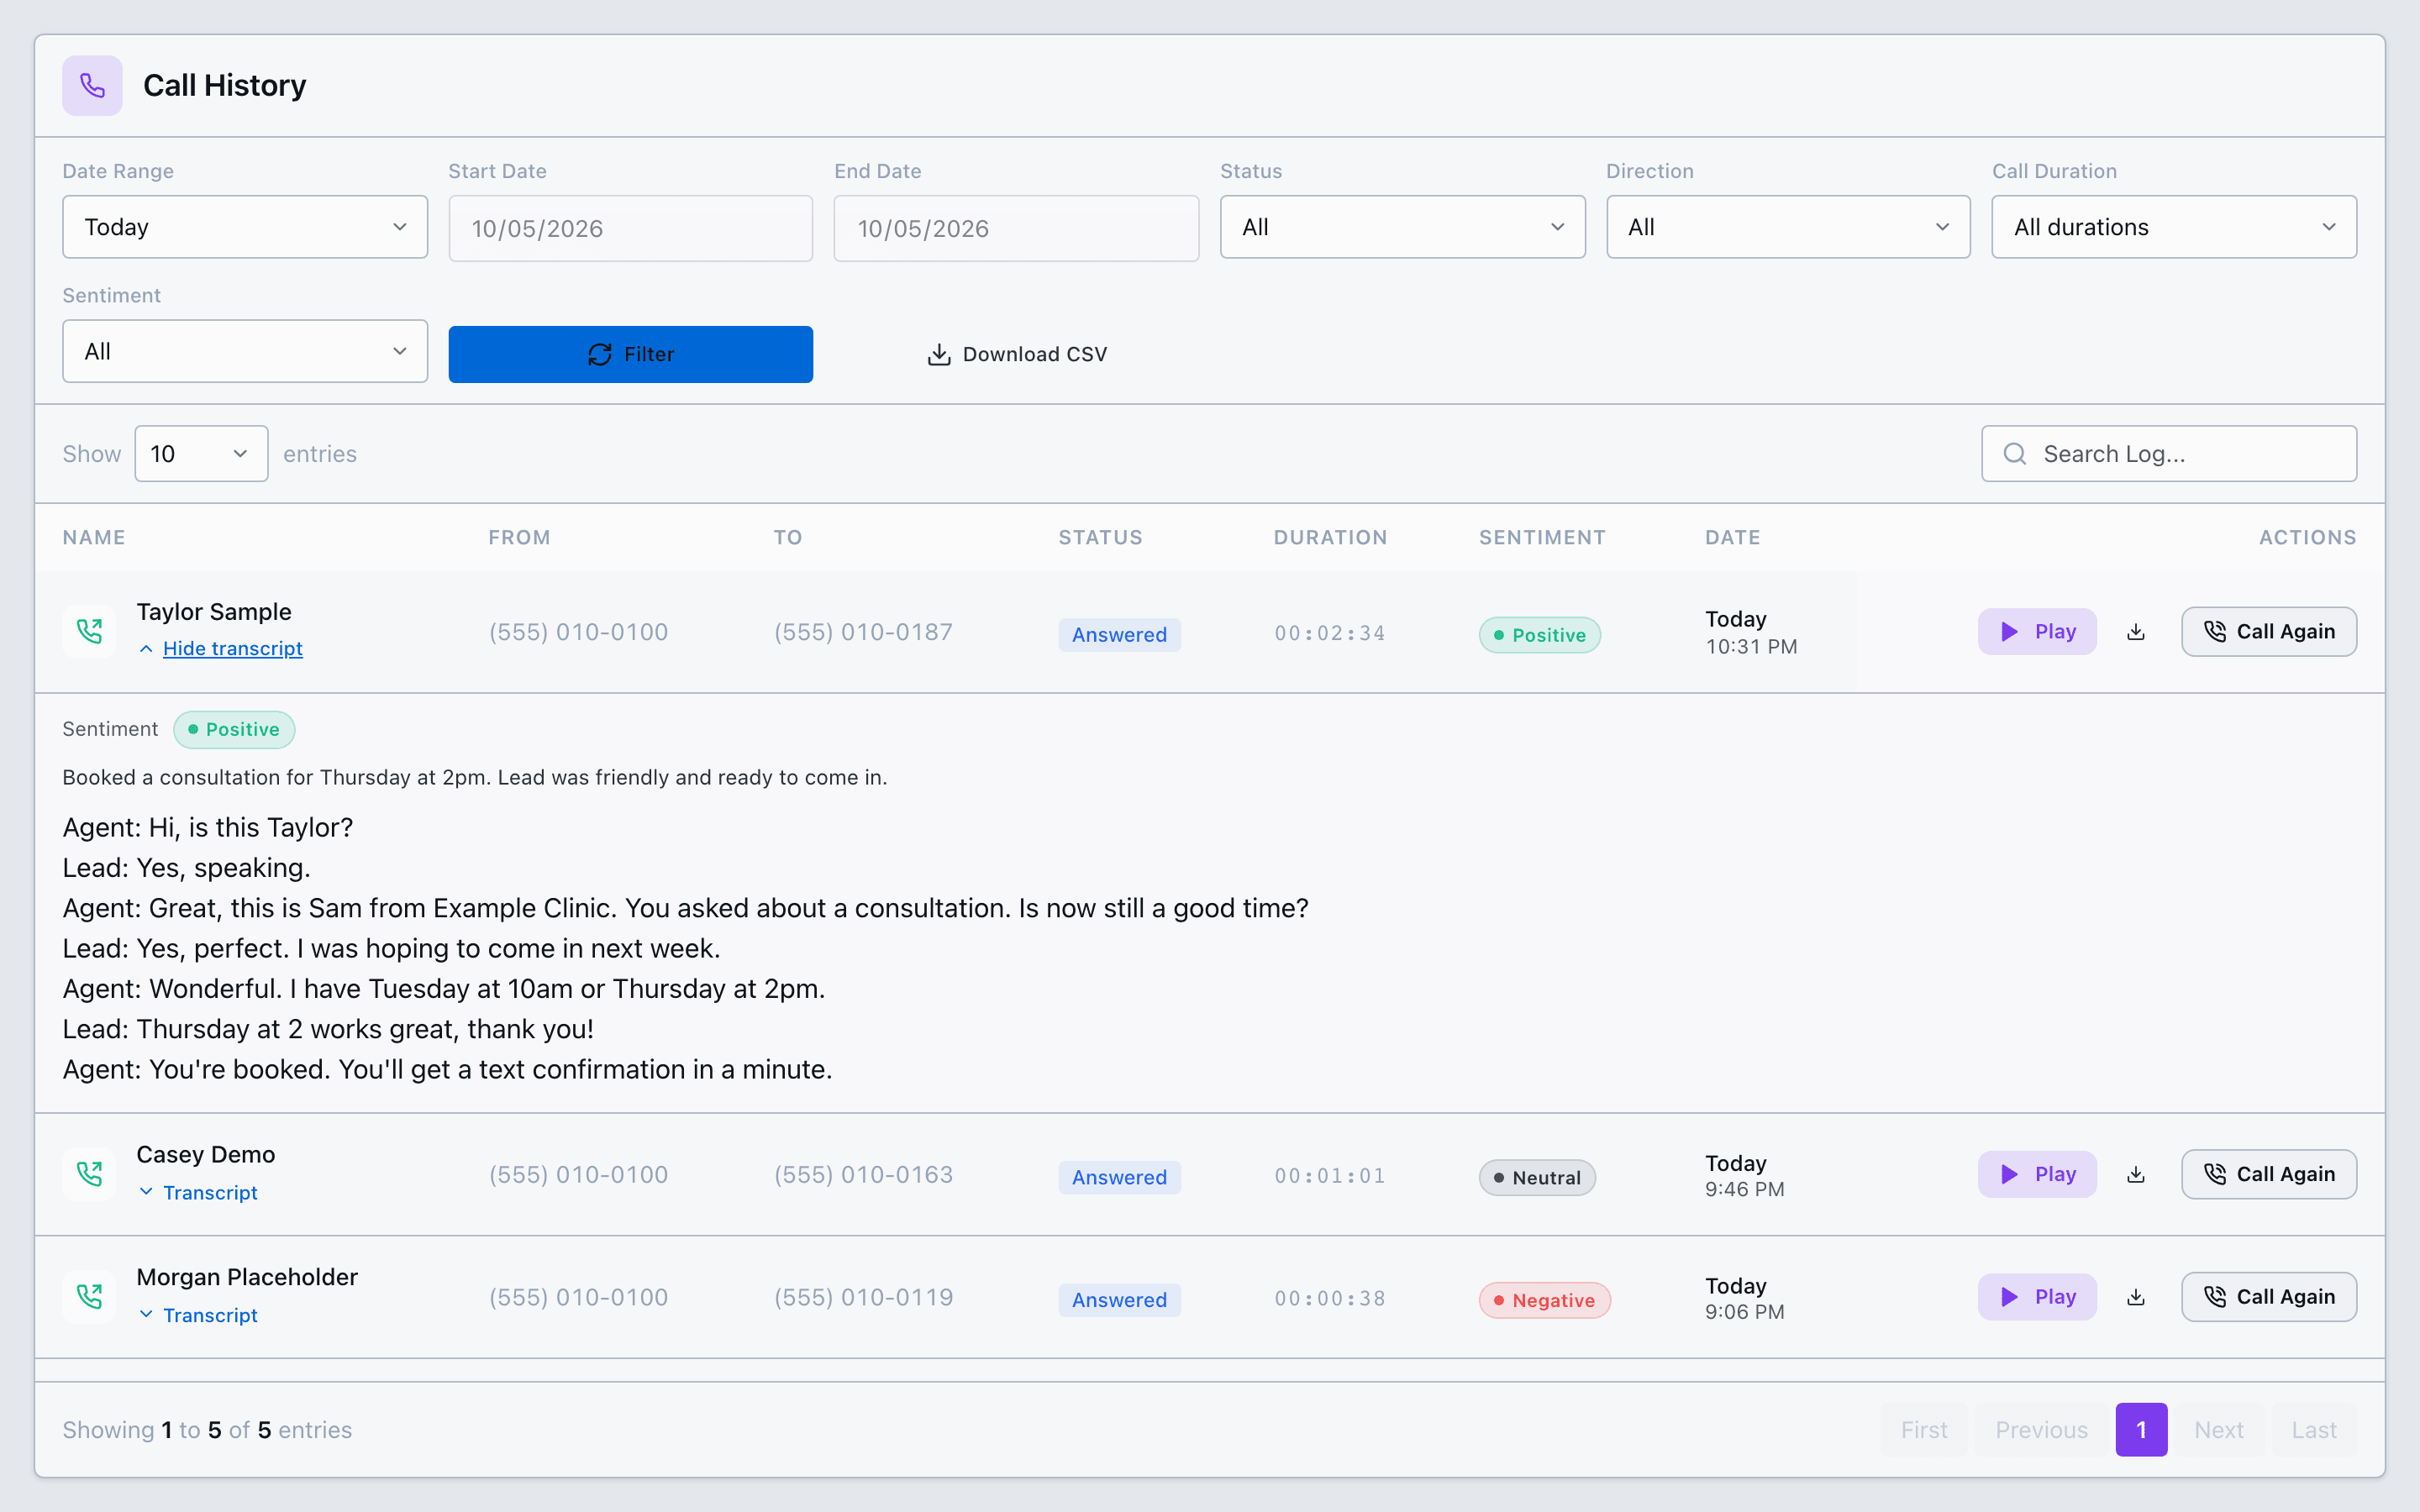
An expanded call: sentiment, summary and transcript.
Sentiment
AI Sync scores how the lead sounded once a call has a transcript:
Use the Sentiment filter (All, Positive, Neutral, Negative, Not scored) and click Filter to show only those calls.
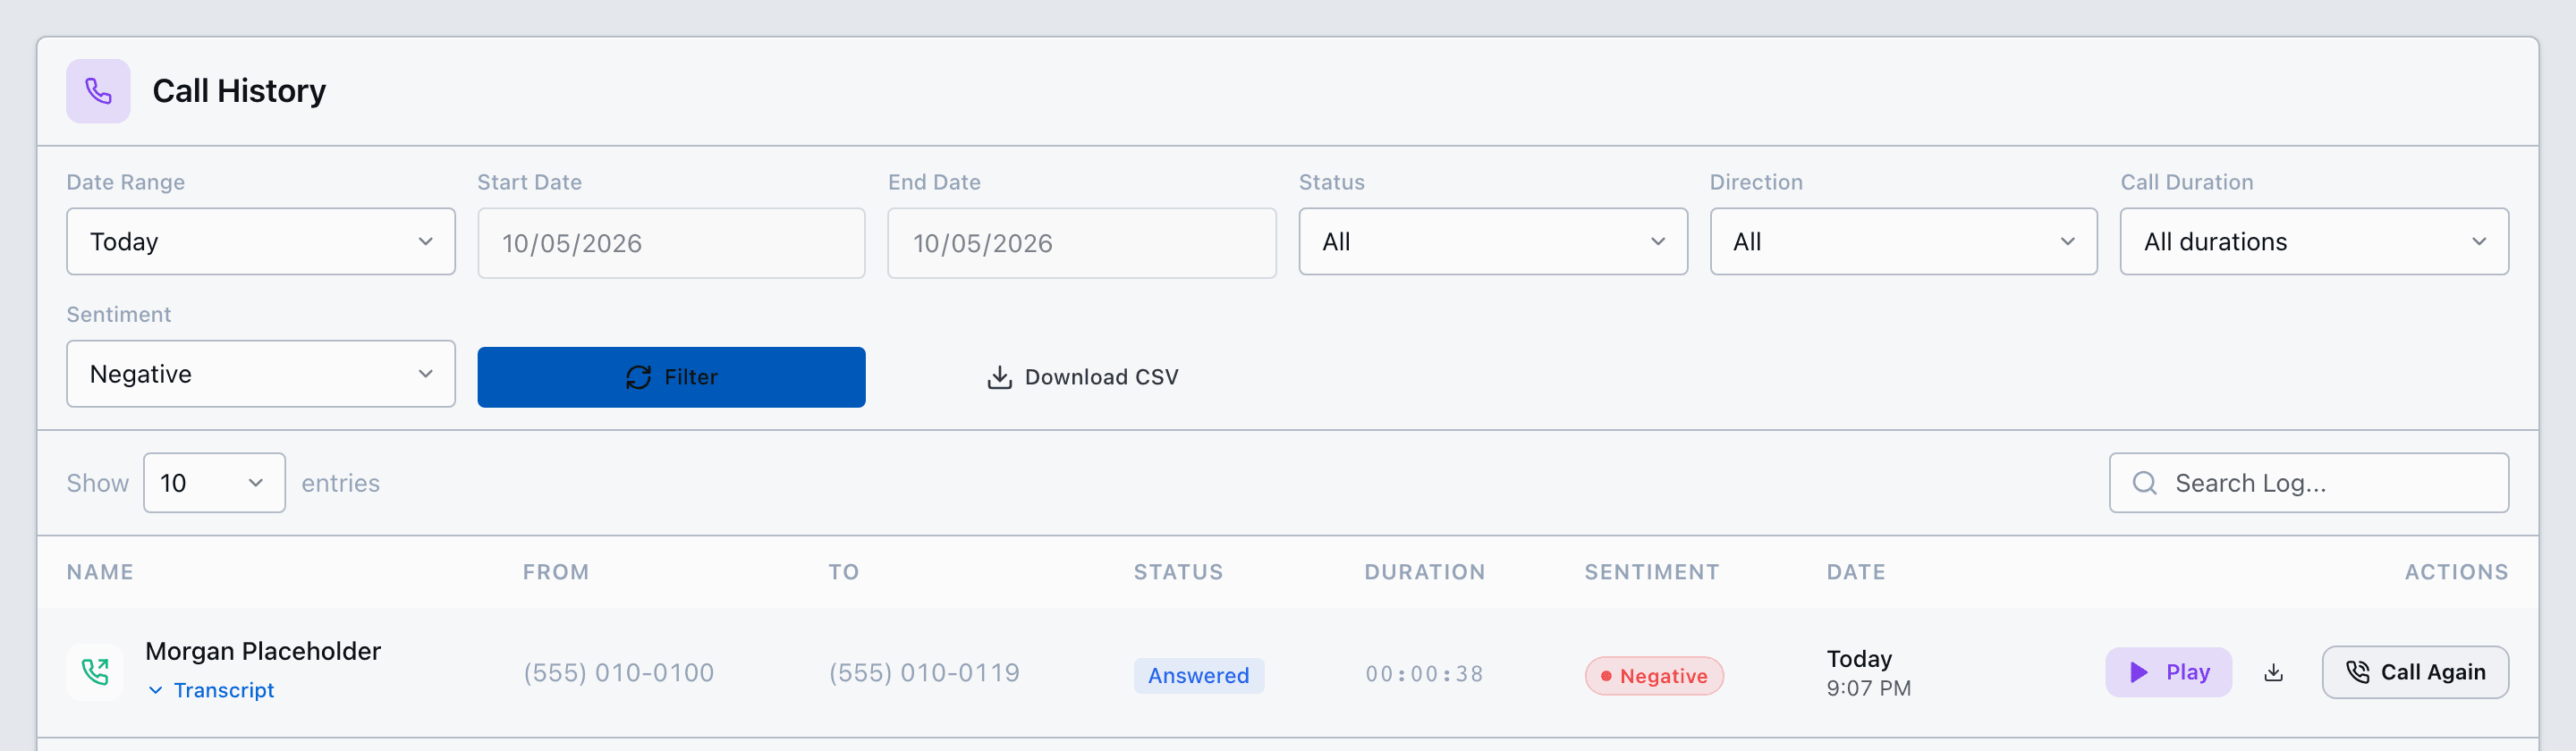
Sentiment set to Negative.
Search by name or number
Type a name or phone number in Search Log and press Enter. If you haven’t picked a date range, search looks back over the last 90 days, so you can find older calls without changing the dates.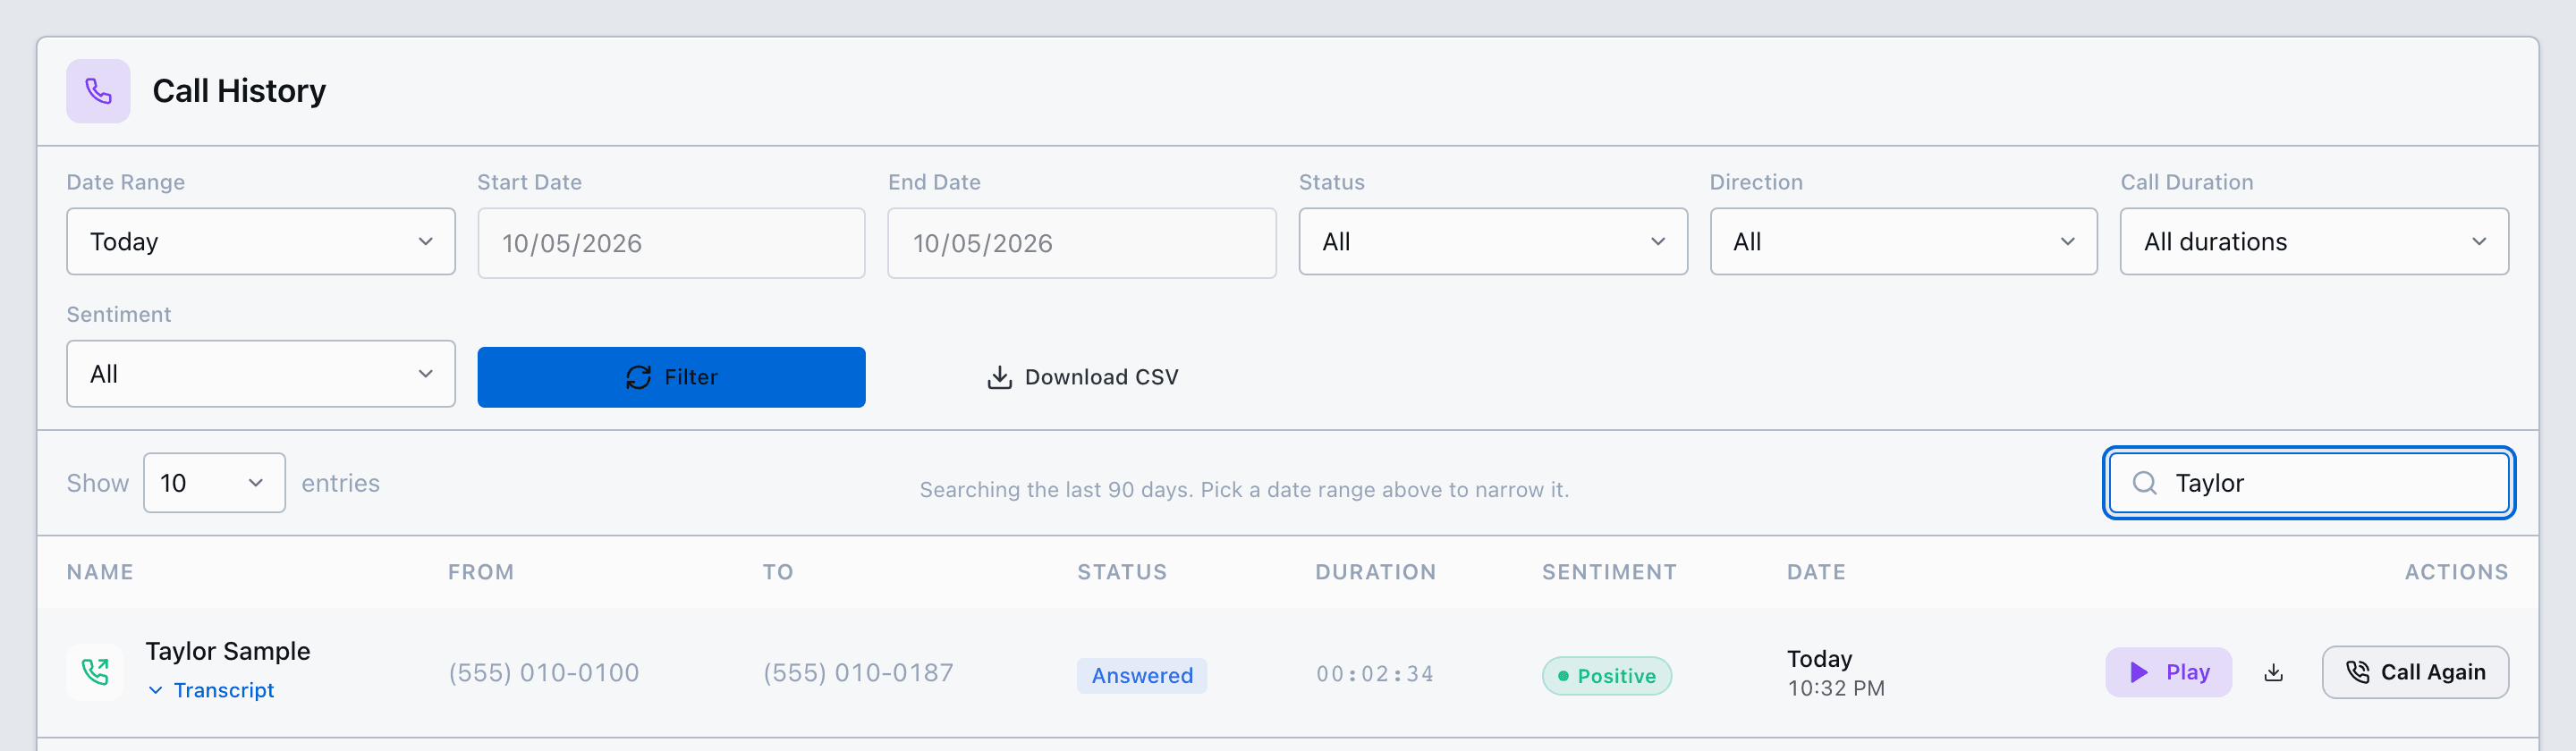
Searching for a lead by name.
Download CSV
Click Download CSV to save the calls you’re looking at as a spreadsheet, with transcripts. It uses the same date range, filters and search as the table.Other filters
- Date Range: Today, other presets, or Custom start and end dates
- Status and Direction (inbound or outbound)
- Call Duration: for example only calls with talk time, or 1+ minute
- Play and download recordings, and Call Again from any row
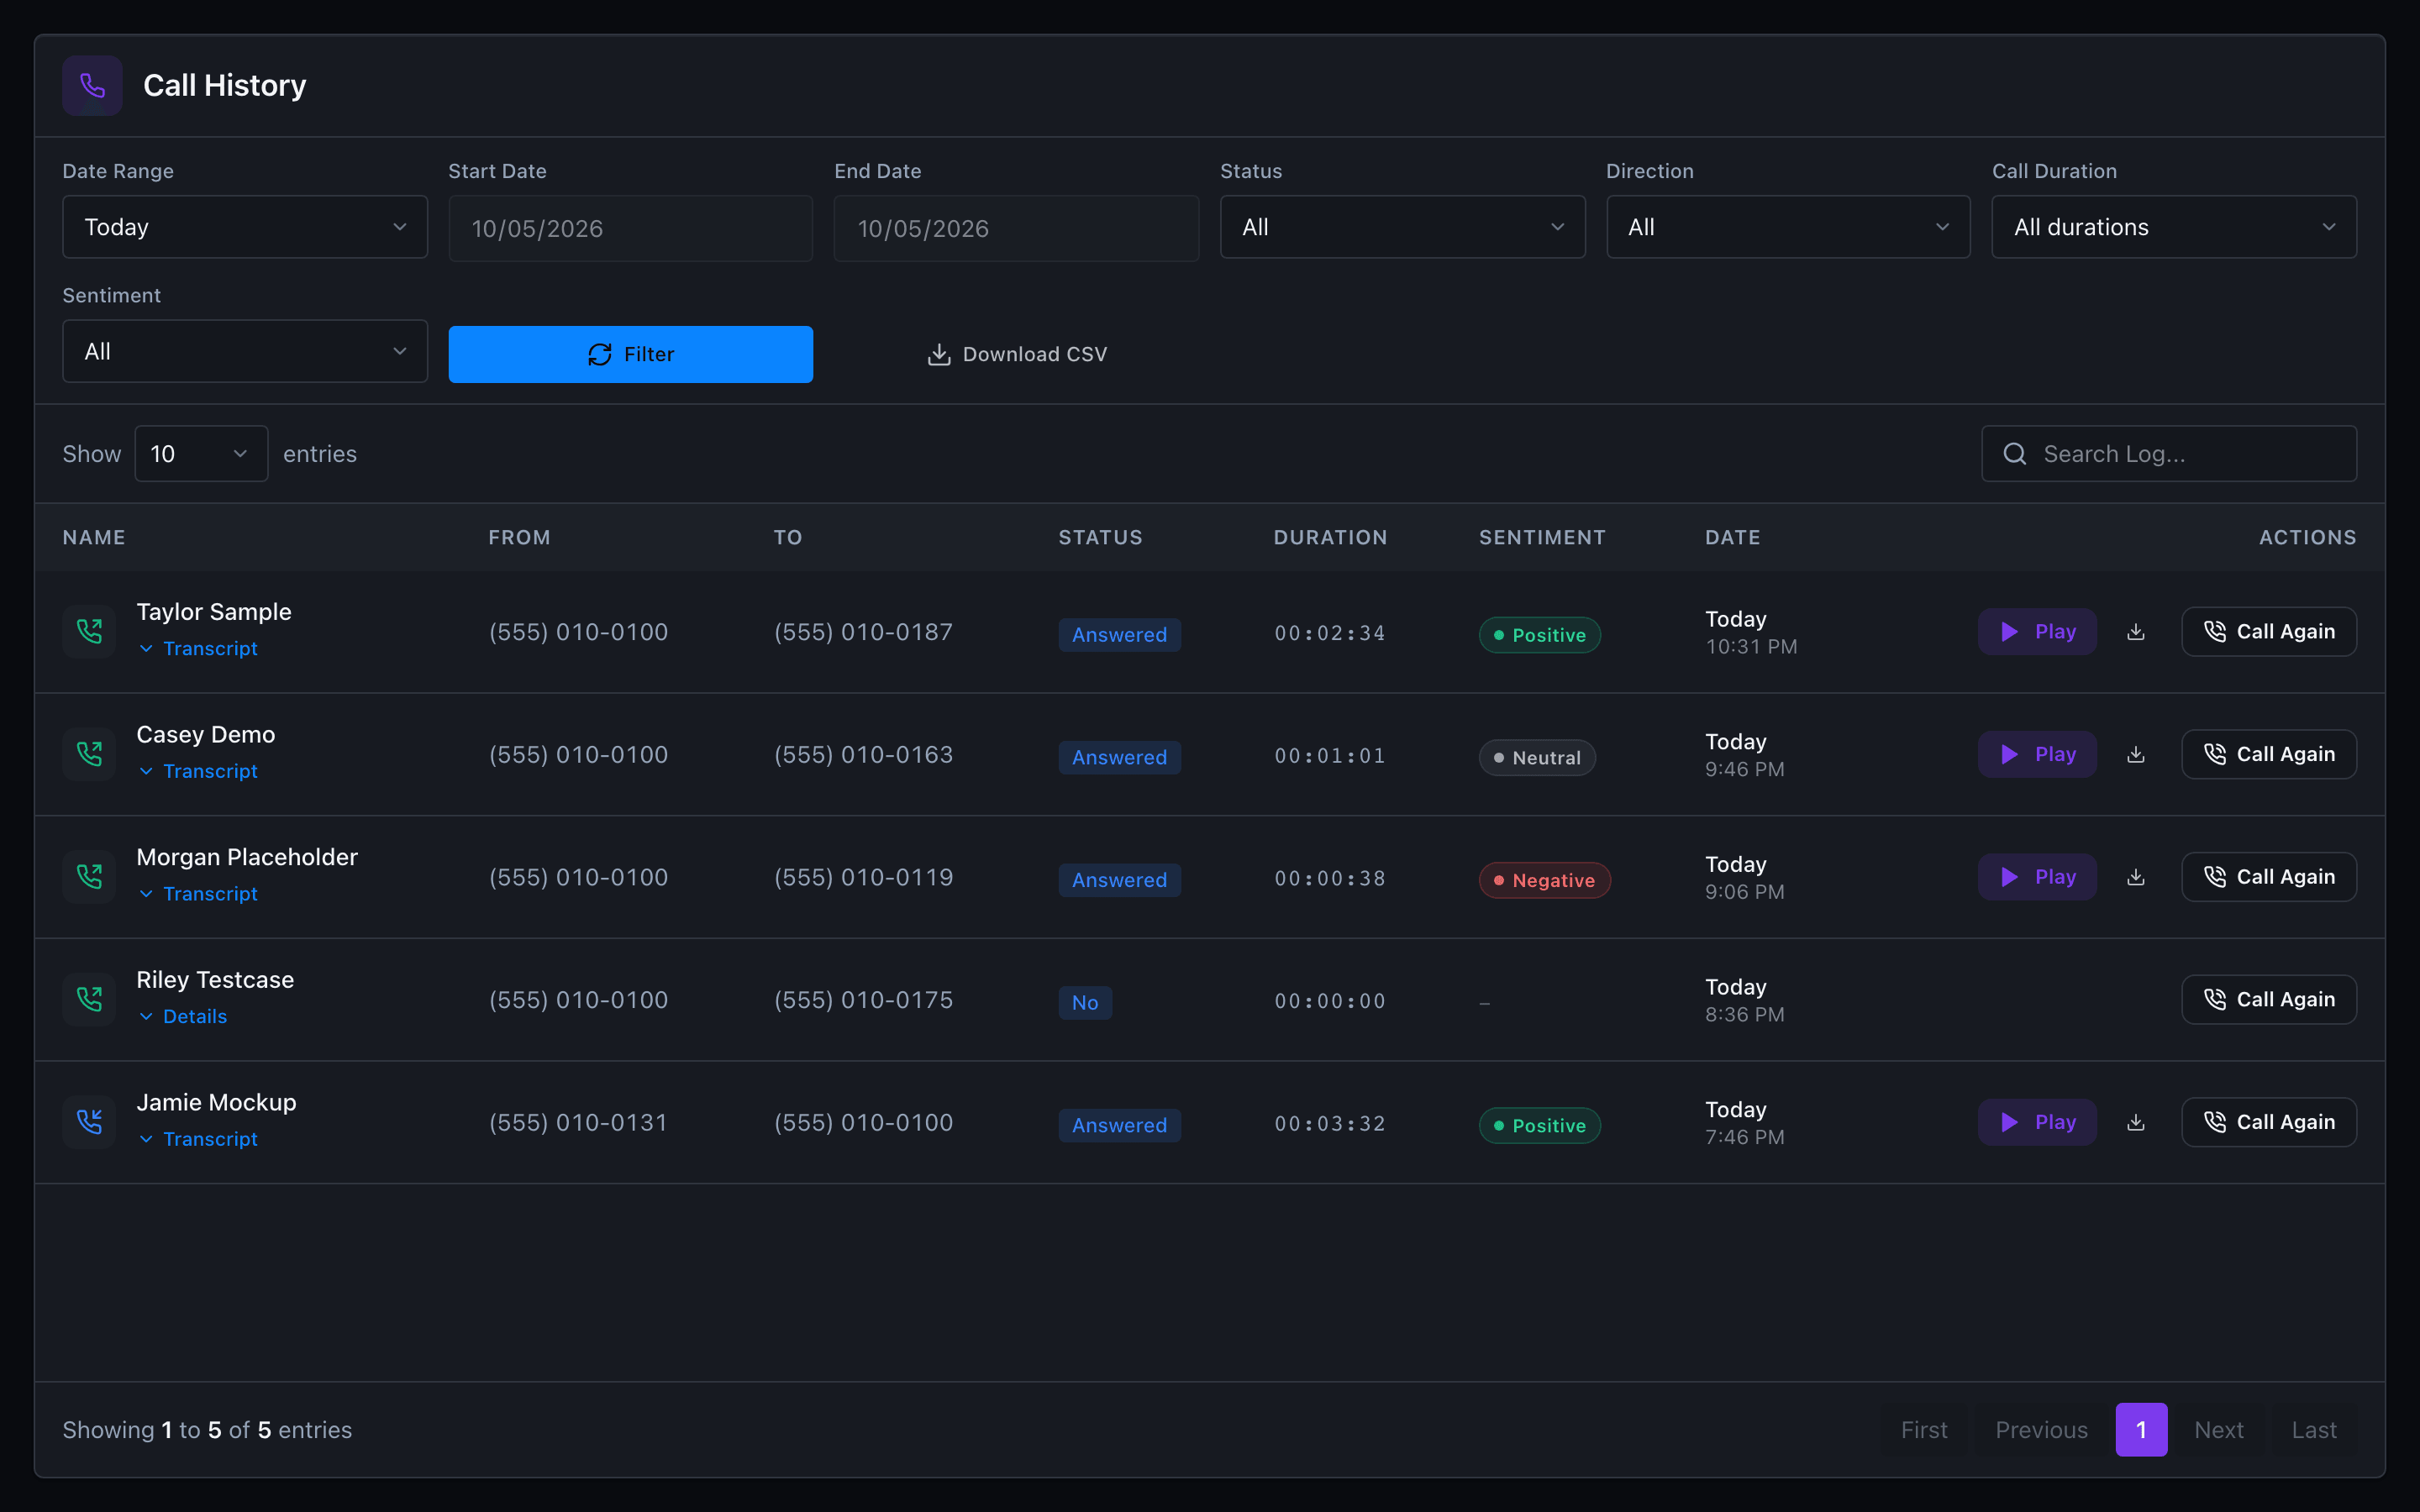
Call history in dark mode.
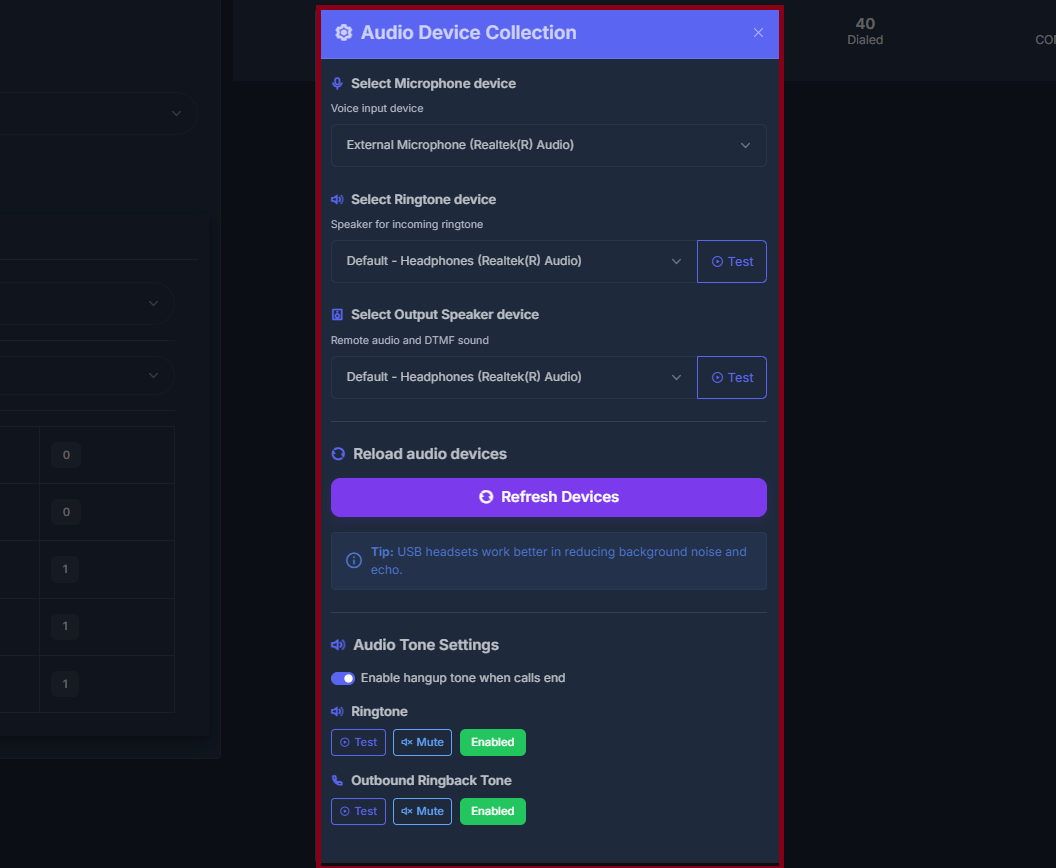
- Device Selection: External Microphone (Realtek Audio)
- Voice Input Configuration: Optimized for call quality
- Speaker Selection: Default - Headphones (Realtek Audio)
- Test Functionality: Audio testing capability
- Incoming Call Audio: Dedicated ringtone device
- Remote Audio: DTMF sound configuration
- Speaker Device: Default - Headphones (Realtek Audio)
- Audio Testing: Built-in test controls
- Reload Audio Devices: Refresh available devices
- Refresh Devices: Update device list
- USB Headset Tip: Noise reduction recommendation
- Hangup Tone: Enable/disable call end tones
- Ringtone Controls: Test, Mute, Enable options
- Outbound Ringback Tone: Test, Mute, Enable controls
📊 System Status Dashboard

🟢 Status Indicators Explained
Dialer Status- “Not ready…”: System is initializing or loading PowerList
- “Ready”: Dialer is prepared and waiting for instructions
- “Dialing”: Currently attempting to connect a call
- “Connected”: Active call in progress
- “Idle”: No active calls, ready to dial next number
- “Ringing”: Outbound call is ringing
- “Connected”: Call successfully connected
- “Disconnected”: Call ended, preparing for next dial
- Online: Available to receive and make calls
- Offline: Unavailable, dialer will not initiate new calls
- Busy: Currently on a call or handling post-call tasks
- Away: Temporarily unavailable
🩺 System Health Monitoring
Connection Status- Network Connectivity: Internet connection quality
- Server Communication: Connection to dialing servers
- Audio Device Status: Microphone and speaker readiness
- PowerList Sync: Contact list synchronization status
🔁 Reset daily
Reset daily starts a list over every night. Every lead goes back to New, and leads you’ve already called can be called again, up to the list’s daily limit.- It’s a switch in the dialer’s left panel under Text if missed, labelled Reset daily · this list.
- It’s off unless you turn it on. With it off, the dialer keeps working down the list, so leads you’ve never called get reached.
- Turning it on shows a short explanation first. Every change is logged with who made it and when.
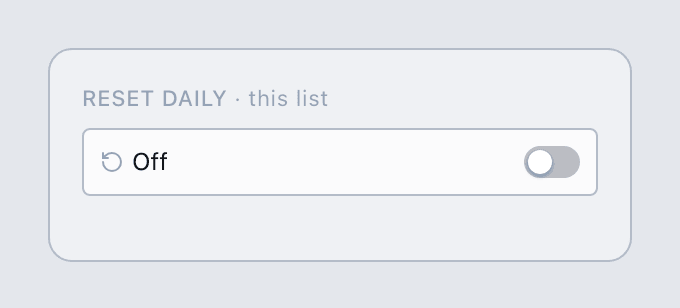
Reset daily in the dialer's left panel, off (the default).
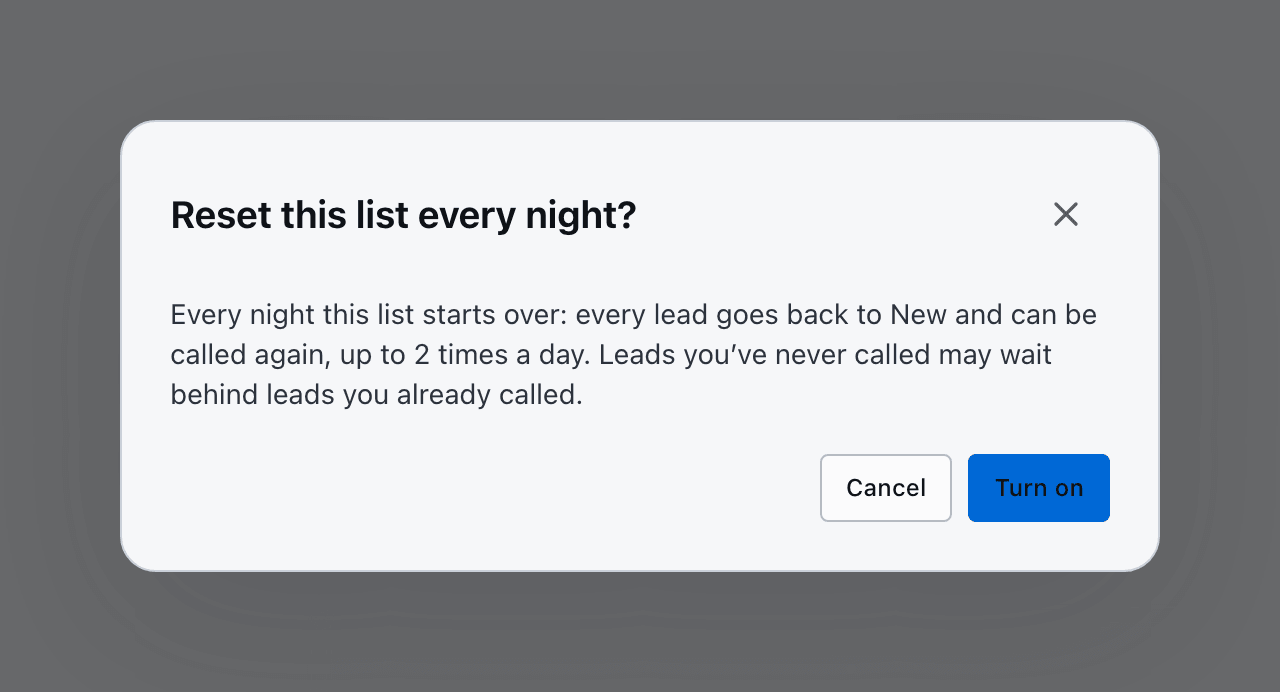
Turning it on explains what happens first.
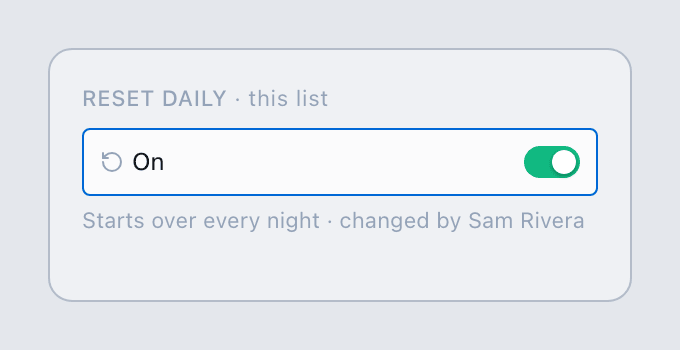
On: the list starts over every night, and it shows who turned it on.
With Reset daily on, leads you’ve never called can sit behind leads you already called. For a fresh list, leave it off until everyone has been called once.
🆕 What changed recently
Power Dialer
Your reporting now separates a conversation from a pickup. A call that
reached voicemail, or that a phone screened on the lead’s behalf, is no longer
counted as a connection. Your connect rate may read a little lower than before —
it was previously counting calls where nobody spoke to you.Picking your line count also puts you online. You no longer have to set your
lines and then find a second control to start.