🎯 What This Page Is Used For
Use the Workflows page when you want to:- View all workflows in one place
- Create a new workflow
- Open an existing workflow for editing
- Organize workflows into folders
- Search and browse workflows
- Activate or deactivate workflows
- Duplicate an existing workflow
- Import a workflow from a JSON file
- Export a workflow as a JSON file
- Move a workflow into a different folder
- Delete workflows that are no longer needed
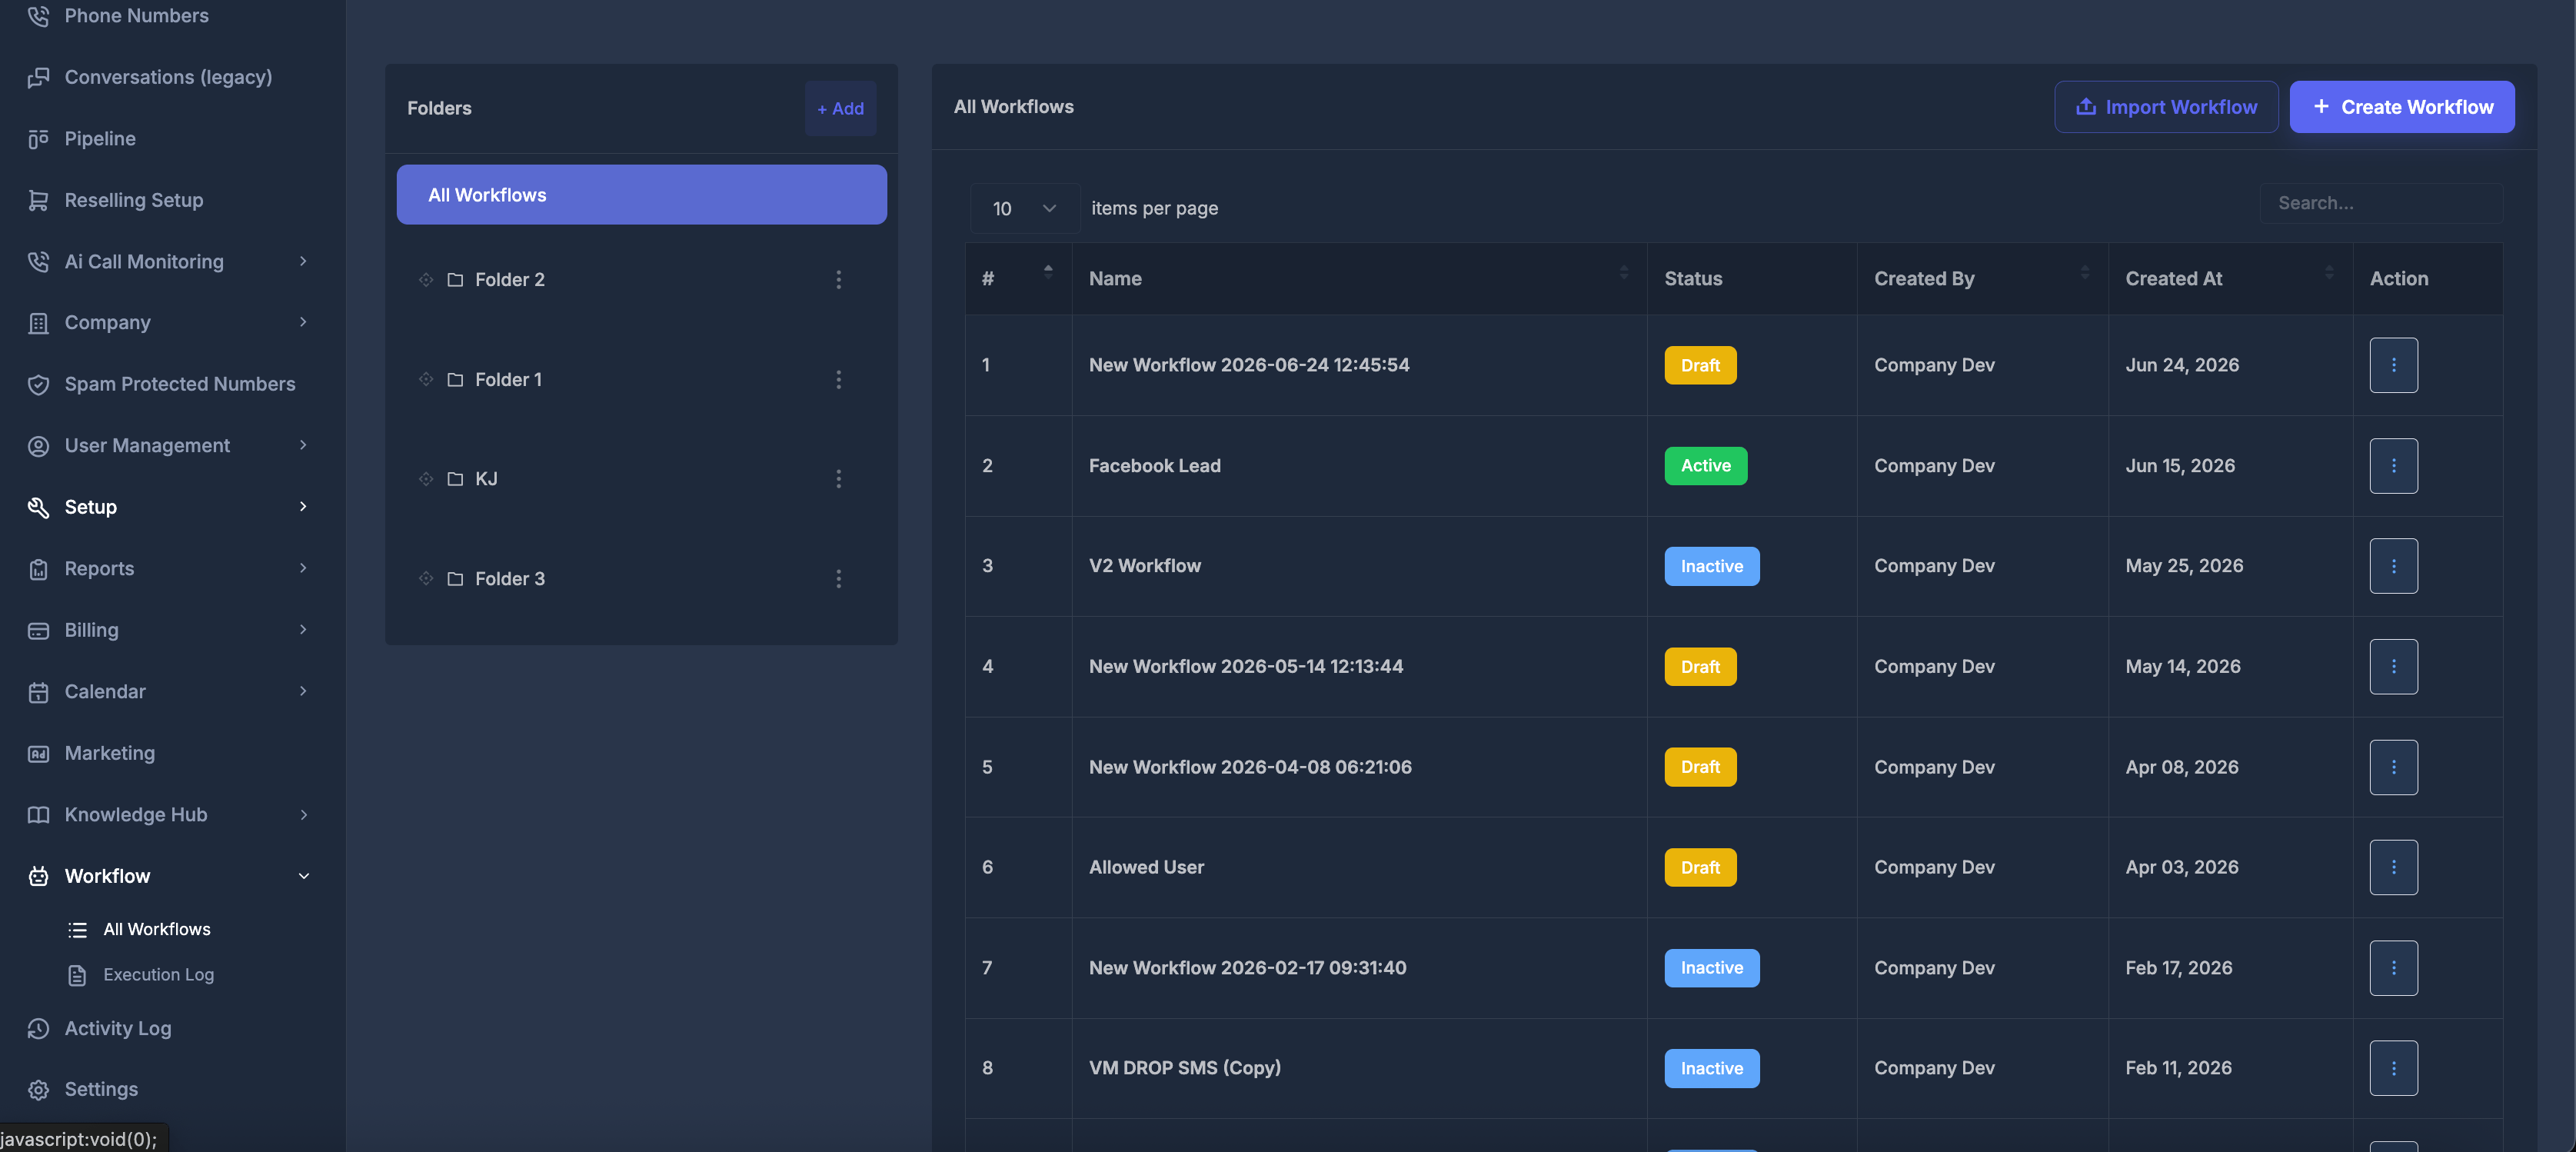
📋 Workflows Table
The right side shows the workflow list. Each workflow row includes:- Number
- Workflow name
- Status
- Created by
- Created date
- Action menu
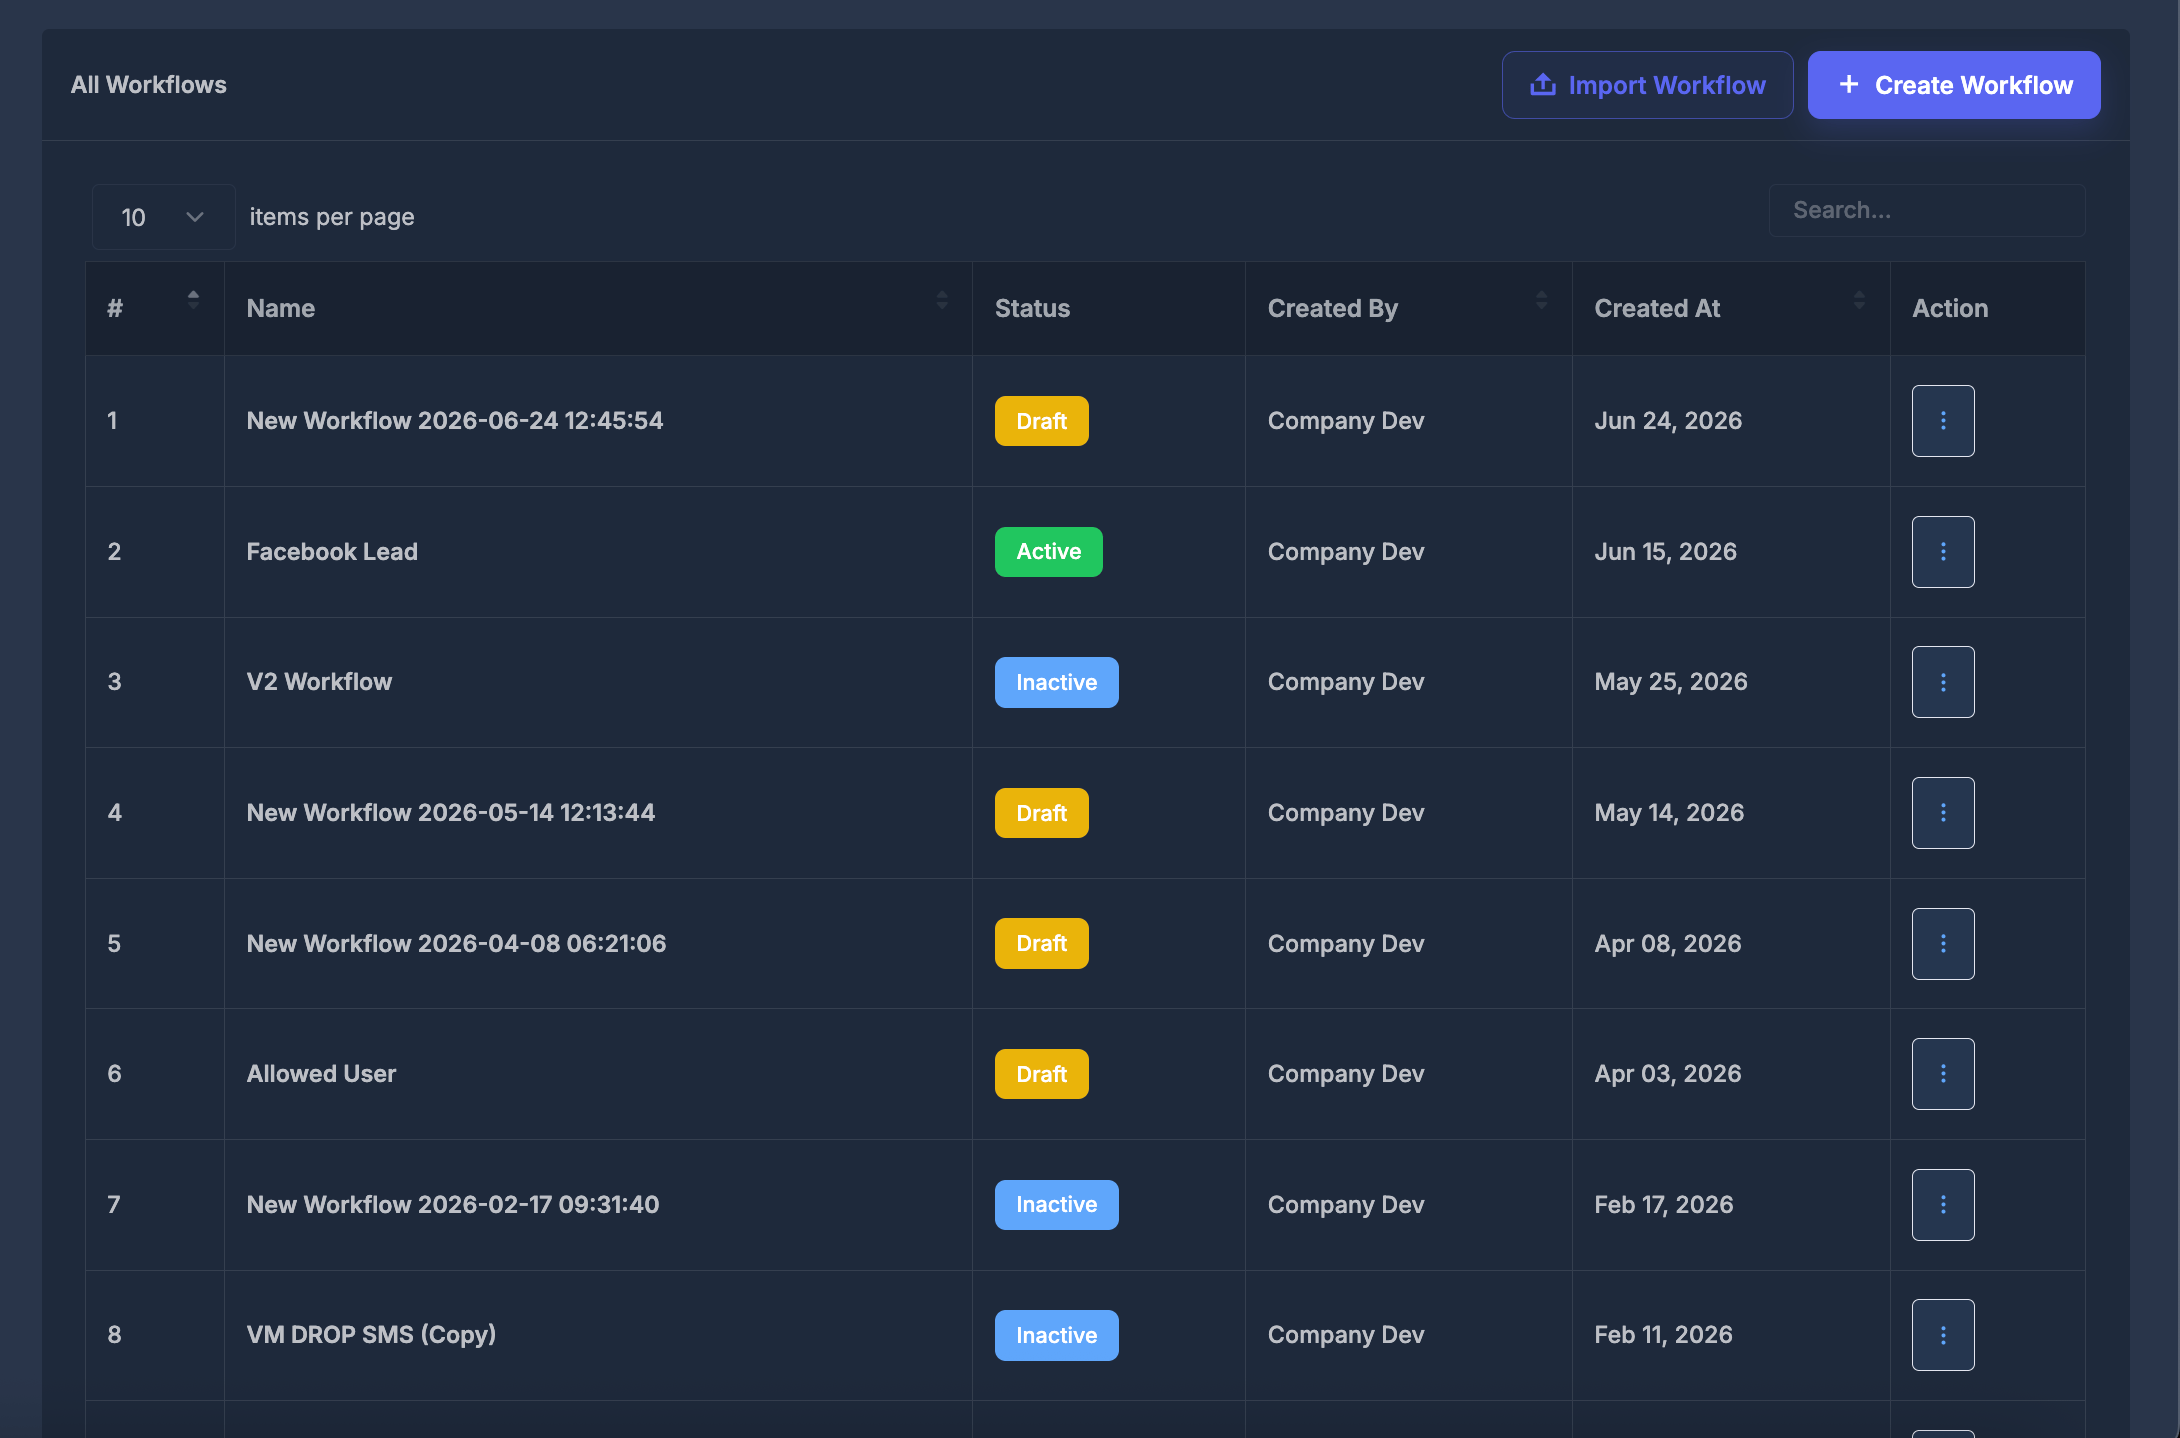
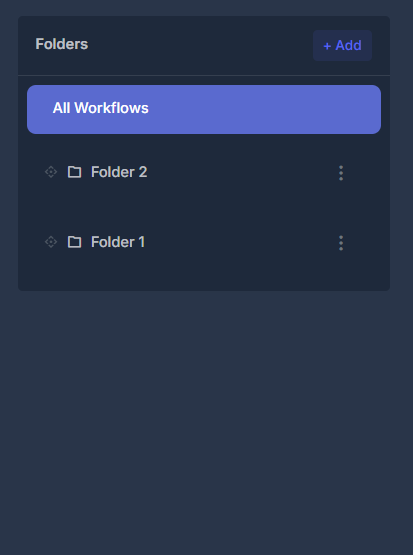
📁 Folders
Folders are optional, but they are useful when an account has many workflows.➕ Add a Folder
Click Add in the Folders panel. Enter a folder name, then click Save. After saving, the folder appears in the folder list.
✏️ Edit a Folder
Open the folder’s three-dot menu and choose Edit. Update the folder name, then save it.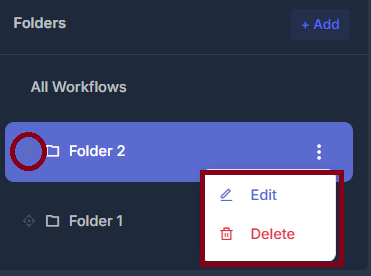
| Status | Meaning |
|---|---|
| Active | The workflow is turned on and can run |
| Inactive | The workflow is turned off |
| Draft | The workflow is still being prepared and should be reviewed before activation |
➕ Creating a Workflow
Click Create Workflow to start a new workflow.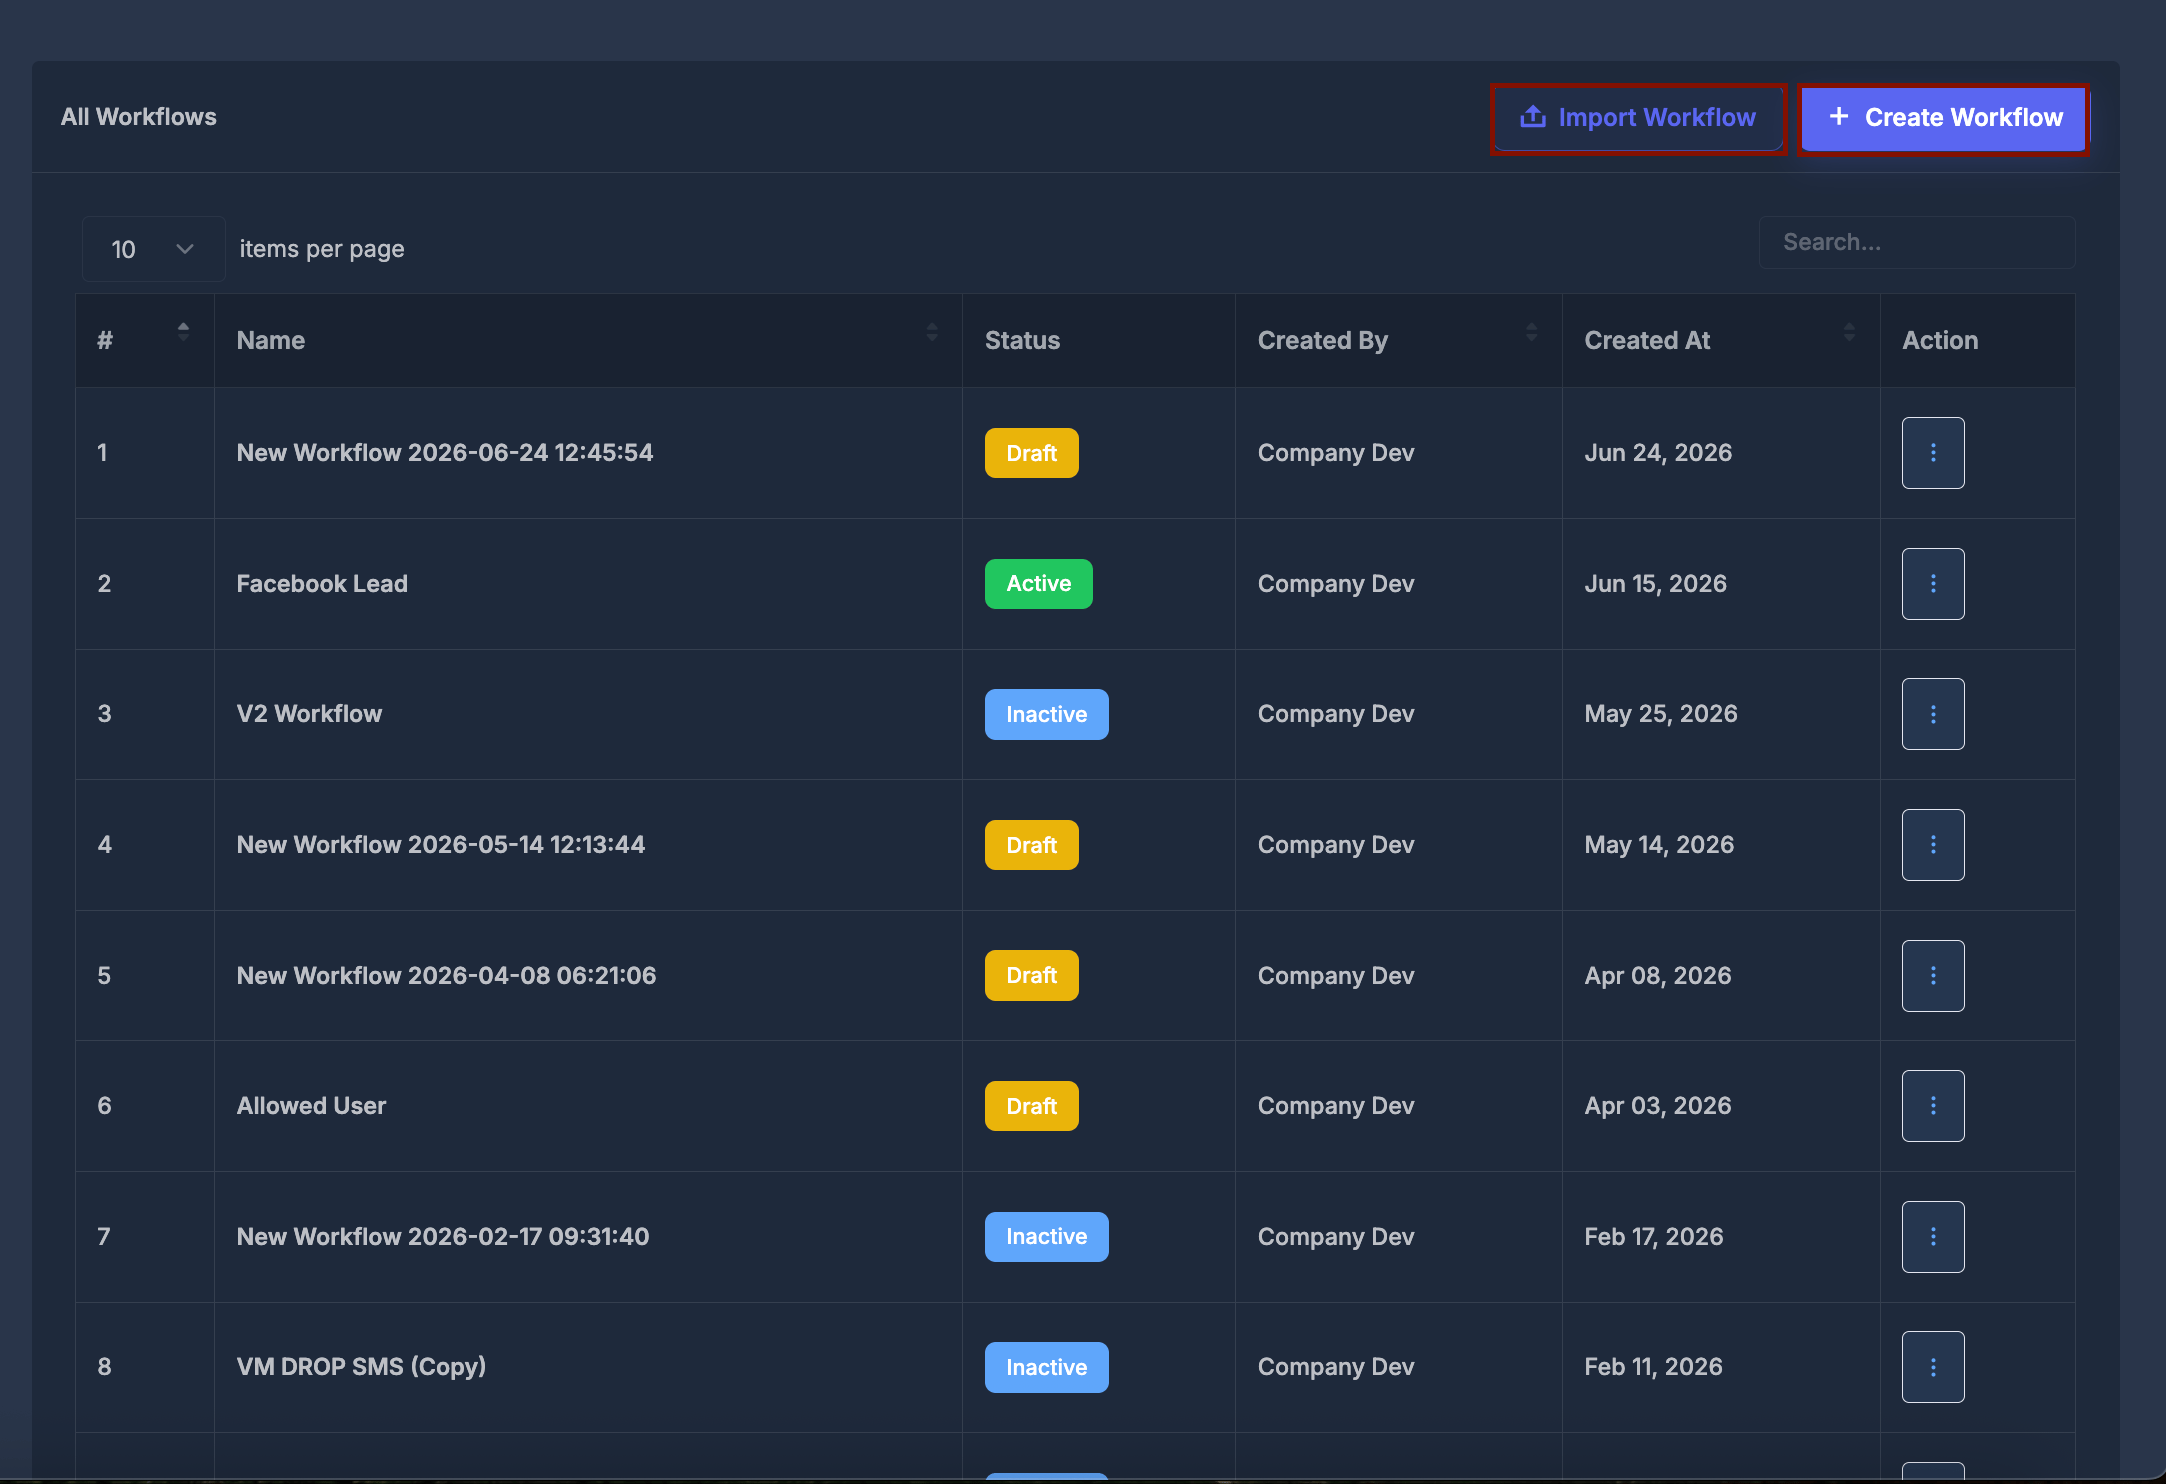
📥 Importing a Workflow
Click Import Workflow to upload a workflow JSON file.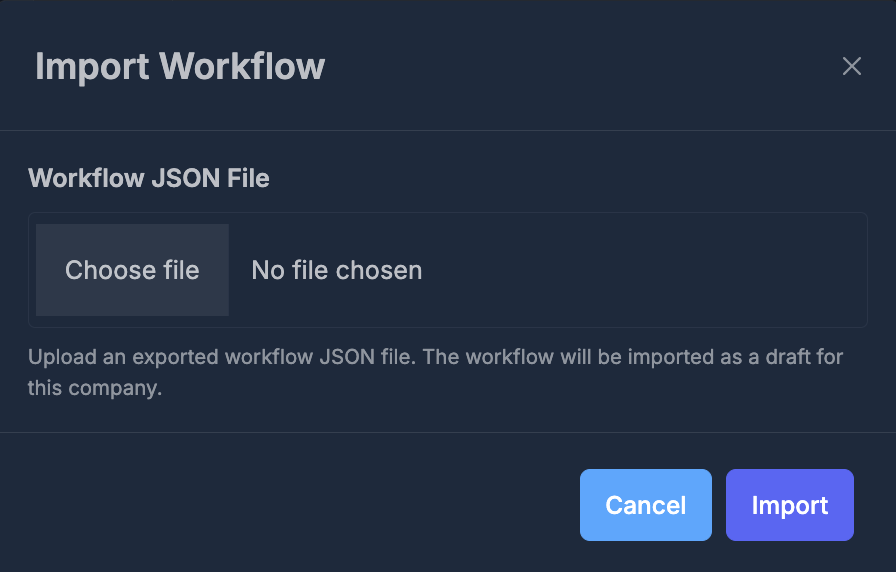
- Click Import Workflow
- Choose a valid workflow JSON file
- Click Import
- Wait for the import to finish
⚙️ Workflow Actions Menu
Each workflow row has a three-dot action menu. Available actions can include:- Edit
- Change Folder
- Activate or Deactivate
- Duplicate
- Export
- Delete
- No folders yet — no workflow folders have been created
- No workflows in selected folder — the selected folder does not contain workflows
- No matching search results — the search term does not match any workflow
🛠️ Workflow Builder
When you click Create Workflow, a workflow name, or Edit from the action menu, the Workflow Builder opens. This is where you design triggers, actions, and the full automation flow.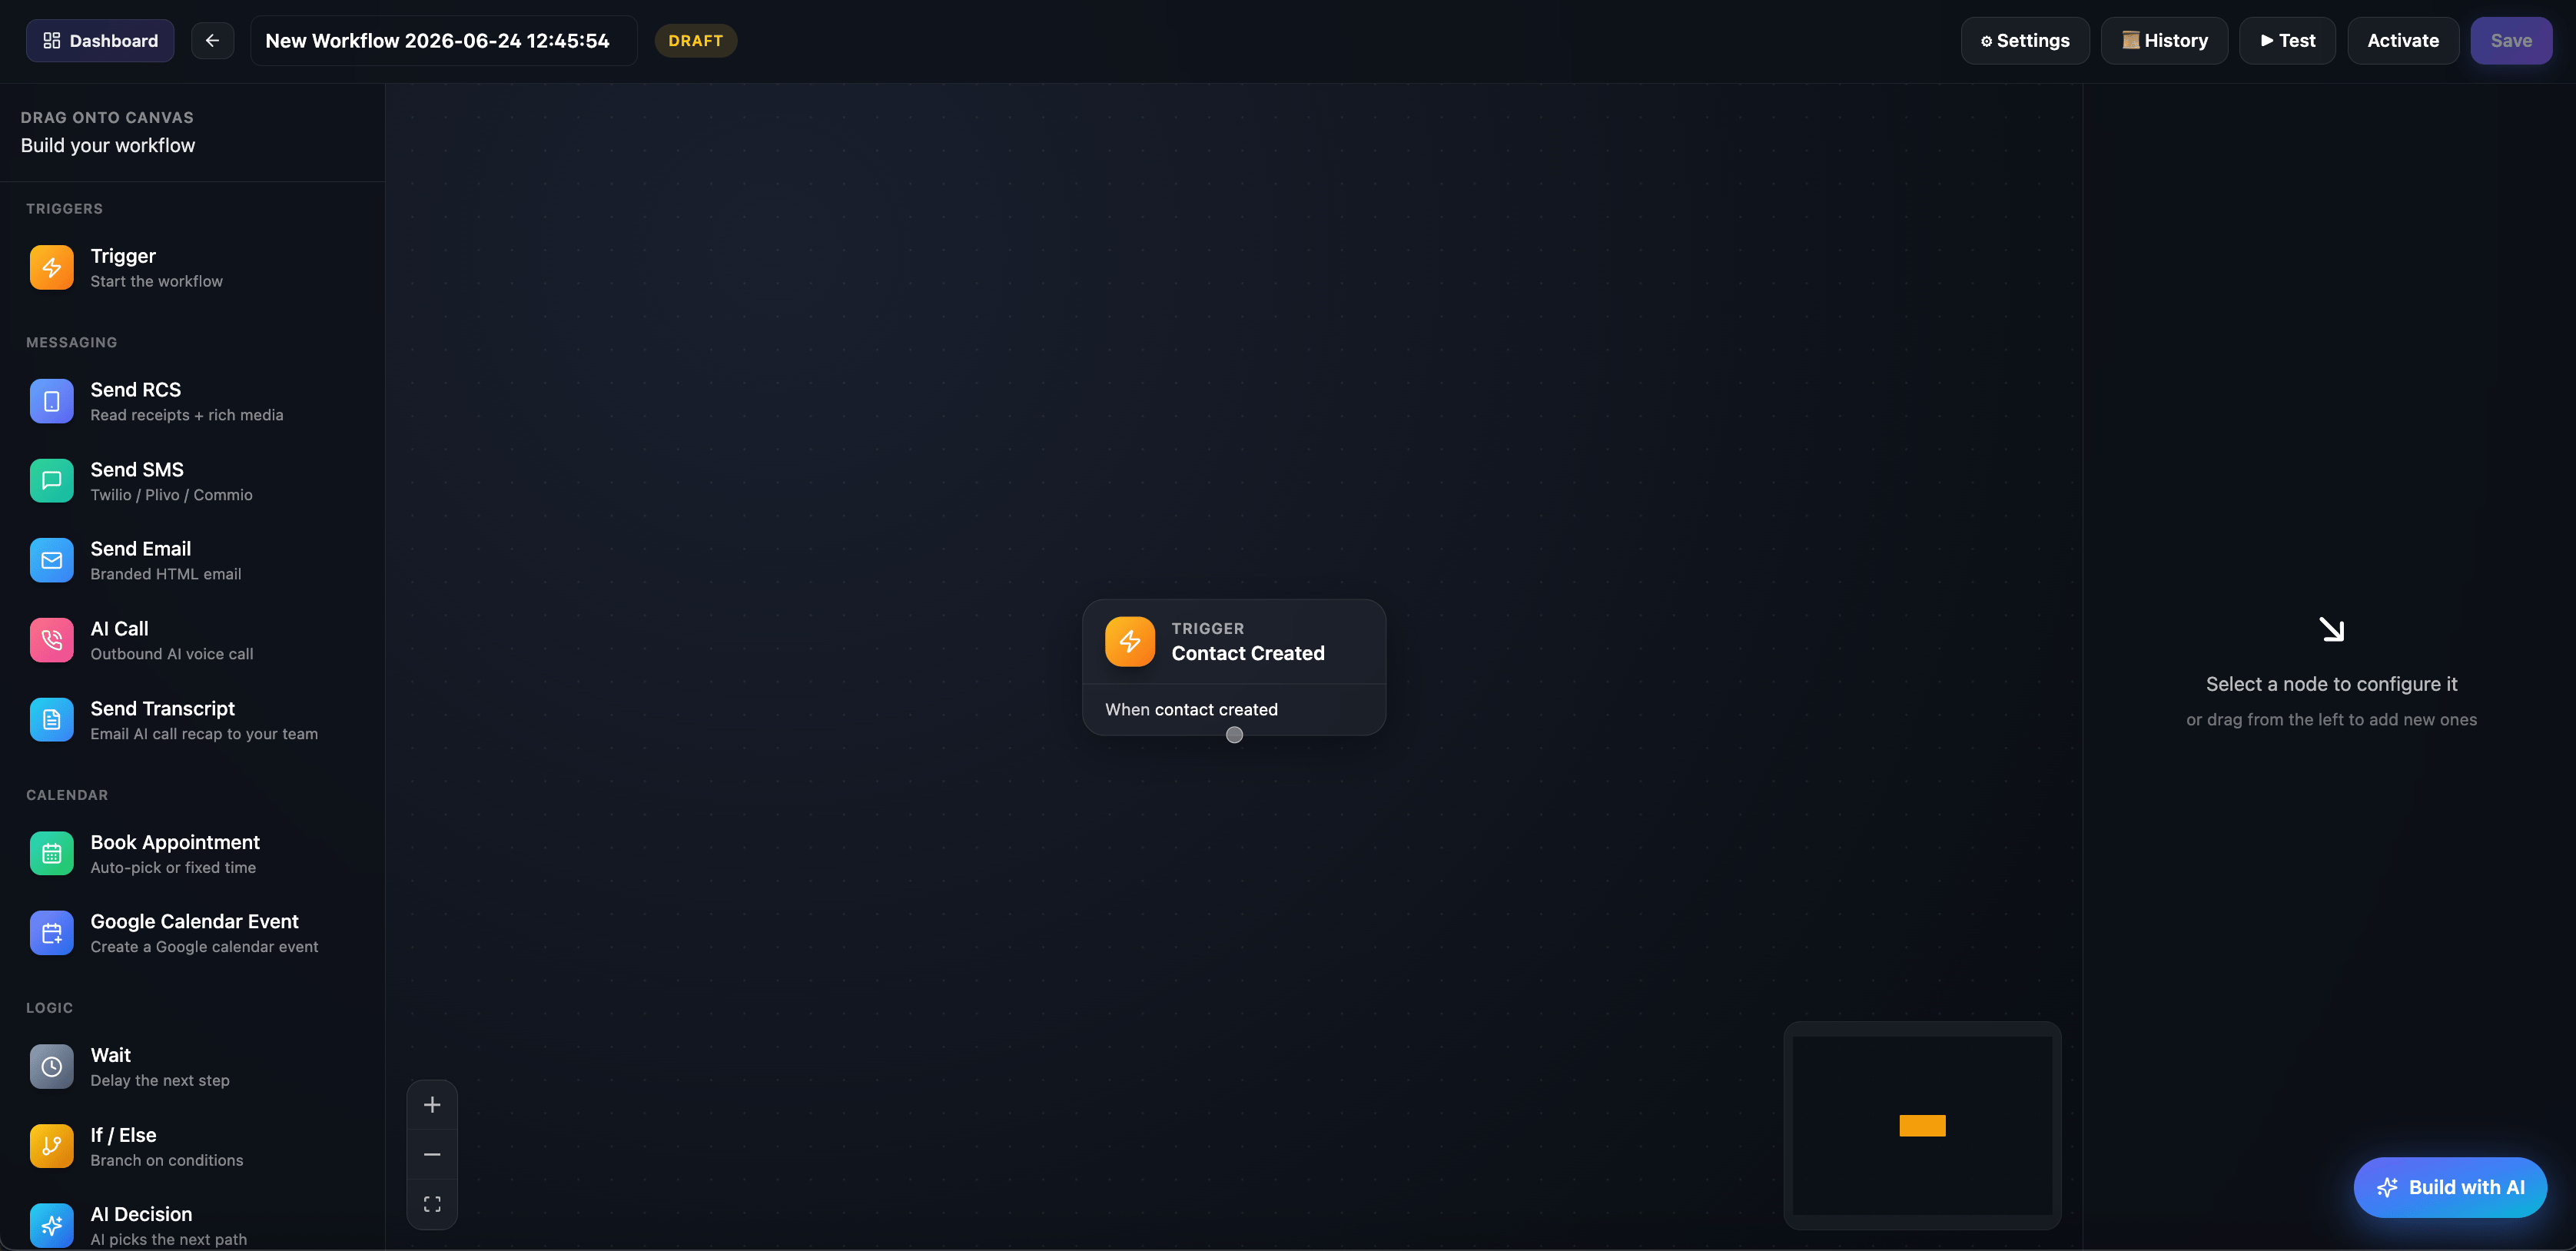
🎨 Builder Canvas
The builder has three main areas:- Left sidebar — drag triggers and actions onto the canvas
- Center canvas — visual grid where your workflow is built
- Right panel — configure the selected trigger or action
⚡ Available Triggers
Drag a Trigger block from the left sidebar onto the canvas, then choose a Trigger Event from the dropdown in the right panel. Common trigger events include:| Trigger | When it runs |
|---|---|
| Contact Created | A new contact is added to RizzDial |
| Contact Changed | An existing contact’s details are updated |
| Contact Tag Added / Removed | A tag is added to or removed from a contact |
| Disposition Change | A call disposition is set or updated |
| Note Added | A note is added to a contact |
| Pipeline Stage Change | A contact is moved to a different pipeline stage |
| Appointment Status | An appointment status changes (for example booked, confirmed, or missed) |
| Customer Booked Appointment | A contact books an appointment through your calendar or booking flow |
| Incoming SMS | A contact sends an inbound SMS to your number |
| Dialer Call Details | A dialer call ends or reaches a specific call outcome |
| AI Call Details | An AI call ends or reaches a specific call outcome |
⚡ Configure a Trigger or Action
Click any block on the canvas to open its settings in the right panel.
⚙️ Workflow Settings
Click Settings in the builder toolbar to open communication and timing options for the workflow.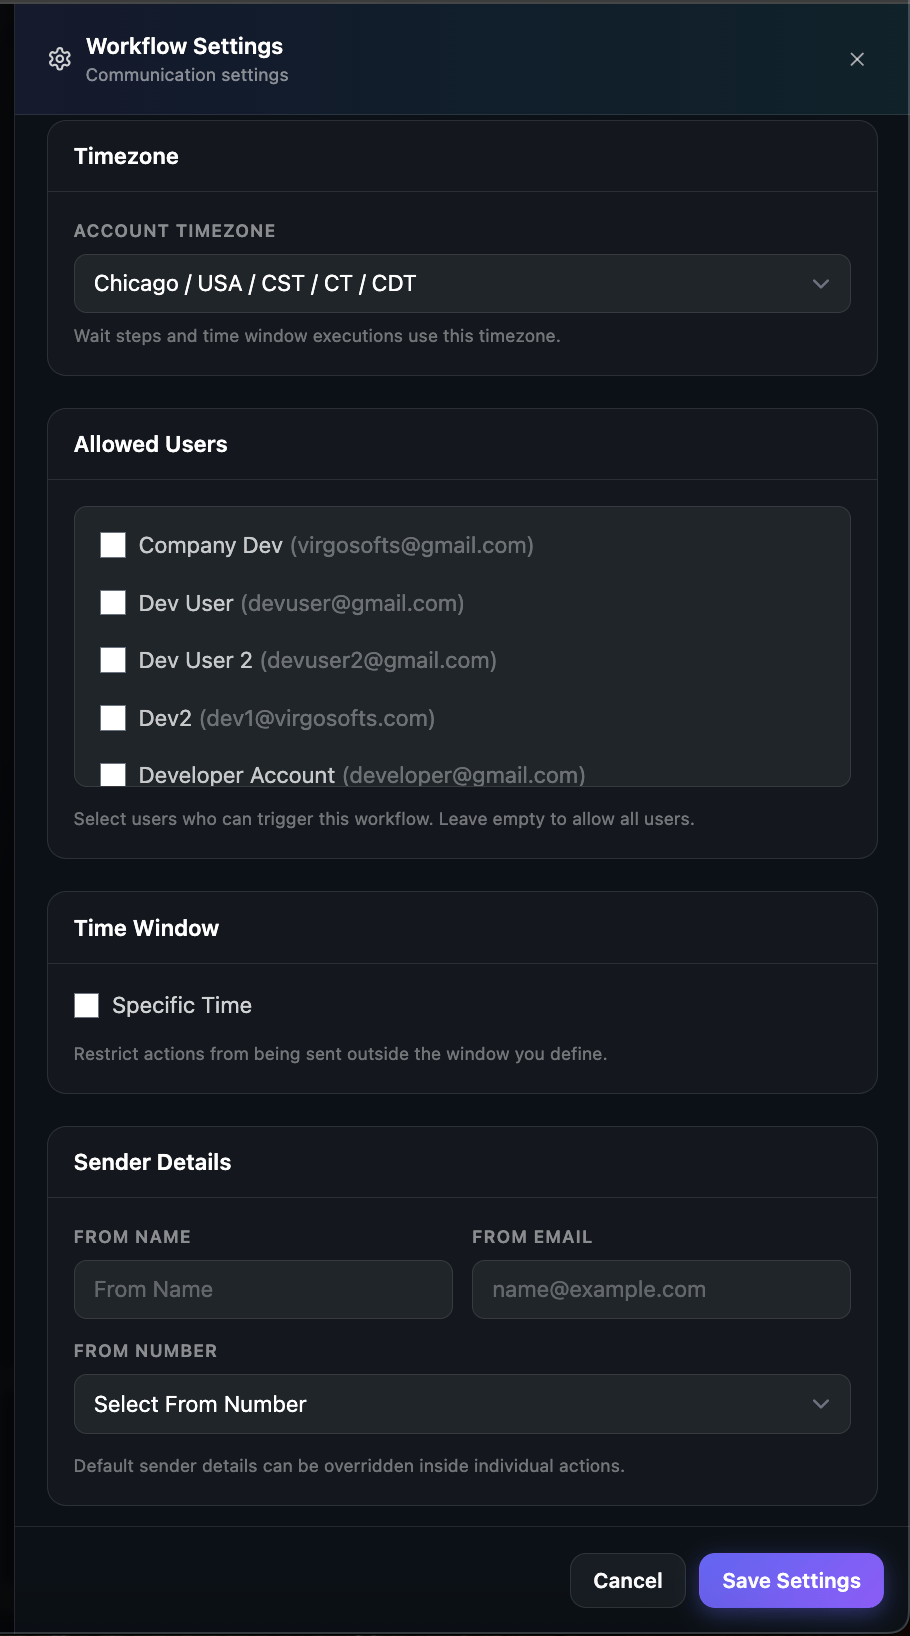
- Timezone — used for wait steps and time window rules
- Allowed Users — choose who can trigger this workflow; leave empty to allow all users
- Time Window — restrict when automated actions may run
- Sender Details — default From Name, From Email, and From Number for outgoing messages
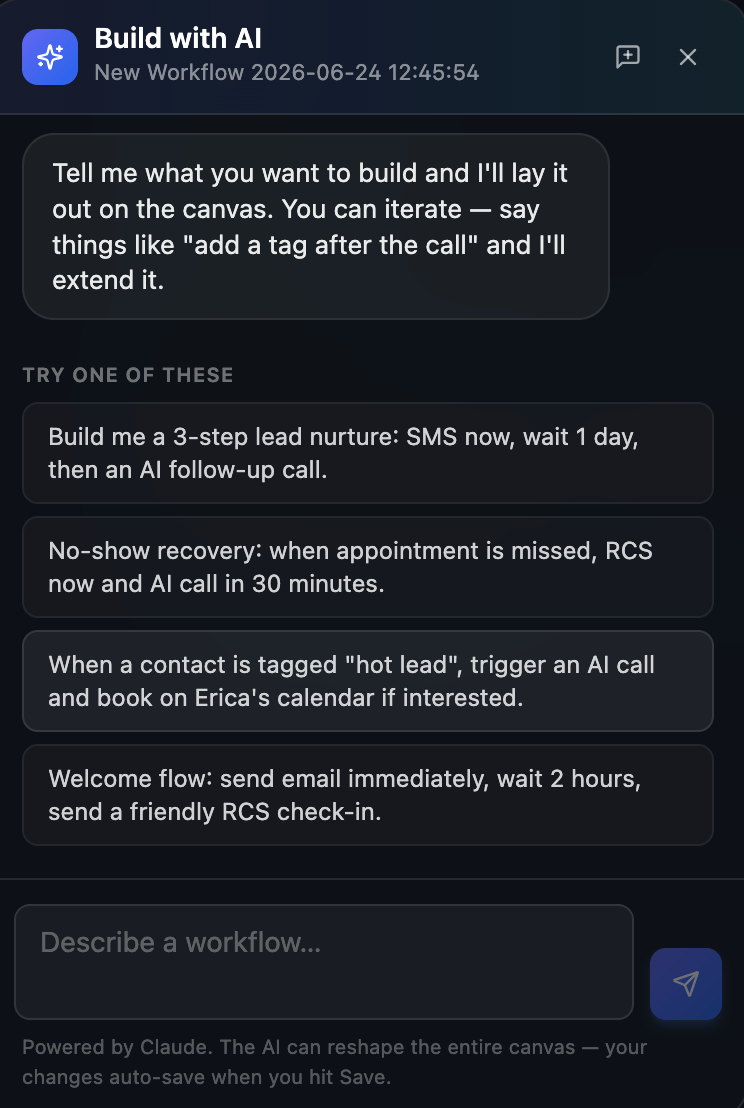
✨ Build with AI
Click Build with AI in the builder to describe a workflow in plain language. The AI lays out triggers and actions on the canvas based on your prompt.