Manage -> Setup Contact Fields
🗃️ Field cards
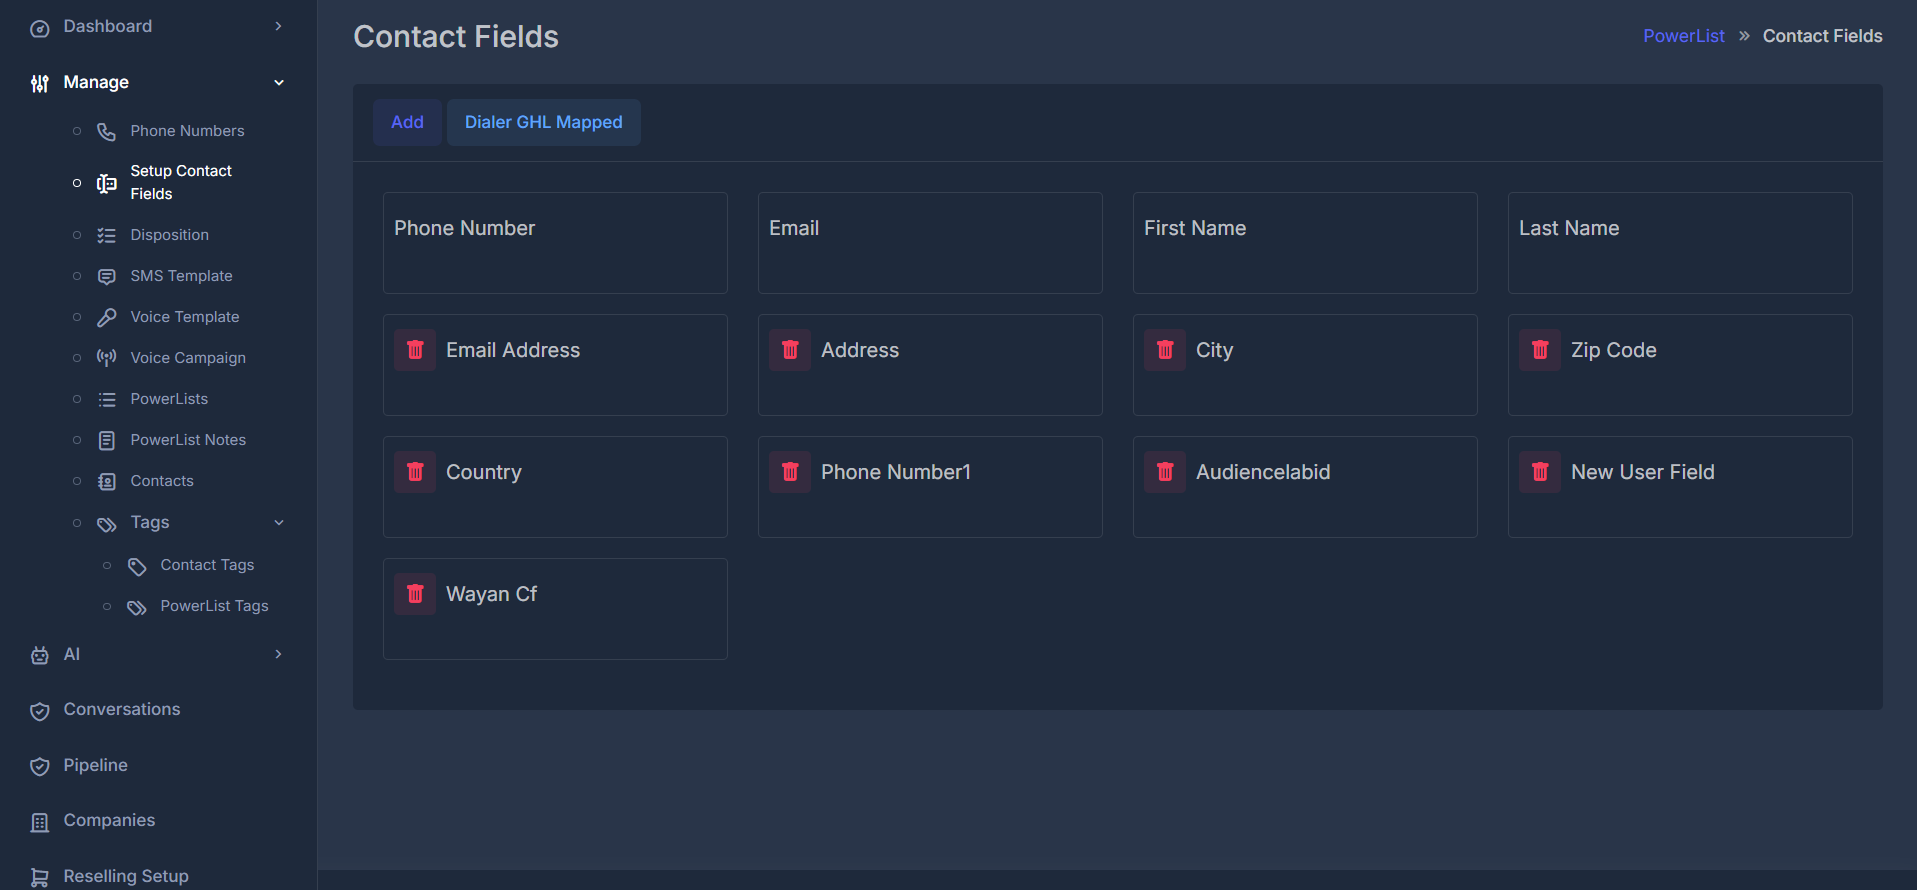
All fields appear as cards in a grid. On each card:- Field name is shown in readable format.
- Internal underscores are displayed as spaces.
- Words are capitalized (for example
zip_codedisplays as Zip Code). - Delete (trash) appears only for fields that can be removed.
🔒 Core fields that cannot be deleted
- Phone Number
- First Name
- Last Name
➕ Creating a new field
Click Add to open the create form. Use Back to return to card list without saving.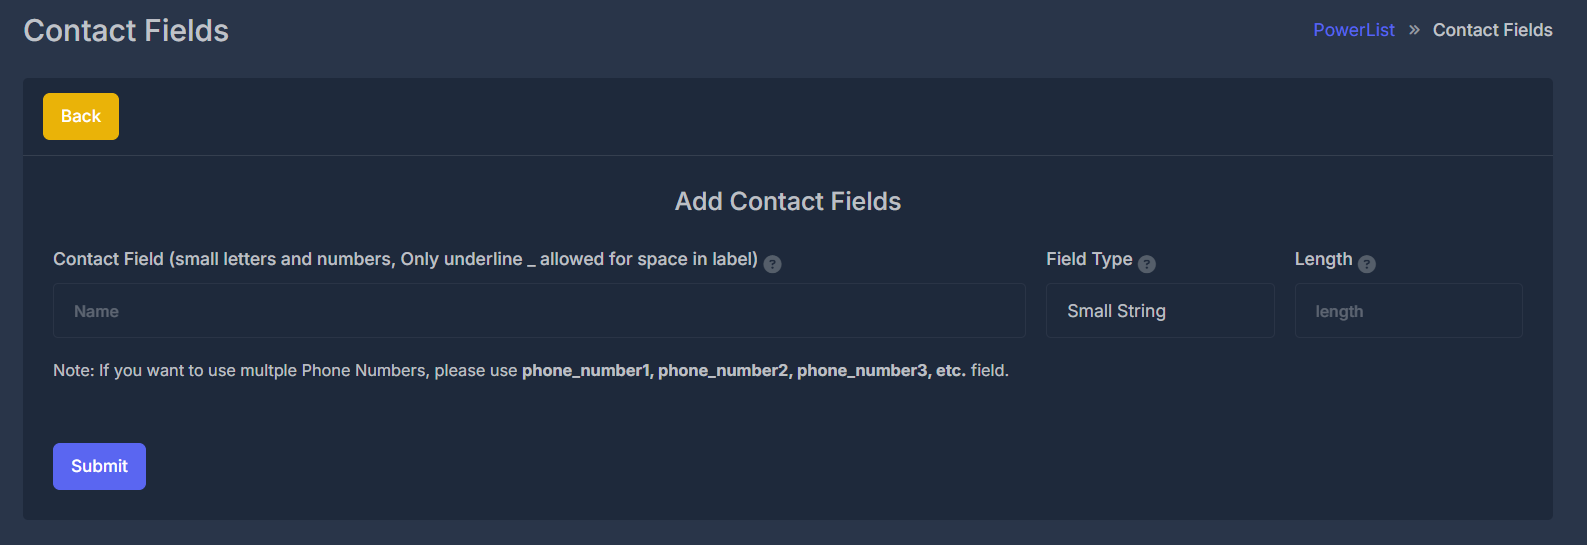
🏷️ Contact Field (name)
Use naming rules:- Lowercase letters
- Numbers
- Underscores for spaces
company_namedate_of_birthpreferred_language
🔠 Field Type
Choose one:- Small String (short text)
- Text (medium text)
- Long Text (long content, notes)
- Sets max character length.
- If left empty, default length is used.
📞 Extra phone numbers
If you need multiple phone numbers, use this naming pattern:phone_number1phone_number2phone_number3
- On success: confirmation appears, then page reloads with new field.
- On validation/error: message explains what to fix.
🔗 GoHighLevel Mapping
Click Dialer GHL Mapped to open Field Mappings modal. This is where you map your internal contact fields to GoHighLevel (GHL) fields so syncing, dialer flows, and personalization tokens use the right data.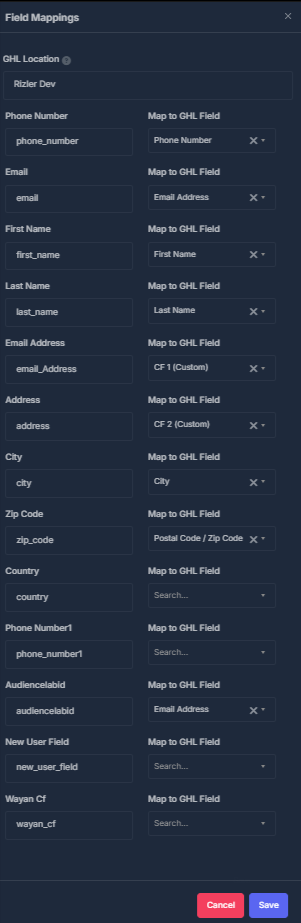
📍 GHL Location
Choose the target GHL location first.- Field options are location-dependent.
- Changing location reloads available GHL fields.
- You may see loading or error messages while options fetch.
🗂️ Mapping rows
Each internal contact field appears as one row:- Left side: readable label + internal key (read-only).
- Right side: Map to GHL Field selector.
- Save: stores mappings and applies changes.
- Cancel: closes modal without saving.
- Save replaces previous mapping set for your organization.
- Rows left empty are treated as unlinked.