⚙️ Advanced tab (user guide)
The Advanced tab is where you give your agent extra abilities during calls: ending calls on purpose, transferring callers, booking appointments, collecting details after or during a call, joining meetings, using phone menus (press-a-number systems), optional clinic-related options, and connecting custom actions. You will also find phone number assignment for this agent, tools to test and connect the agent, and sender settings for notifications.📋 Agent Functions (main section)
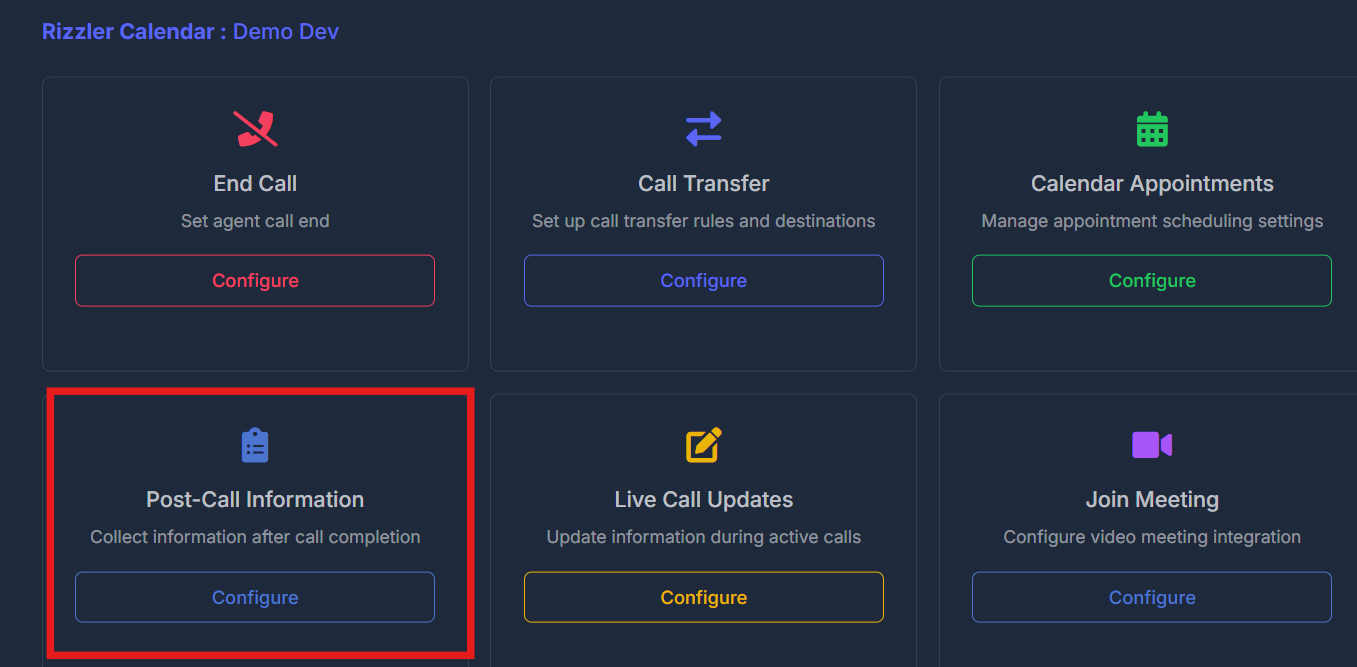
Under the title Agent Functions, a short line explains that you can turn on things like calendar booking and ending calls—read it once; it sets context for everything below. Below that, a grid of cards lets you open setup for each type of function. Each card has a title, one line of help text, and a Configure button (or a switch in one special case).🔴 End Call
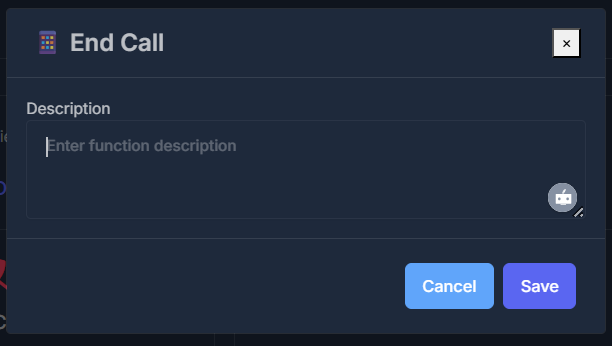
Purpose: Tell the agent when and how it may end the call after your business goal is finished.- Choose Configure on the End Call card.
- A panel opens with a single large text area: Description.
- Write clear instructions in everyday language (for example: after the appointment is booked, end the call politely).
- Choose Save. Cancel closes without saving.
🔄 Call Transfer
Empower your callers to reach the right person—instantly. The Call Transfer feature allows your AI agent to intelligently hand off conversations to a real staff member or team whenever personalized human support is needed, a booking must be made, or a specialized department should step in.- Click the Configure button on the Call Transfer card.
- Complete a few simple settings—tailored to your workflow.
- Hit Save to activate. Use Cancel to exit without changes.
🔁 Warm Transfer
Decide how callers are routed:- Warm Transfer: Your AI agent smoothly prepares the handoff and connects the caller to a single destination—no awkward transitions!
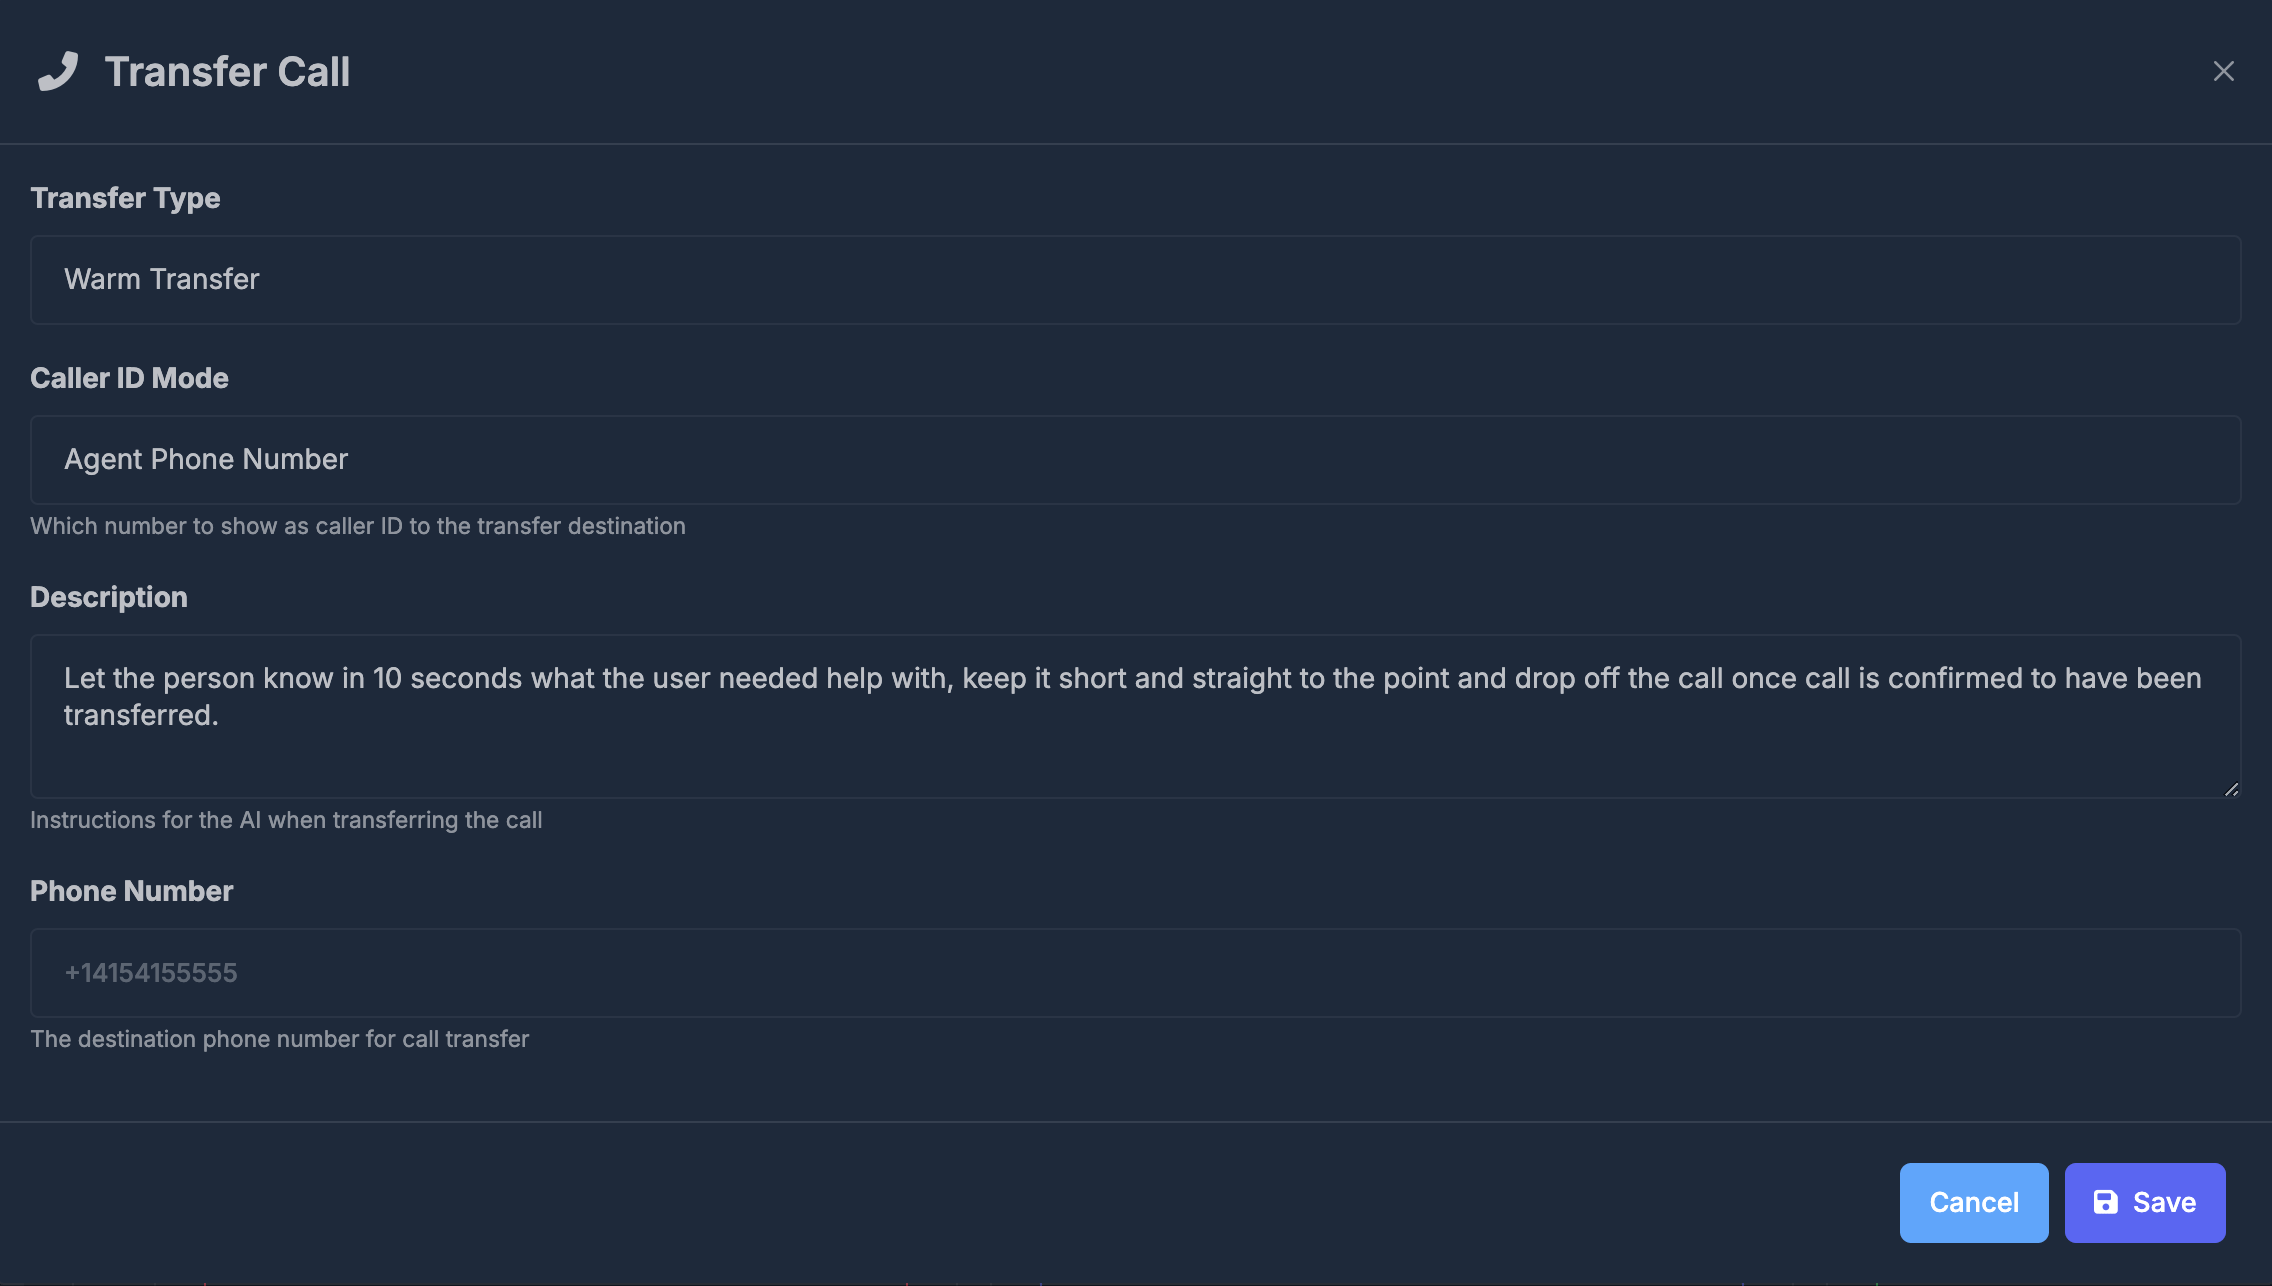
| Option | What shows up for the recipient |
|---|---|
| Agent Phone Number | The agent’s assigned business number |
| User Phone Number | The caller’s own phone number |
📝 Description Add clear, concise instructions for your AI about what to say during the transfer. (Example: “Introduce the caller and explain they want to schedule an appointment. Then connect the call.”) ☎️ Phone Number Designate the destination number (in international format, e.g.
+14154155555).
⚠️ If left blank and you save, Call Transfer will be disabled.
🗓️ Schedule Transfer
Route callers automatically to different numbers based on business hours, staffing, or special scenarios.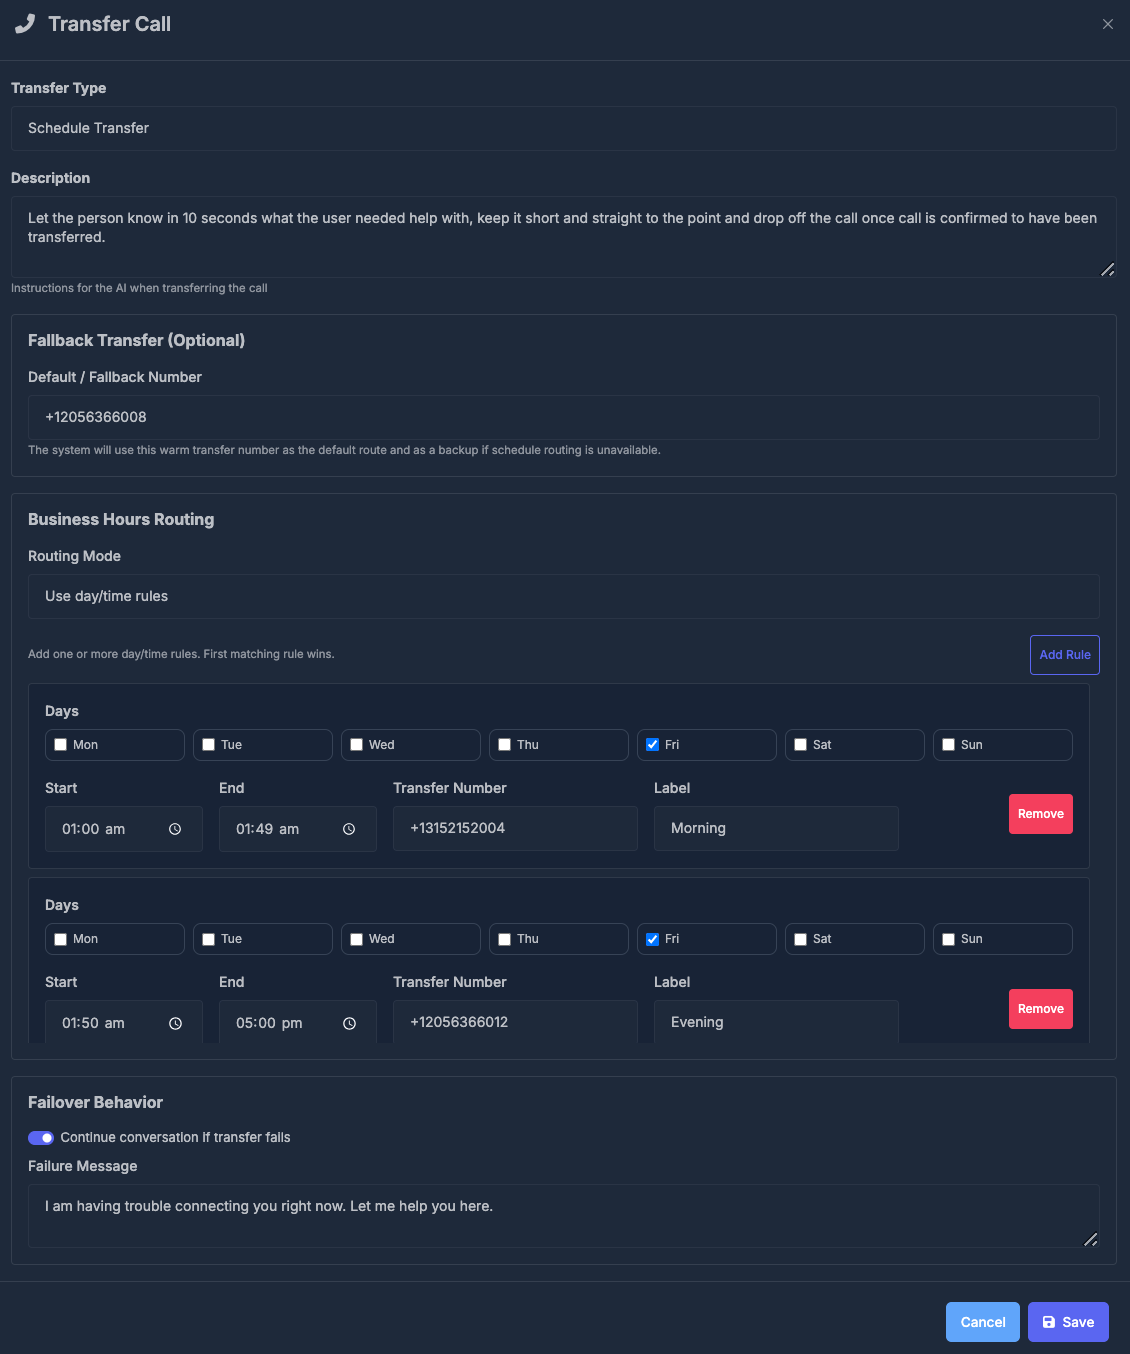
- Description: What should your AI say during the handoff? (Think: a quick summary and polite introduction.)
- Default/Fallback Number: Used as the primary transfer and as a safety net if all else fails.
- Business Hours Routing:
- Set Routing Mode to Use day/time rules
- Click Add Rule for blocks like “Weekdays Morning” or “After Hours”.
- Days: Which weekdays the rule applies to
- Start/End time: When is this number active?
- Transfer Number: Destination for this time period
- Label: Easily recognize the rule (e.g. “Lunch Shift”)
- Remove: Clear outdated rules in one click
- Failover Behavior:
If the transfer doesn’t connect:- Enable Continue conversation if transfer fails
- Provide a Failure Message — what your AI should say instead
(Example: “Sorry, I couldn’t reach a human right now. Can I help you with something else?”)
📅 Calendar Appointments
Purpose: Let your agent check availability and book appointments using your connected calendar system. You can integrate your calendar from the Settings > Integrations tab. Connect either:- Go High Level (GHL)
- Calendly
- Rizz Dial (Google Calendar)
ℹ️ Make sure you’ve connected your calendar (or Calendly) from the Integration tab in your settings before configuration.Choosing the booking method and selecting GHL, Calendly, or Google Calendar/Rizz Dial:
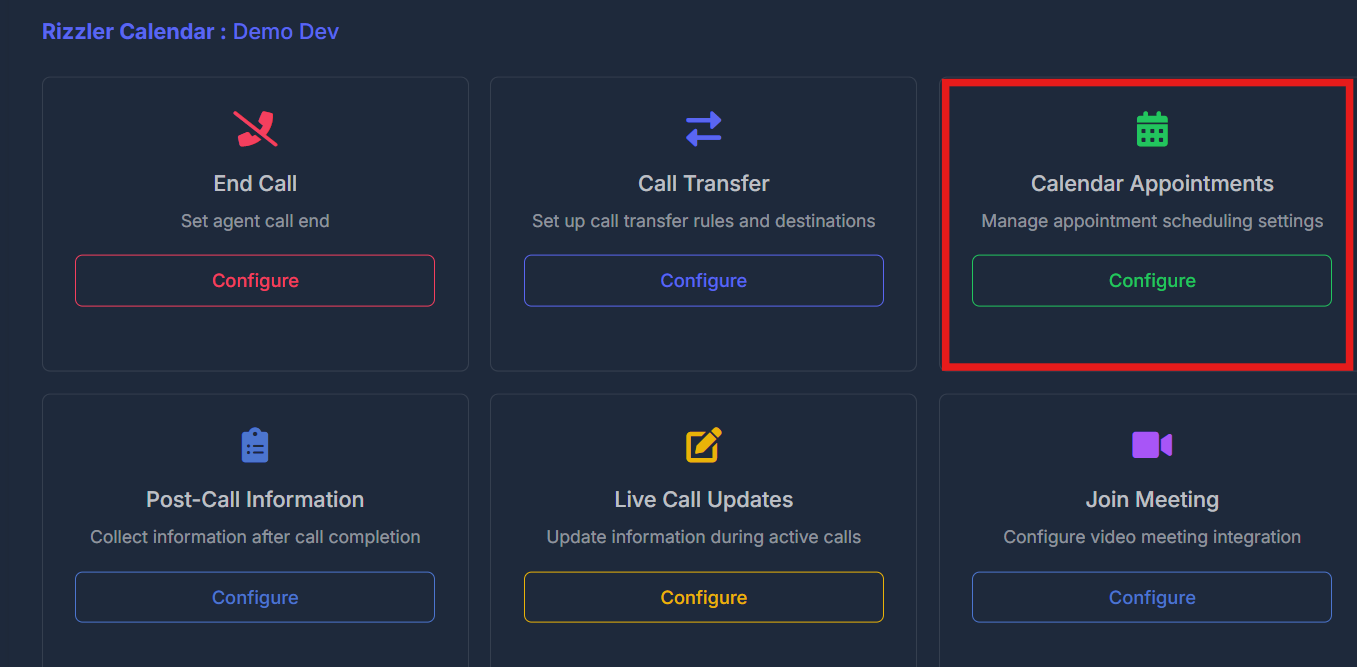
- From the Calendar Appointments card, click Configure.
- If you select Direct Calendar Booking:
- Select Calendar Platform: Pick GHL, Calendly, or Google Calendar/Rizz Dial—choose whichever you’ve already connected.
- Choose Calendar: Select the calendar your agent should use for bookings. If no options appear, confirm your integration is properly set up under Settings > Integrations.
- Appointment Title: Set the event name shown on the calendar (e.g., “Sales Call”, “Consultation”).
- Booking Window: Set how many days into the future your agent can offer appointments (e.g., show only the next 7 days).
- Collect Contact Information: Choose the caller details your agent must collect before booking (options depend on calendar platform).
- Calendar Timezone: Match the calendar’s timezone to your business/location needs.
- Click Save to apply changes or Cancel to discard edits.

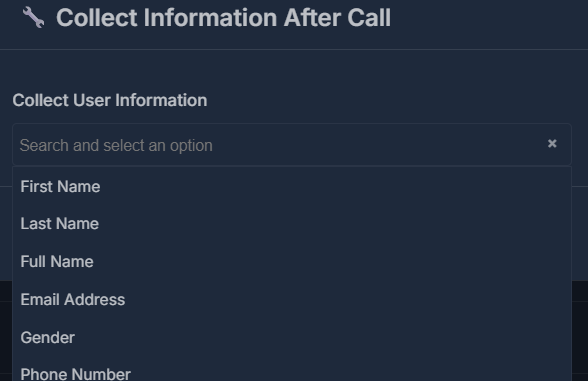
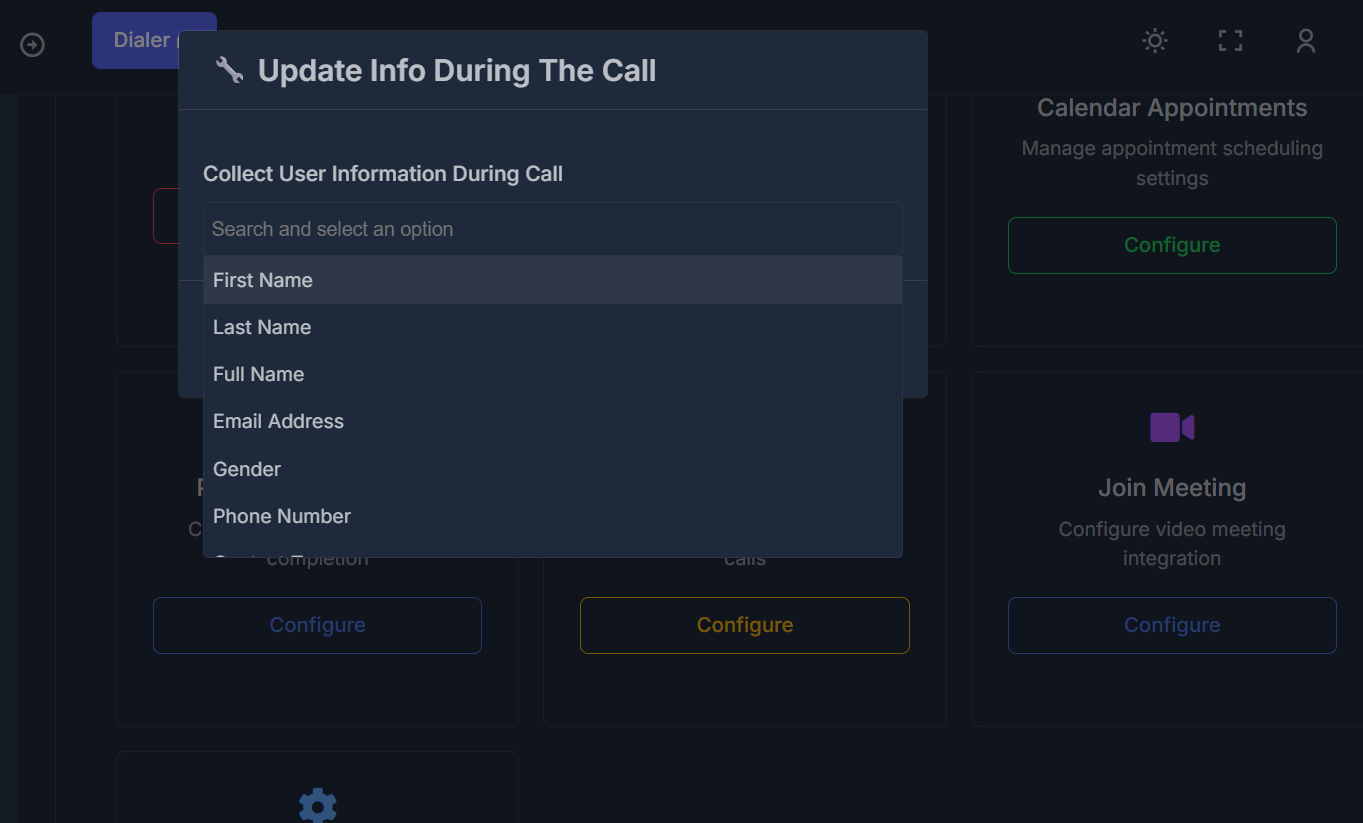
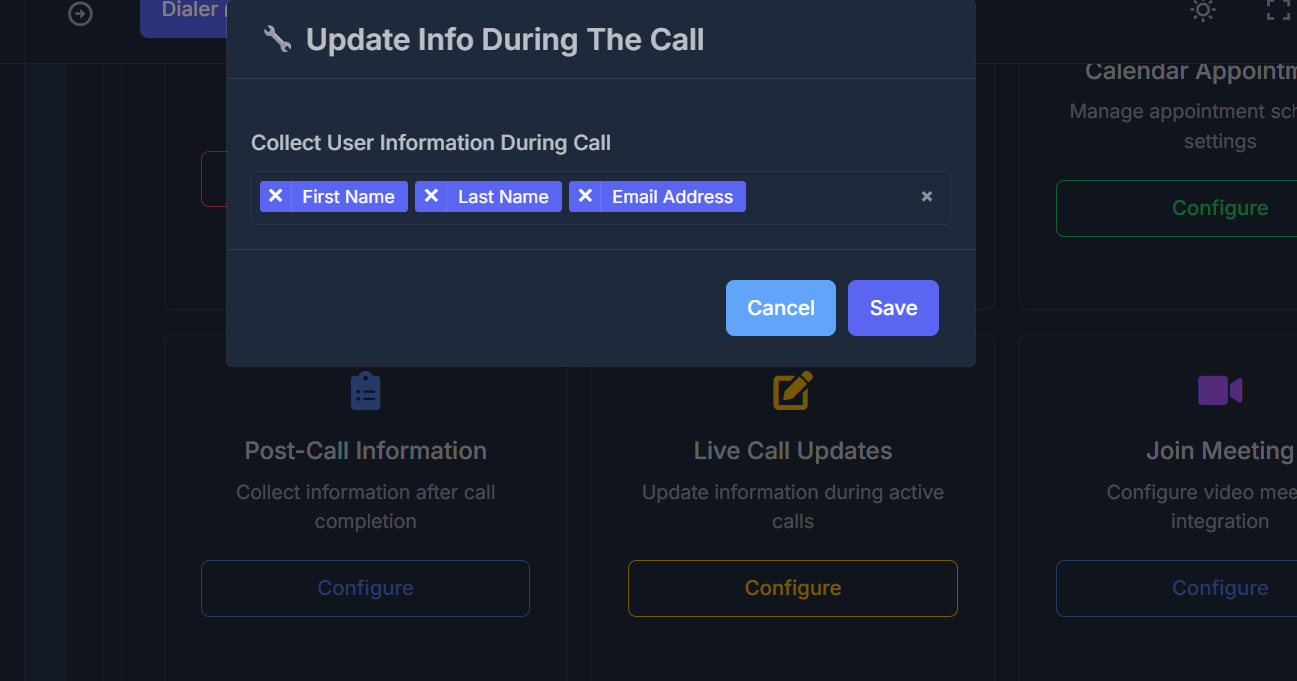
📋 Post-Call Information
Purpose: After the call ends, have the agent capture specific information you care about (aligned with fields your system can store).- Choose Configure on the Post-Call Information card.
- Use Collect User Information to select one or more items (the list depends on your connected setup).
- Save applies. Cancel closes without saving.
📝 Live Call Updates
Purpose: While the call is still active, update stored information when the caller says something relevant. What the Live Call Updates function is for: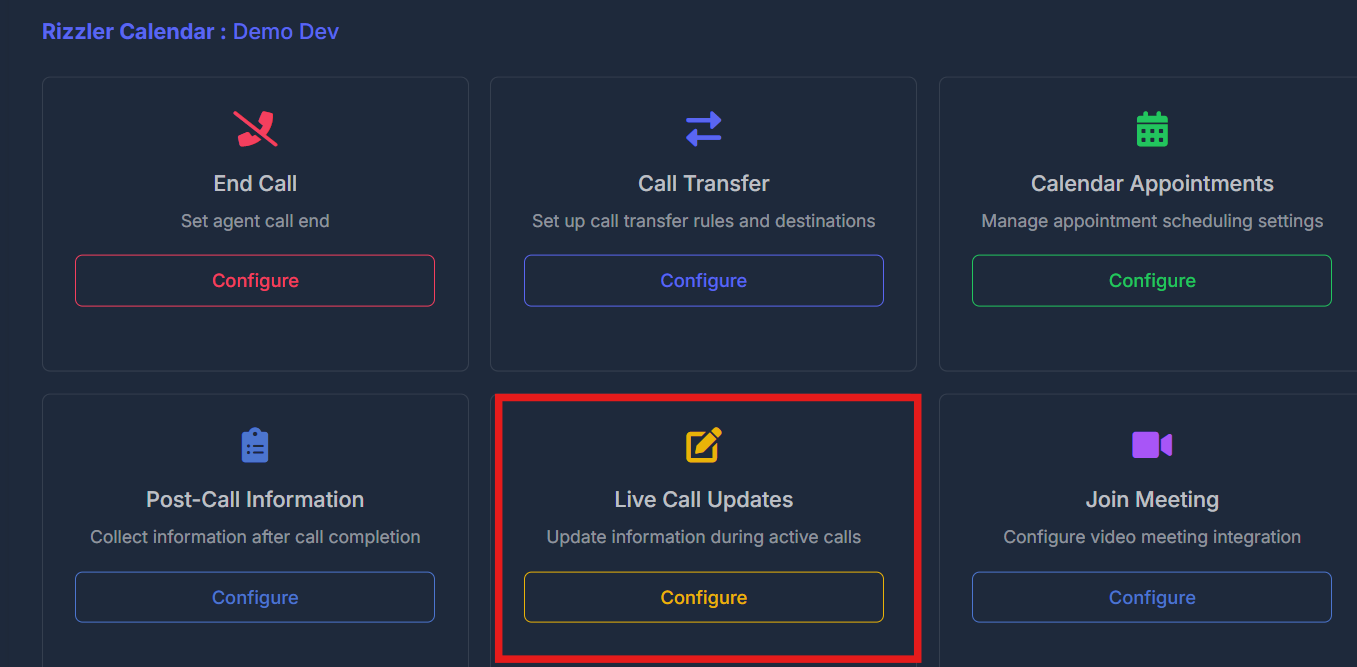
- Choose Configure on the Live Call Updates card.
- Select the information the agent is allowed to update during the call.
- Save applies.
🎥 Join Meeting
Purpose: Connect video meeting behavior so the agent can work with your meeting flow.- Choose Configure on the Join Meeting card.
- Select Google Calendar: Pick the calendar to use when this applies.

- Description: Explain when and how the agent should use the meeting action.
- Save applies. Cancel closes without saving.

🏥 Setup Cloud Clinic Integration (only if you see this card)
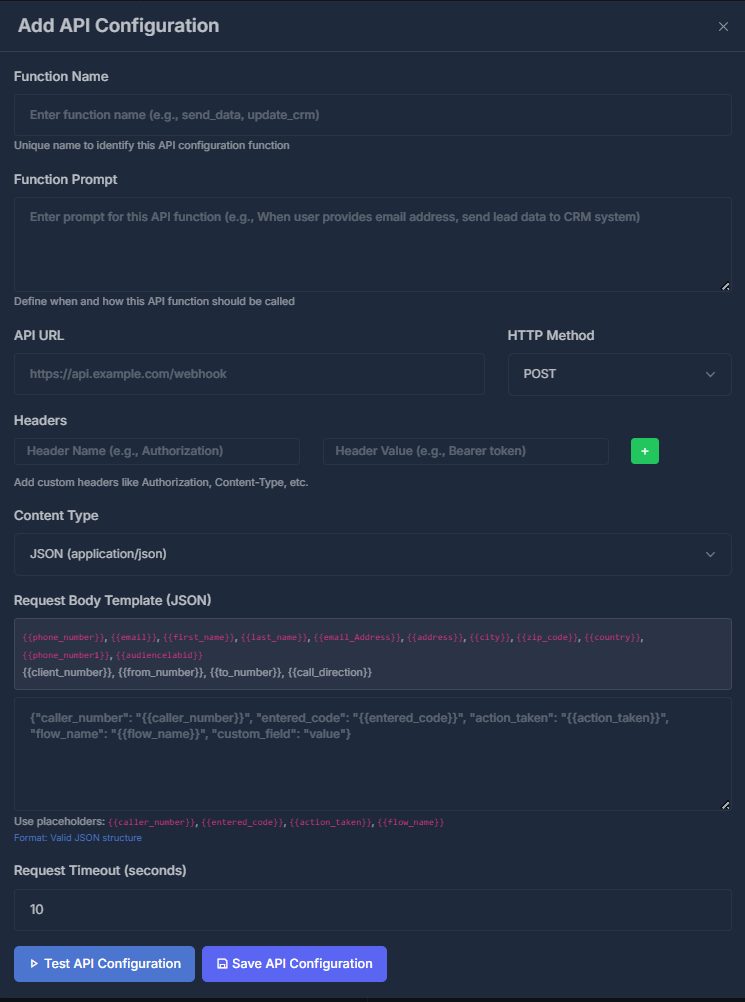
Purpose: Turn clinic-related features on for this agent when your organization uses that integration. You may see a switch to enable or disable the feature. If your profile is missing required clinic connection details, the switch may stay off and a note tells you to add Source System Id and Auth Token in Profile Settings first.🔗 API Configuration
Purpose: Set up custom webhooks and API actions for your agent, allowing it to interact with your own services in addition to built-in tools like calendar and transfer. Click Configure to manage your API action list. When enabled, these actions appear in Active Functions under the API Configuration summary, which displays each action’s endpoint, HTTP method, and data format. Example view of multiple API actions: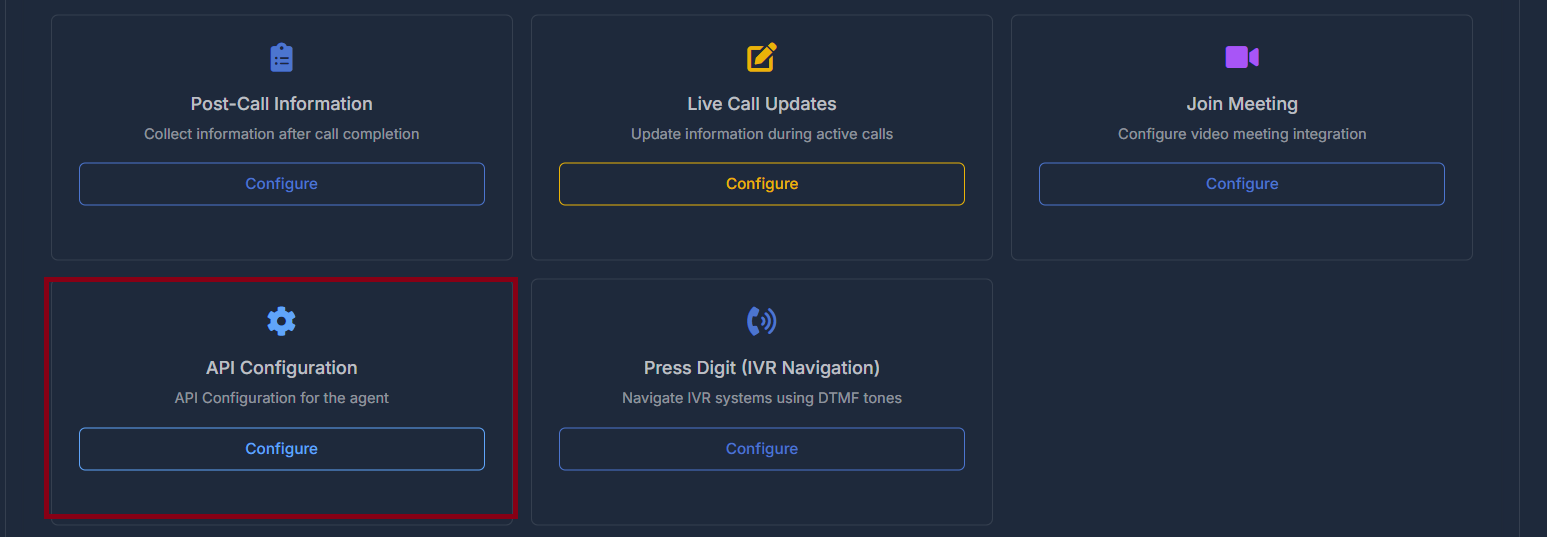
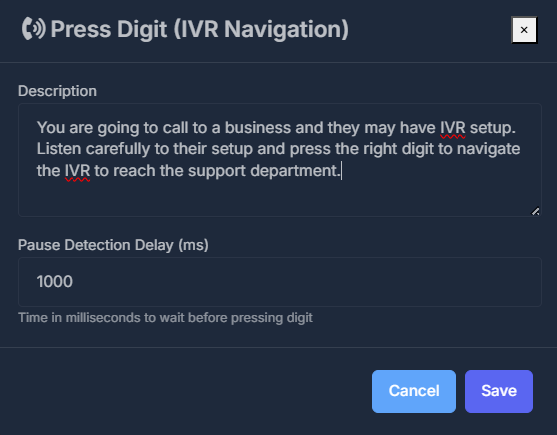
☎️ Press Digit (IVR Navigation)
Purpose: When the other side uses a phone tree (“Press 1 for sales…”), the agent can listen and press the right keys. Press Digit as an agent function you can configure: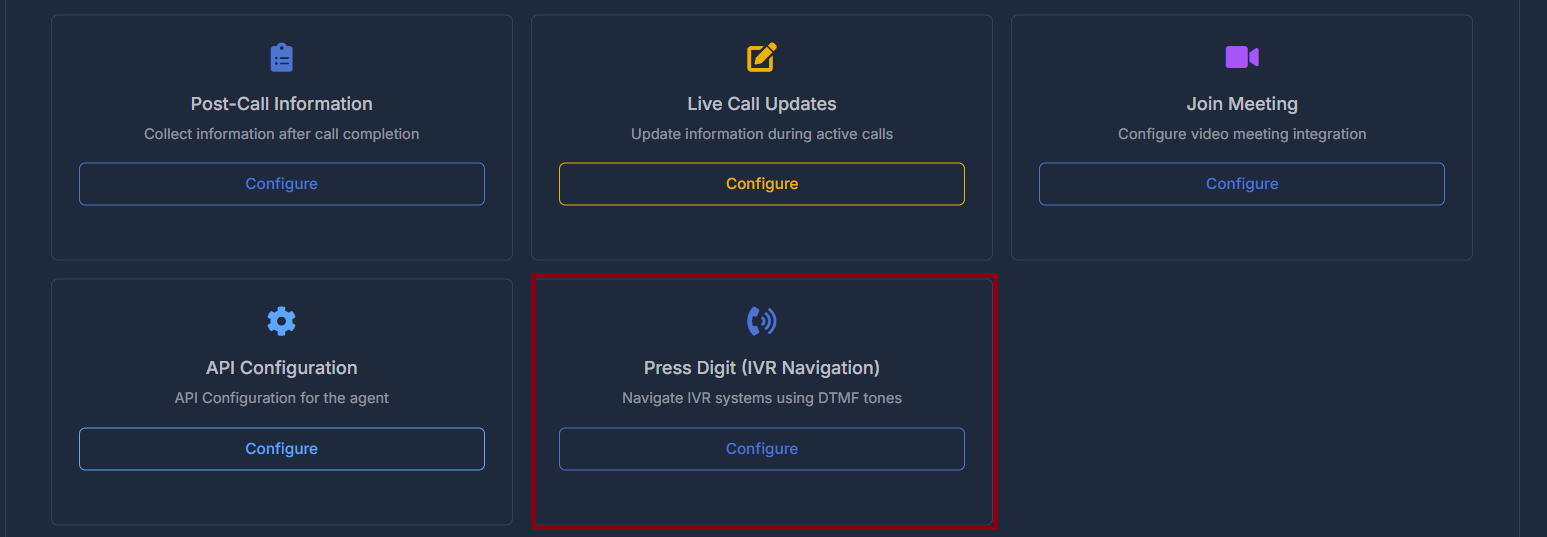
- Choose Configure on the Press Digit card.
- Description: Explain the situation (for example, navigate to support). Stay within the character limit shown under the box.
- Pause detection delay: How long the agent waits before sending each digit—adjust if menus are slow or fast (allowed min/max are on screen).
- Save applies. Cancel closes without saving.
📞 Phone Number Configuration
Purpose: Choose which incoming and outgoing phone numbers this agent uses from numbers available to your account. Inbound Numbers — Open the list and pick the number that should receive calls for this agent; use the save control next to the list to apply. Outbound Numbers — Pick the number used or shown for outbound calls from this agent; use the save control next to the list to apply. If a number is already used elsewhere, your organization’s rules may limit what appears in the list. Inbound and outbound pickers on one screen: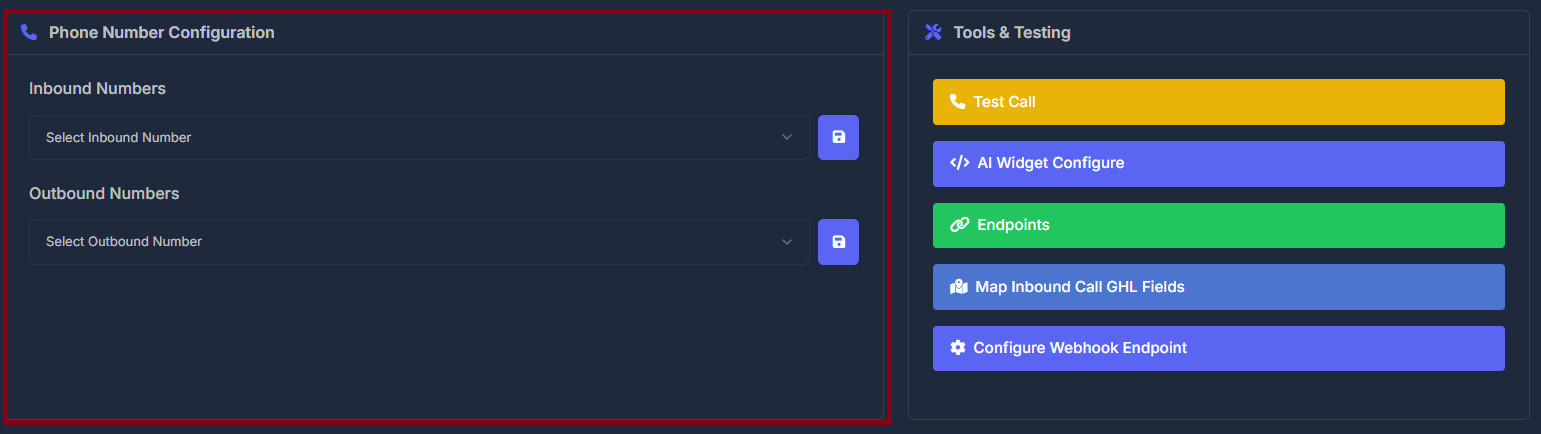
🛠️ Tools & Testing
Shortcuts for trying the agent and technical setup. The row of tool buttons on the agent page: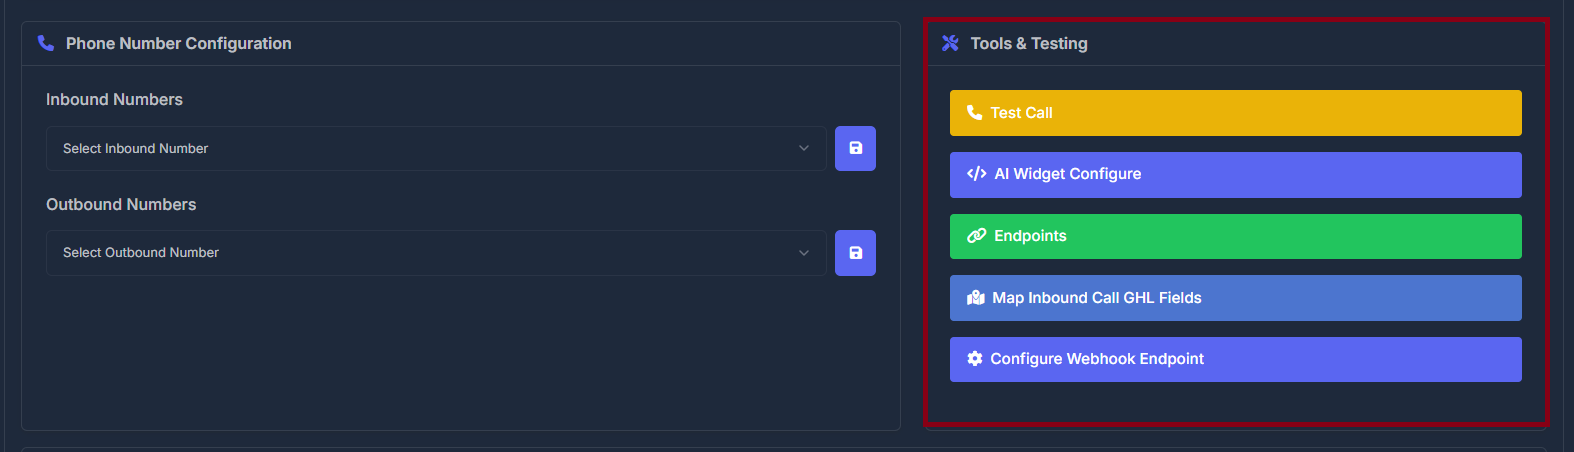
| Button | What it is for |
|---|---|
| Test Call | Start a test call flow so you can hear how the agent behaves. |
| AI Widget Configure | Open setup for the chat or web widget tied to this agent. |
| Endpoints | View connection addresses and related information for integrations. |
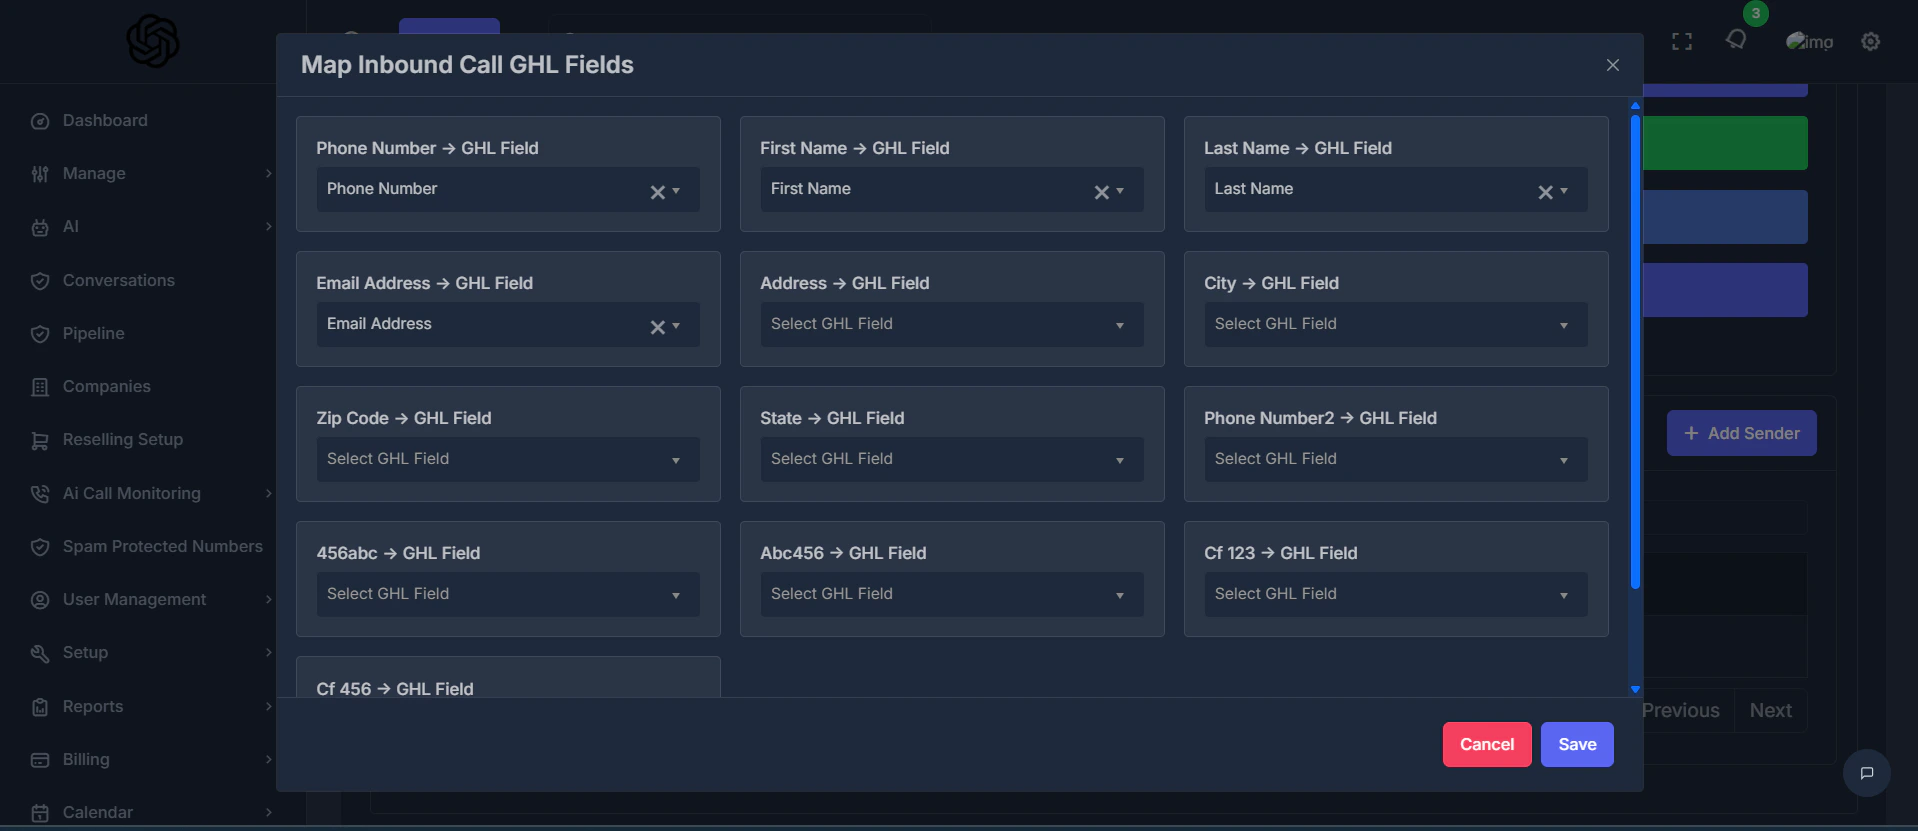
| Map Inbound Call GHL Fields | Match incoming call data to fields in your connected business platform. |
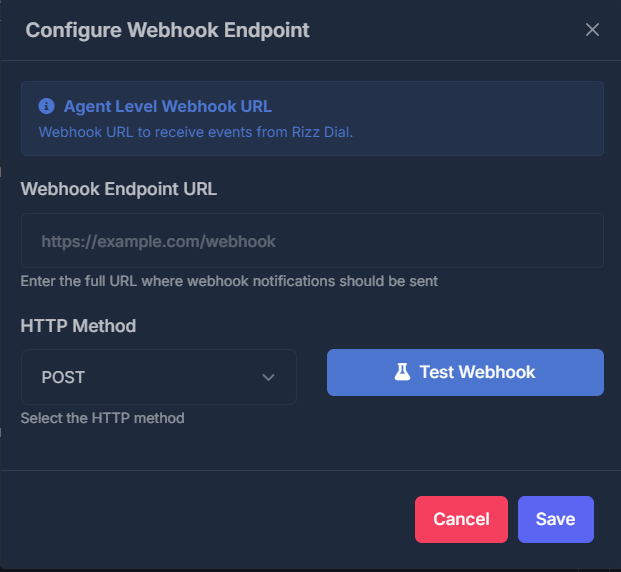
| Configure Webhook Endpoint | Set or view where call events can be sent for other systems. |
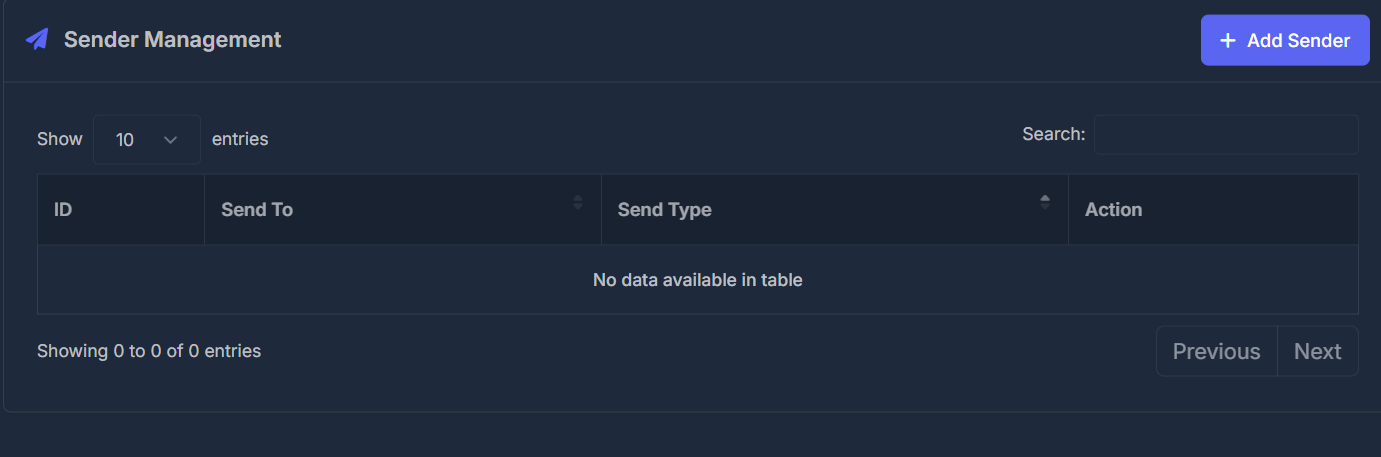
✉️ Sender Management
Purpose: Manage where notifications about this agent can be sent (for example email or text), as rows in a table. Add Sender opens a short form. Send To: destination (email or phone, depending on your process). Send Type: Email or SMS. Saving adds a row; the table includes actions to manage existing entries. Sender list and Add Sender: