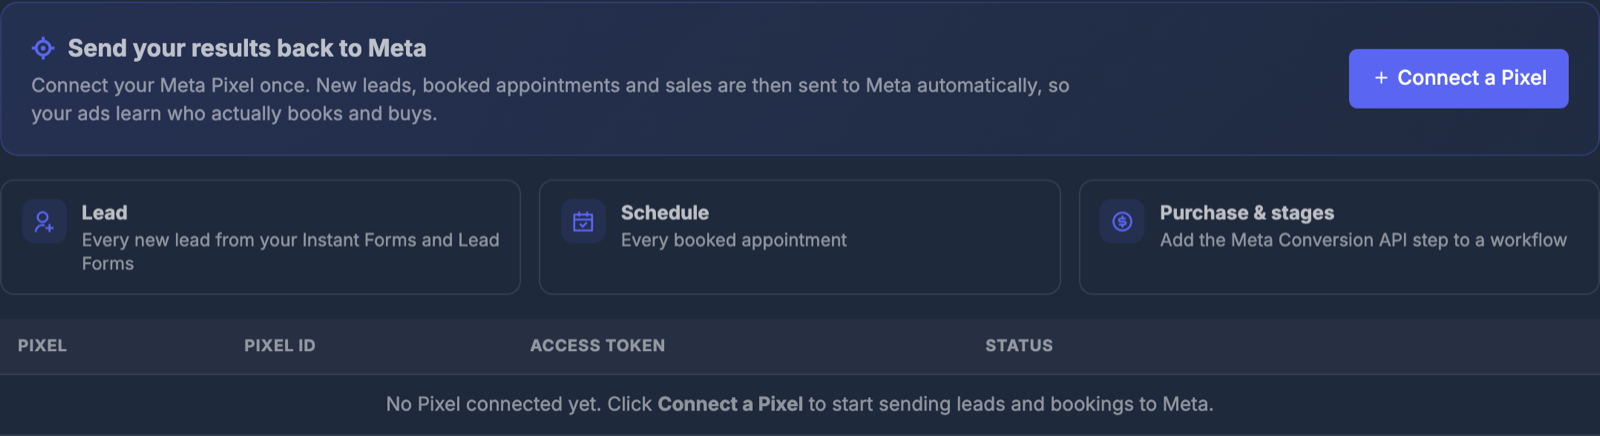
Meta Pixel & Conversions sends your results back to Meta. Once your Pixel is connected, AI Sync tells Meta every time someone becomes a lead, books an appointment, or buys. Meta then shows your ads to more people like the ones who book and buy — not just the ones who fill out a form.
Open from Marketing → Meta Ads → Conversions. Setup takes about 3 minutes. You do not need to connect Facebook first.
✨ What gets sent to Meta#
| Event | When it is sent | What you do |
|---|---|---|
| Lead | Every new lead from your Facebook Instant Forms, Lead Forms, and website form | Nothing — automatic |
| Schedule | Every booked appointment (calendar or AI booking) | Nothing — automatic |
| Purchase | When a lead buys | Add the Meta Conversion API step to a workflow (below) |
| Your own stage (for example Qualified) | When a lead reaches that stage | Add the Meta Conversion API step to a workflow |
Each event carries the person's email, phone and name, scrambled (hashed) the way Meta requires. Their real details never leave AI Sync.
🔌 Connect your Pixel#
You need two things from Meta Events Manager: your Pixel ID and an access token. The setup wizard tells you exactly where to click for each one.
Open the wizard
Go to Marketing → Meta Ads, open the Conversions tab, and click Connect a Pixel.
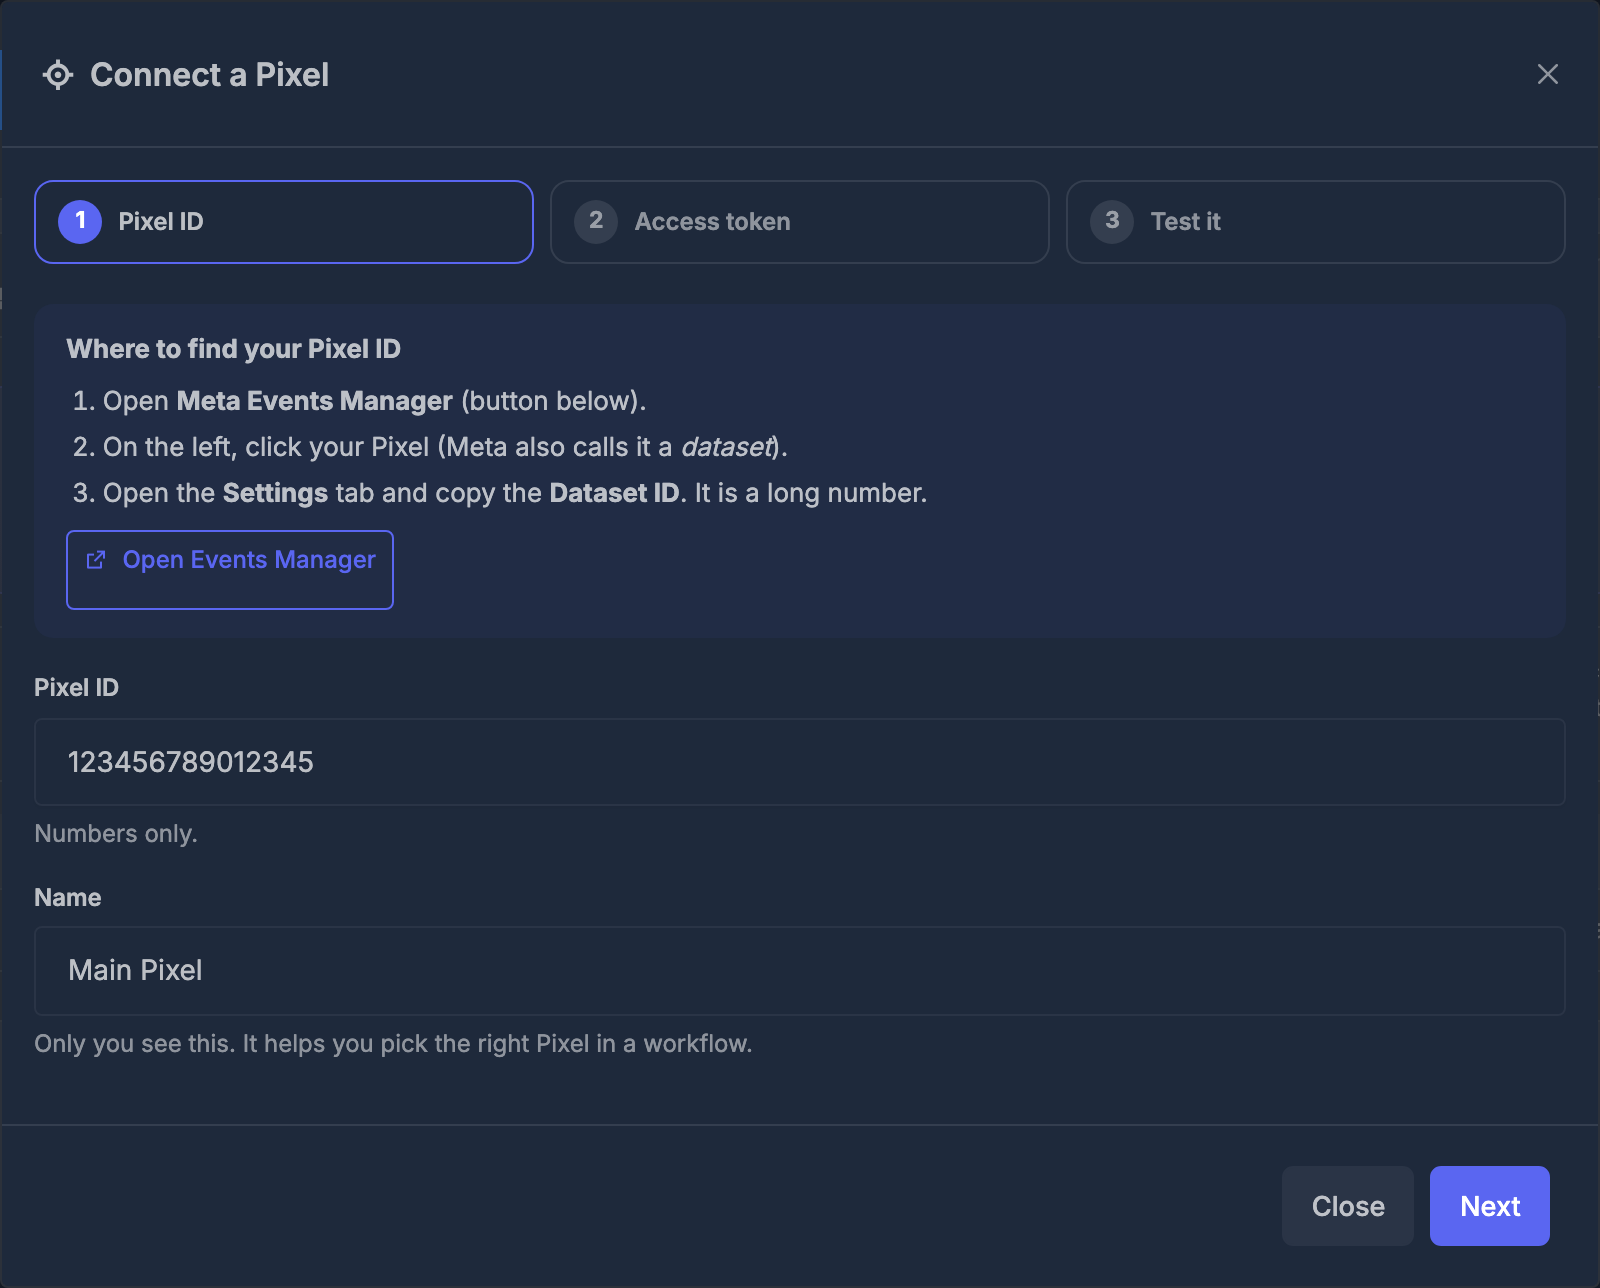
Step 1 — Pixel ID
Click Open Events Manager. On the left, click your Pixel (Meta also calls it a dataset). Open its Settings tab and copy the Dataset ID — a long number. Paste it into Pixel ID, then click Next.
Step 2 — Access token
In Events Manager, stay on the same Pixel's Settings tab. Scroll to Conversions API and click Generate access token. Copy it right away — Meta shows it only once. Paste it into Access token and click Save and continue.
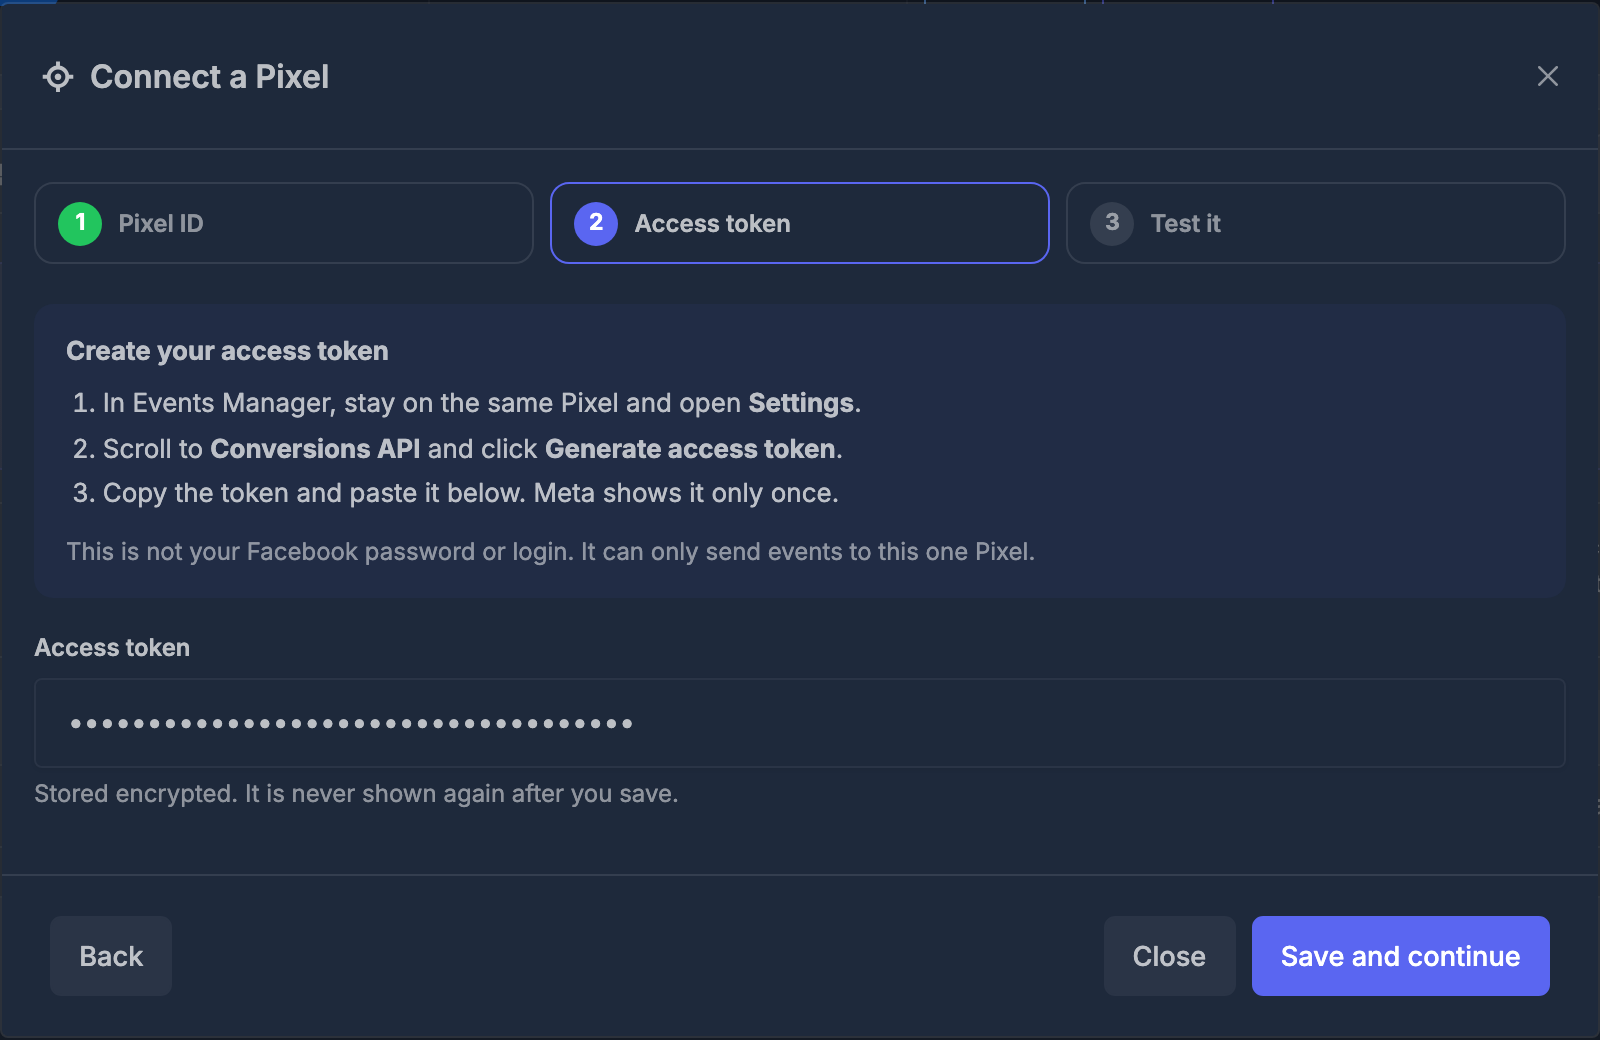
The access token is not your Facebook password. It can only send events to this one Pixel, and it is stored encrypted. AI Sync never shows it again.
Step 3 — Test it
In Events Manager, open the Pixel's Test events tab and copy the test code (it looks like TEST12345). Paste it into Test code and click Send test event. When you see Meta received it, the event also appears on Meta's Test events page within seconds.
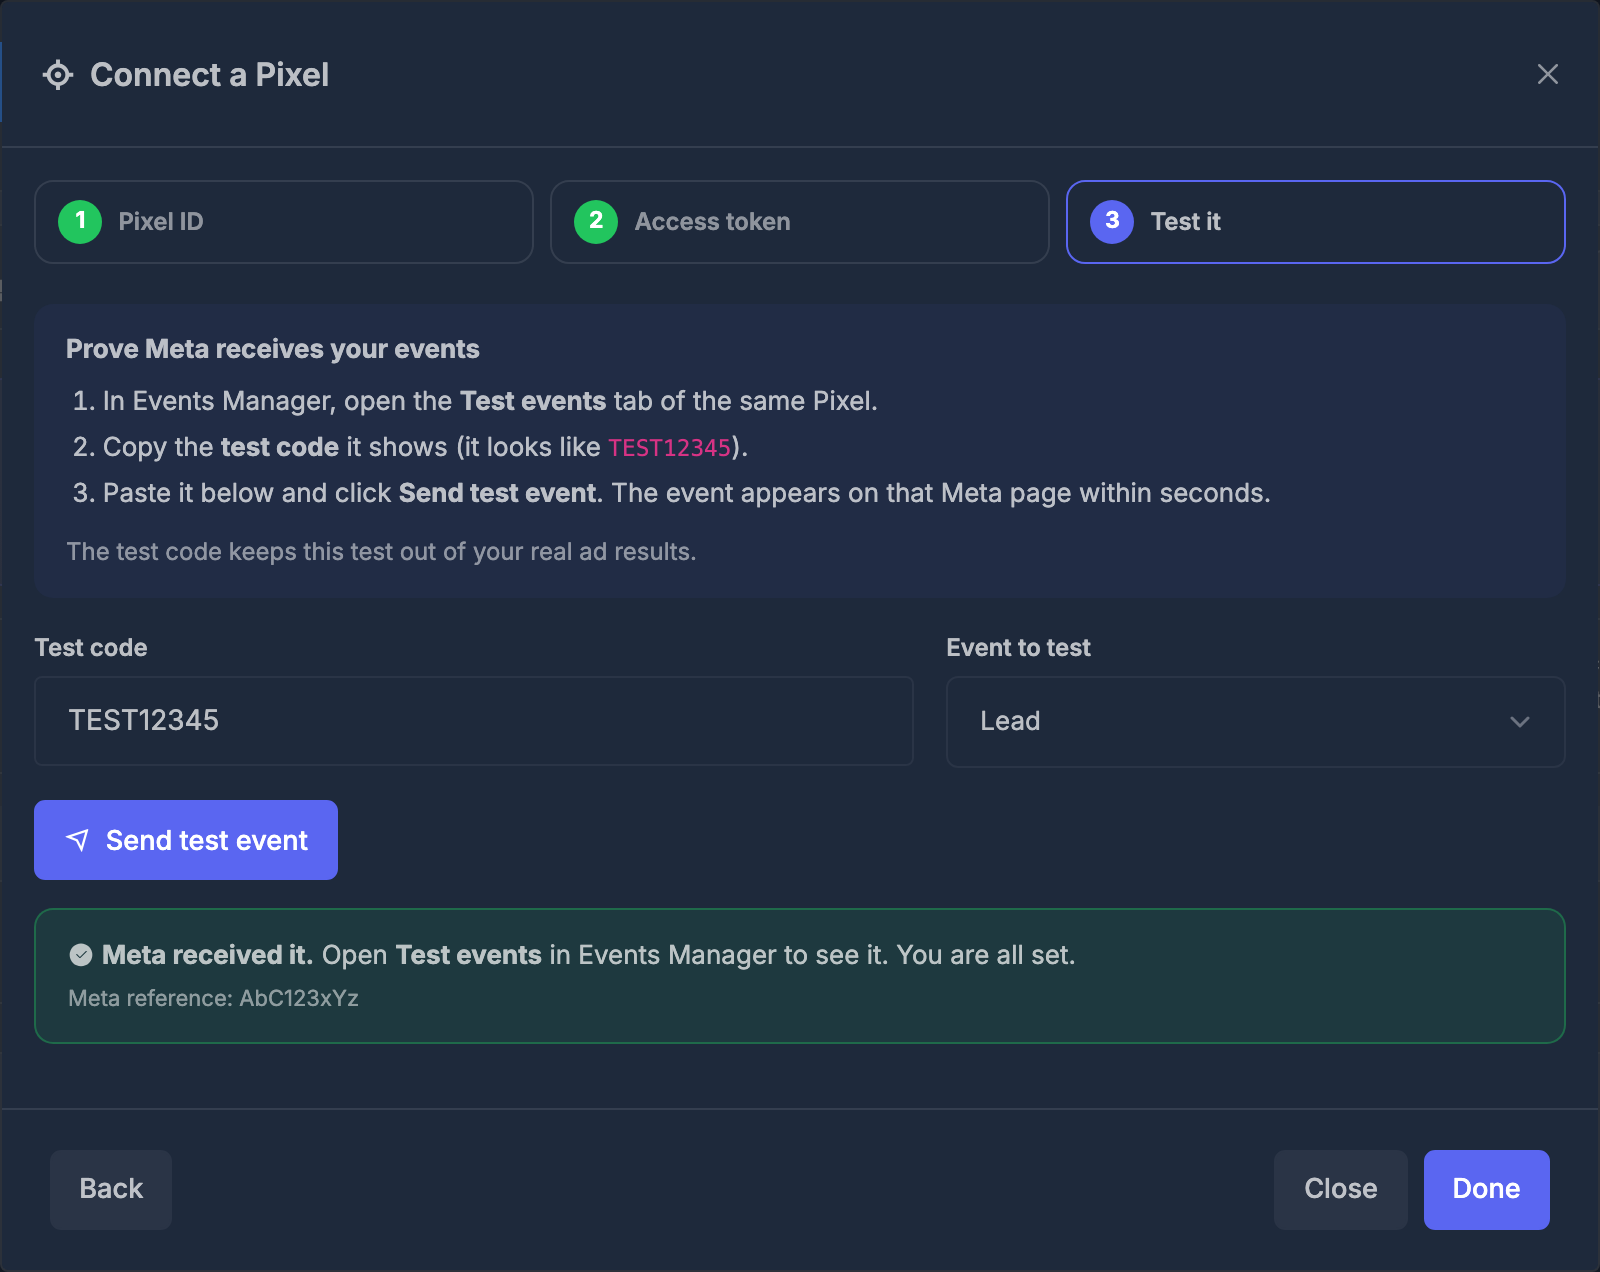
The test code is required. It keeps the test out of your real ad results, so Meta never learns from a fake lead.
When you are done, your Pixel shows Connected. From now on, new leads and bookings go to Meta automatically.
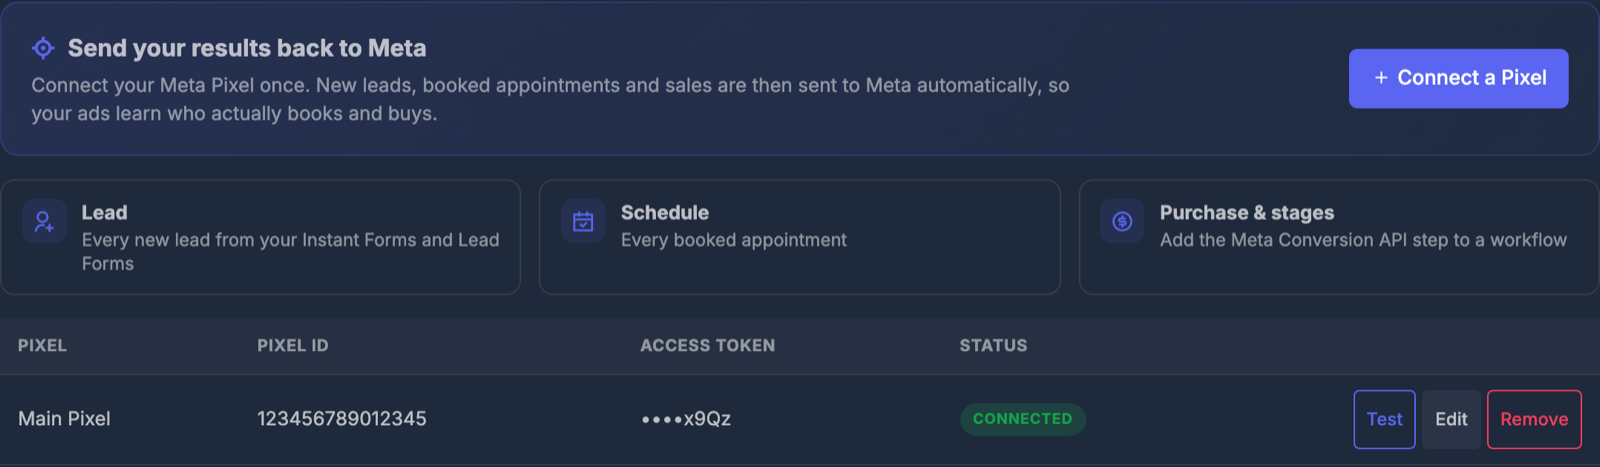
| Button | What it does |
|---|---|
| Test | Opens the wizard on step 3 to send another test event |
| Finish setup | Shown when a Pixel is missing its ID or token — opens the step you still need |
| Edit | Change the name, Pixel ID or token. Leave the token empty to keep the saved one |
| Remove | Stops all events to that Pixel |
You can connect more than one Pixel. Automatic Lead and Schedule events go to every connected Pixel.
💰 Send sales and other stages from a workflow#
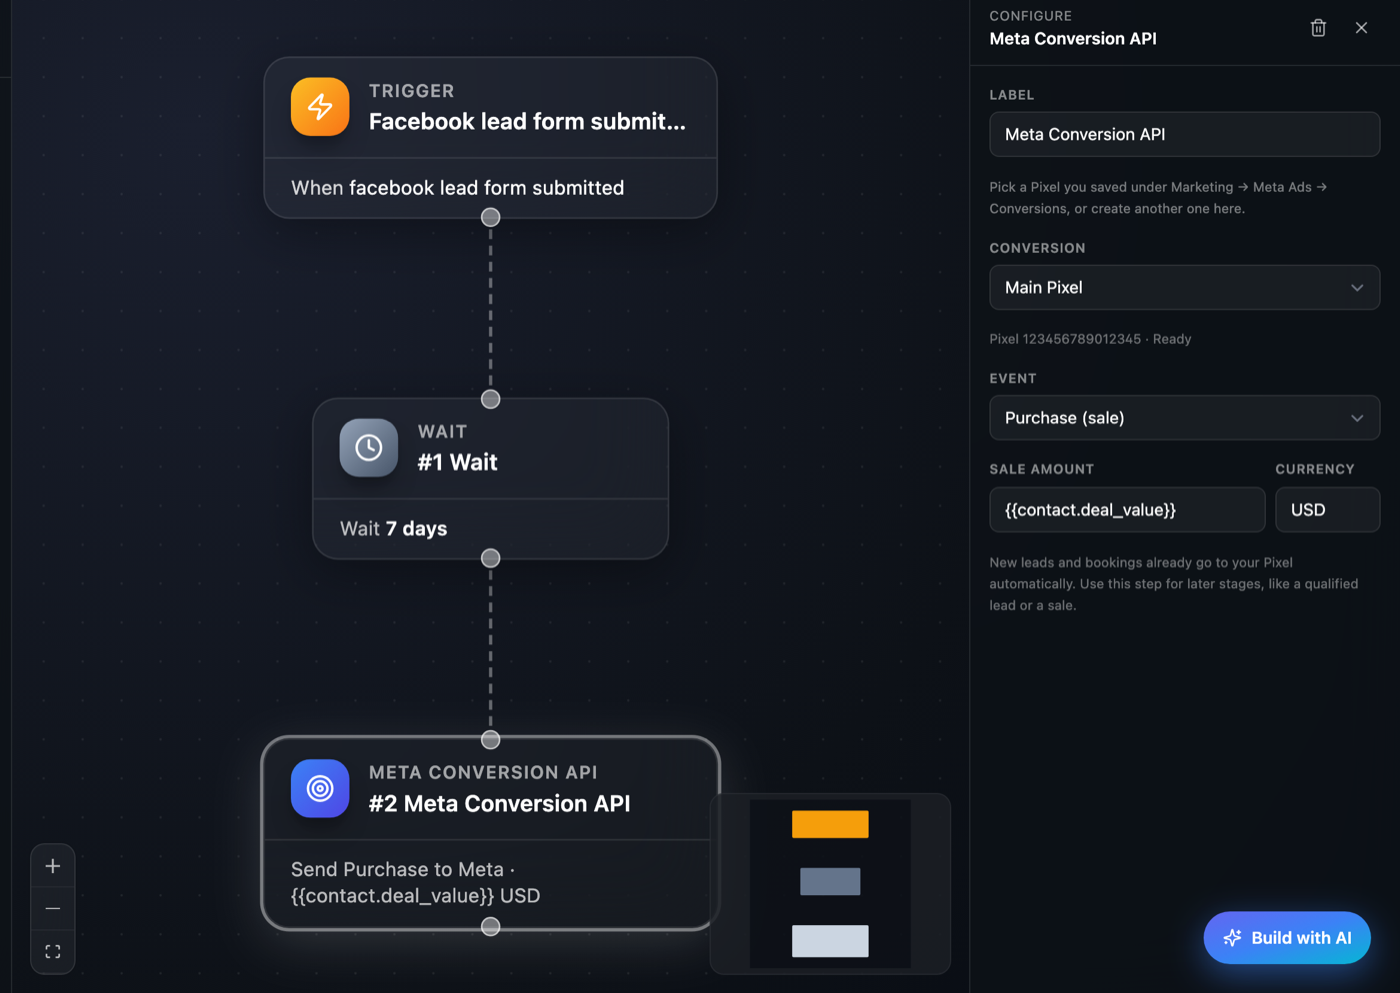
Leads and bookings are automatic. For later stages — a sale, a qualified lead, a signed contract — add the Meta Conversion API step to a workflow.
Add the step
Open a workflow, then drag Meta Conversion API (under Integrations) onto the canvas after the step where the sale or stage happens.
Pick the Pixel
Choose your Pixel under Conversion. It must show Ready.
Pick the event
- Purchase (sale) — enter the Sale amount. Type a number, or a contact field such as
{{contact.deal_value}}so each sale sends its real amount. A Purchase without an amount is not sent, because Meta rejects it. - Custom stage — type a name such as
QualifiedorContract signed. - Lead and Schedule are also available, but they are already sent automatically.
Save and activate
Click Save, then Activate. The step card shows what it sends, for example Send Purchase to Meta · 1500 USD.
Example — tell Meta who bought: Trigger Pipeline stage changed (stage = Sold) → Meta Conversion API → Purchase with {{contact.deal_value}}. Meta learns which ads bring buyers, not just leads.
🧠 How Meta gets the most out of it#
You do not need to set any of this up. It is here so you know what Meta receives.
| Lead source | How Meta reads it |
|---|---|
| Facebook Instant Form | Sent with the Instant Form lead ID. Meta links every later booking and sale back to the exact ad and form (Meta calls this Conversion Leads). |
| Lead Form or website form (in a browser) | Sent as a website event with the page address, the visitor's browser and the Facebook click ID, so Meta can tie it to the ad that was clicked. |
| Lead Form posted from another tool (Zapier, cURL) | Sent with the contact's details only. It is never made to look like a website visit. |
- Every person carries the same private ID across events, so Meta sees lead → booked → bought as one person.
- One booking sends one Schedule event, and a workflow step that retries never counts twice.
- Events older than 7 days are not sent, because Meta rejects them.
Using your own website Pixel too?#
If your website also fires the Meta Pixel Lead event when the form is sent, use the same event ID so Meta counts the lead once. The website snippet returns it as meta_event_id:
submitLeadForm({ first_name, phone_number }).then(function (result) {
  fbq('track', 'Lead', {}, { eventID: result.meta_event_id });
});
🤖 Set it up with your AI assistant (MCP)#
With MCP connected, you can connect and test your Pixel by chat. Copy the Pixel ID, access token and test code from Events Manager as in the steps above, then ask:
| You say | Your assistant does |
|---|---|
| "Connect my Meta Pixel. ID 123456789012345, token EAAG…" | Saves the Pixel (meta_ads_create_conversion) |
| "Send a test event to my Pixel with test code TEST12345" | Sends a test and reports whether Meta received it (meta_ads_test_conversion) |
| "Which Pixels are connected?" | Lists them with Connected / Needs token (meta_ads_list_conversions) |
| "Change my Pixel's token" | Updates it (meta_ads_update_conversion) |
| "Remove my old Pixel" | Asks you to confirm, then removes it (meta_ads_delete_conversion) |
| "When a deal is marked Sold, send a Purchase to Meta with the deal value" | Builds the workflow with the Meta Conversion API step |
Your assistant never sees your saved token again after it is stored — only its last 4 characters.
🛠️ Troubleshooting#
| What you see | What to do |
|---|---|
| Needs token or Needs Pixel ID | Click Finish setup and complete the missing step. |
| Test says the access token is invalid | Generate a new token in Events Manager → Settings → Conversions API, then Edit the Pixel and paste it. |
| Test says Paste the test code | Copy the code from the Pixel's Test events tab in Events Manager. |
| Test worked, but no events show in Overview | Real events appear in Events Manager → Overview within about 20 minutes. Test events appear only on the Test events tab. |
| A workflow Purchase step failed | The sale amount was empty. Make sure the contact field in Sale amount has a number for that contact. |