Use this page when you set up email for a client account. At the end the client:
- sends every lead email from their own domain (for example
hello@harbordental.com) - gets lead replies in the Inbox, on the lead's conversation
- sees delivered, opened, clicked, bounced for every email
- has templates that look good on every phone
- has workflows that send those templates and follow up on clicks
Time: about 15 minutes of work, plus waiting for DNS (a few minutes to an hour).
The screenshots on this page use a sample account (Harbor Dental) with sample data.
📋 1. Get these from the client first#
- Their business domain, like
harbordental.com. Gmail, Yahoo, Outlook and other free addresses can't send. - Someone who can add DNS records today: the person with the login to GoDaddy, Cloudflare, Namecheap, Google, Squarespace or wherever the domain is managed.
- A Resend account in the client's own name. They sign up free at resend.com. Never use your own Resend account for a client: each business keeps its own sending reputation.
- Their postal address, for the email footer. US law requires it on marketing email.
Do the setup logged in as the client's account owner, or with the client on a screen share. Only the account owner can connect sending.
🔌 2. Connect their sending account#
Go to Settings → Integrations → Resend. The page walks you through the steps in order and ticks each one off.
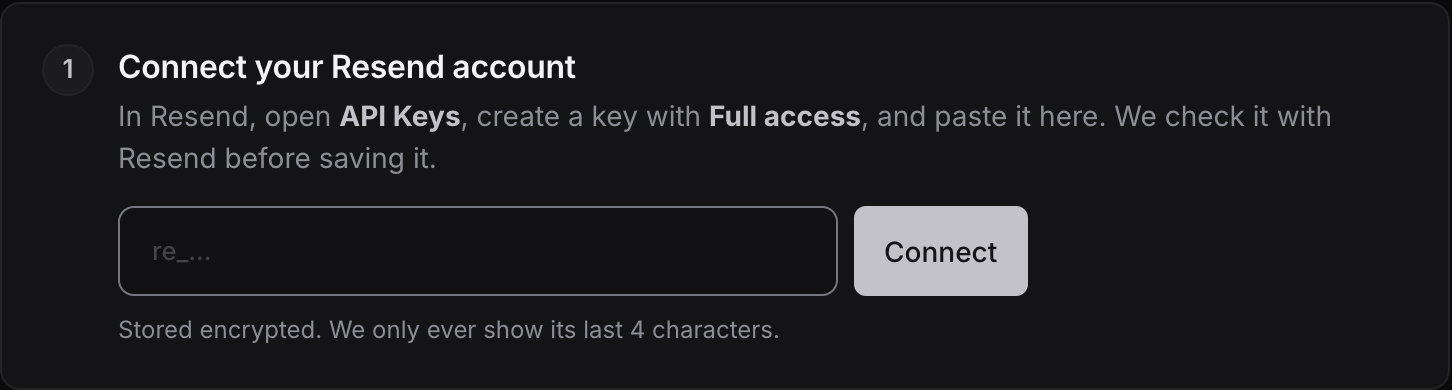
Create a Full access key in Resend
In the client's Resend account, open API Keys → Create API key and choose
Full access. A "Sending access" key can't add domains or turn on replies.
Copy the key (it starts with re_).
Paste the key straight into AI Sync. Never send it in Slack, a text or a doc.
Paste it and click Connect
Add the domain and copy the DNS records
Open Add a domain, type the client's domain and click Add domain. AI Sync shows the records to add. Use the Copy buttons so nothing is mistyped, and add each record at the DNS host.
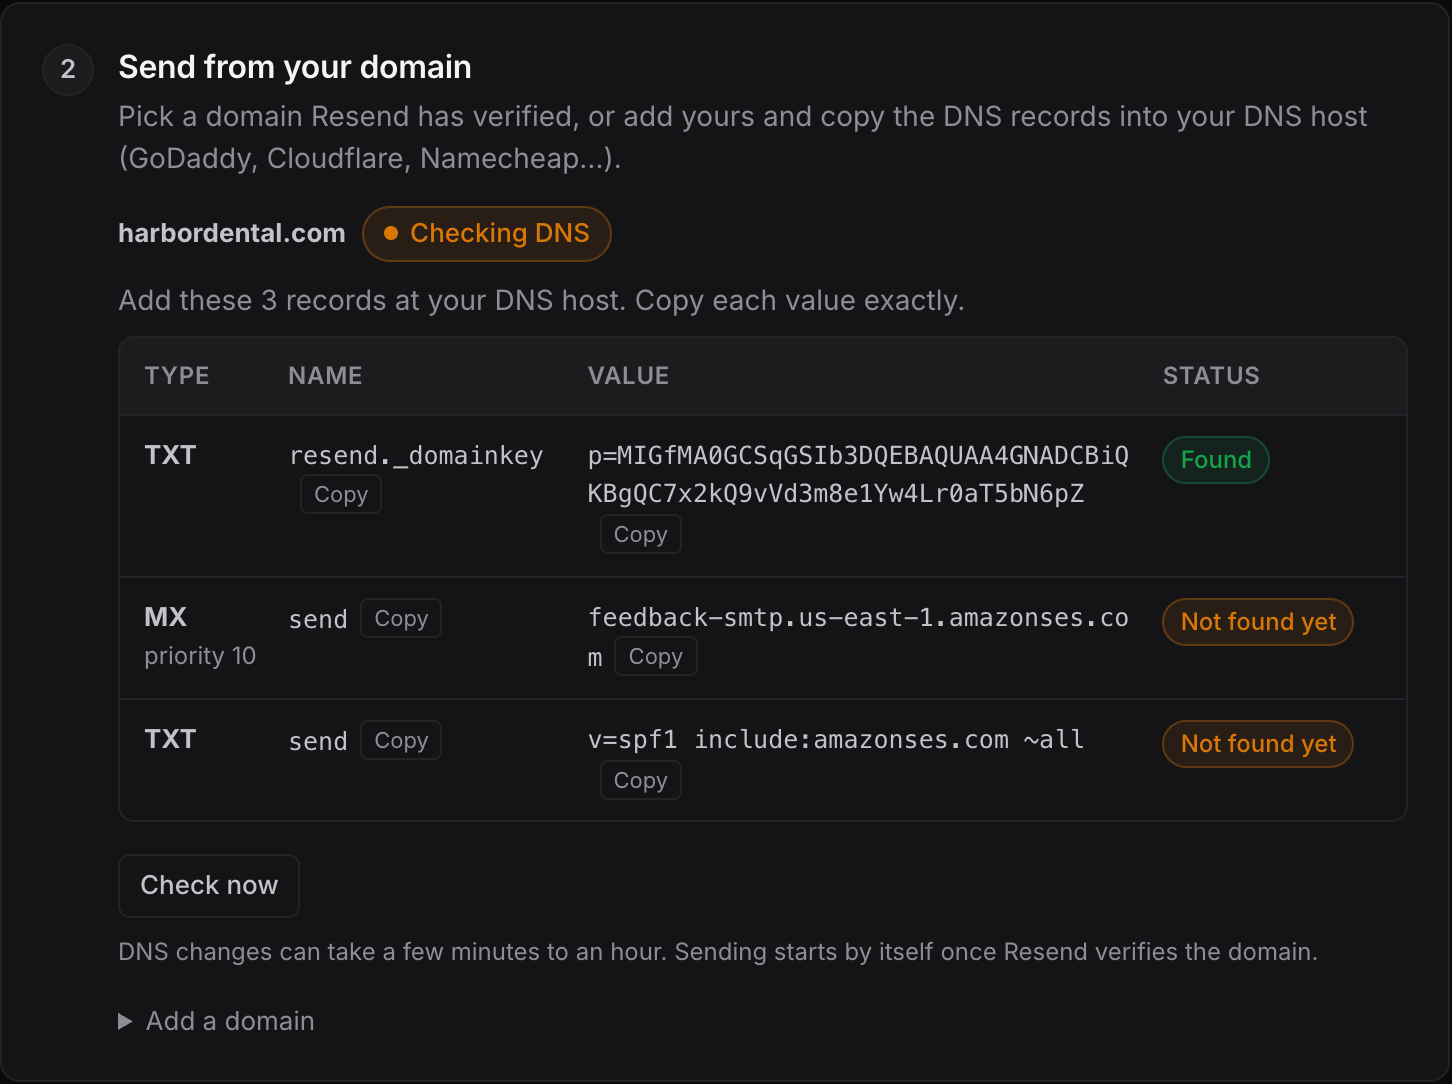
In the Name box at the DNS host, enter just send or
resend._domainkey, not send.harbordental.com. Most hosts add the domain
for you.
DNS can take a few minutes to an hour. Sending starts by itself as soon as the domain is verified, so you don't have to wait on this page.
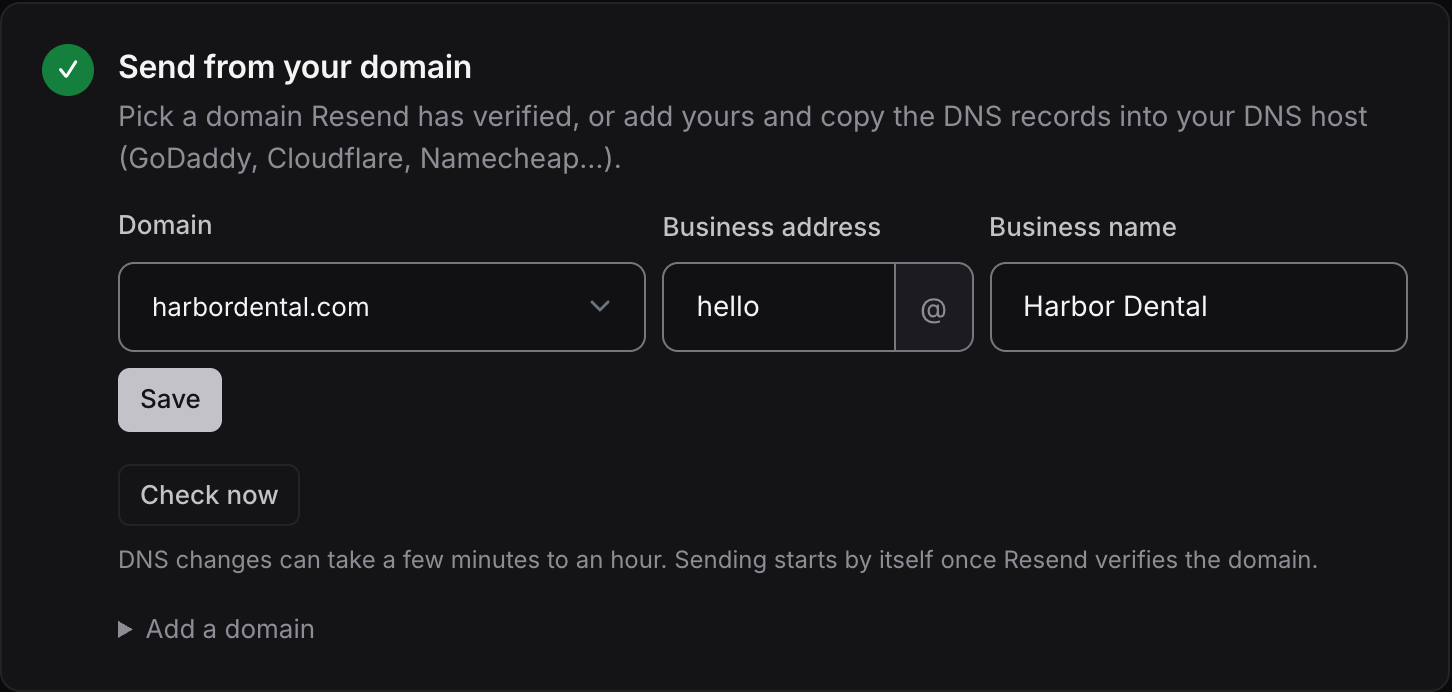
Pick the domain, the address and the business name
Once the domain is verified, pick it, set the business address (usually
hello) and the business name, then click Save.
Turn on replies
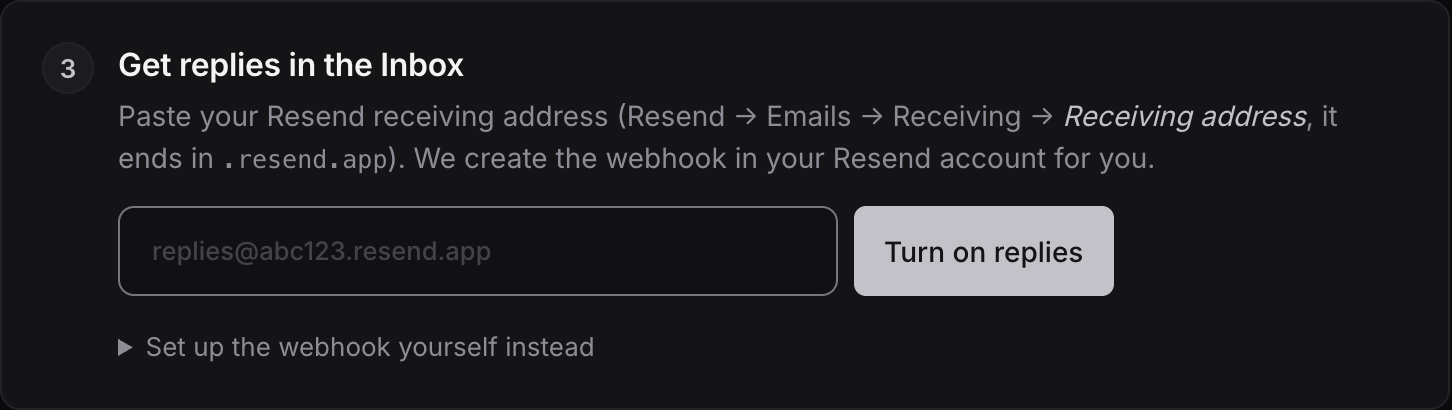
In Resend, open Emails → Receiving, click the three dots, choose
Receiving address and copy it (it ends in .resend.app). Paste it here
and click Turn on replies. AI Sync creates the webhook in Resend for you.
Turn on tracking
Click Turn on tracking (turning on replies already did this). Delivered, bounces and spam reports start right away.
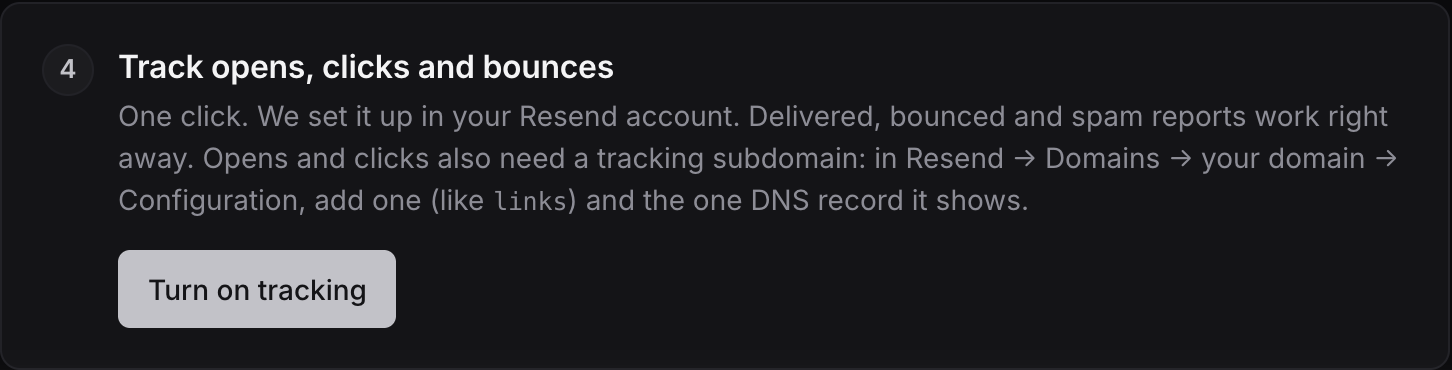
For opens and clicks, add a tracking subdomain too: in Resend open
Domains → the client's domain → Configuration, add links, then add the
one extra DNS record Resend shows. Without it, opens and clicks stay at 0%.
A tracking subdomain can't be removed once it's added, so check with the client before you add it.
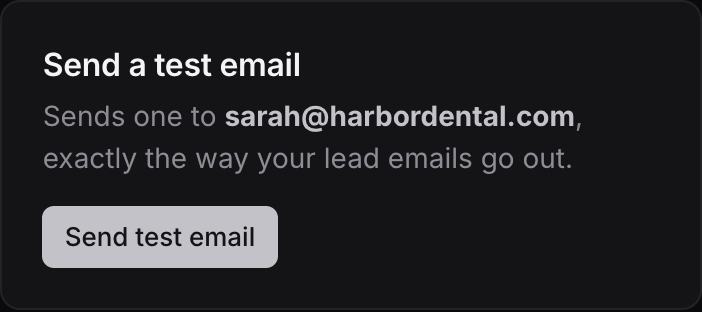
Send a test email
Click Send test email. It goes to the signed-in user's own email, exactly the way lead emails go out.
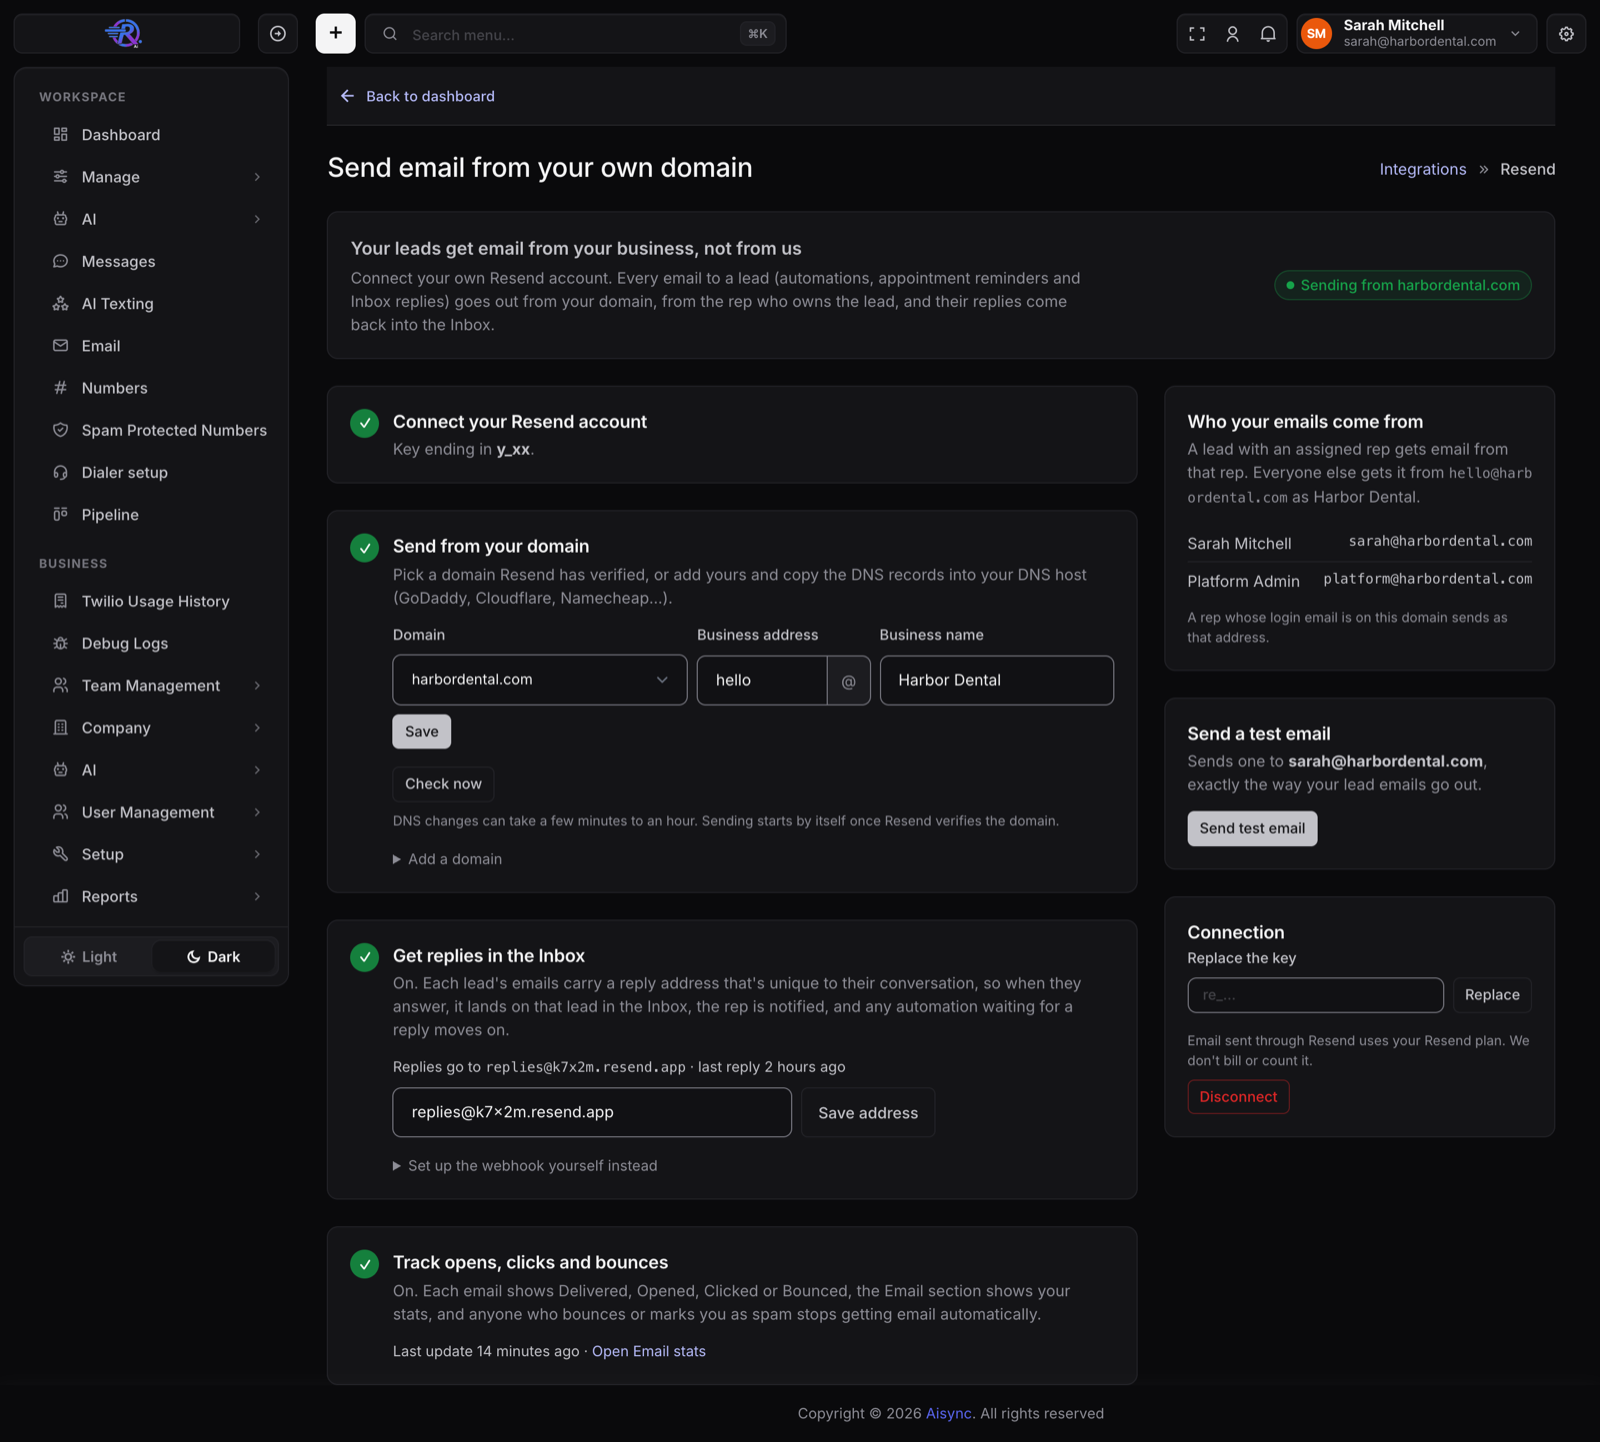
When every step has a green tick, the page looks like this:
🎨 3. Build their templates#
Open Email in the menu (under Messages), then Templates → New template.
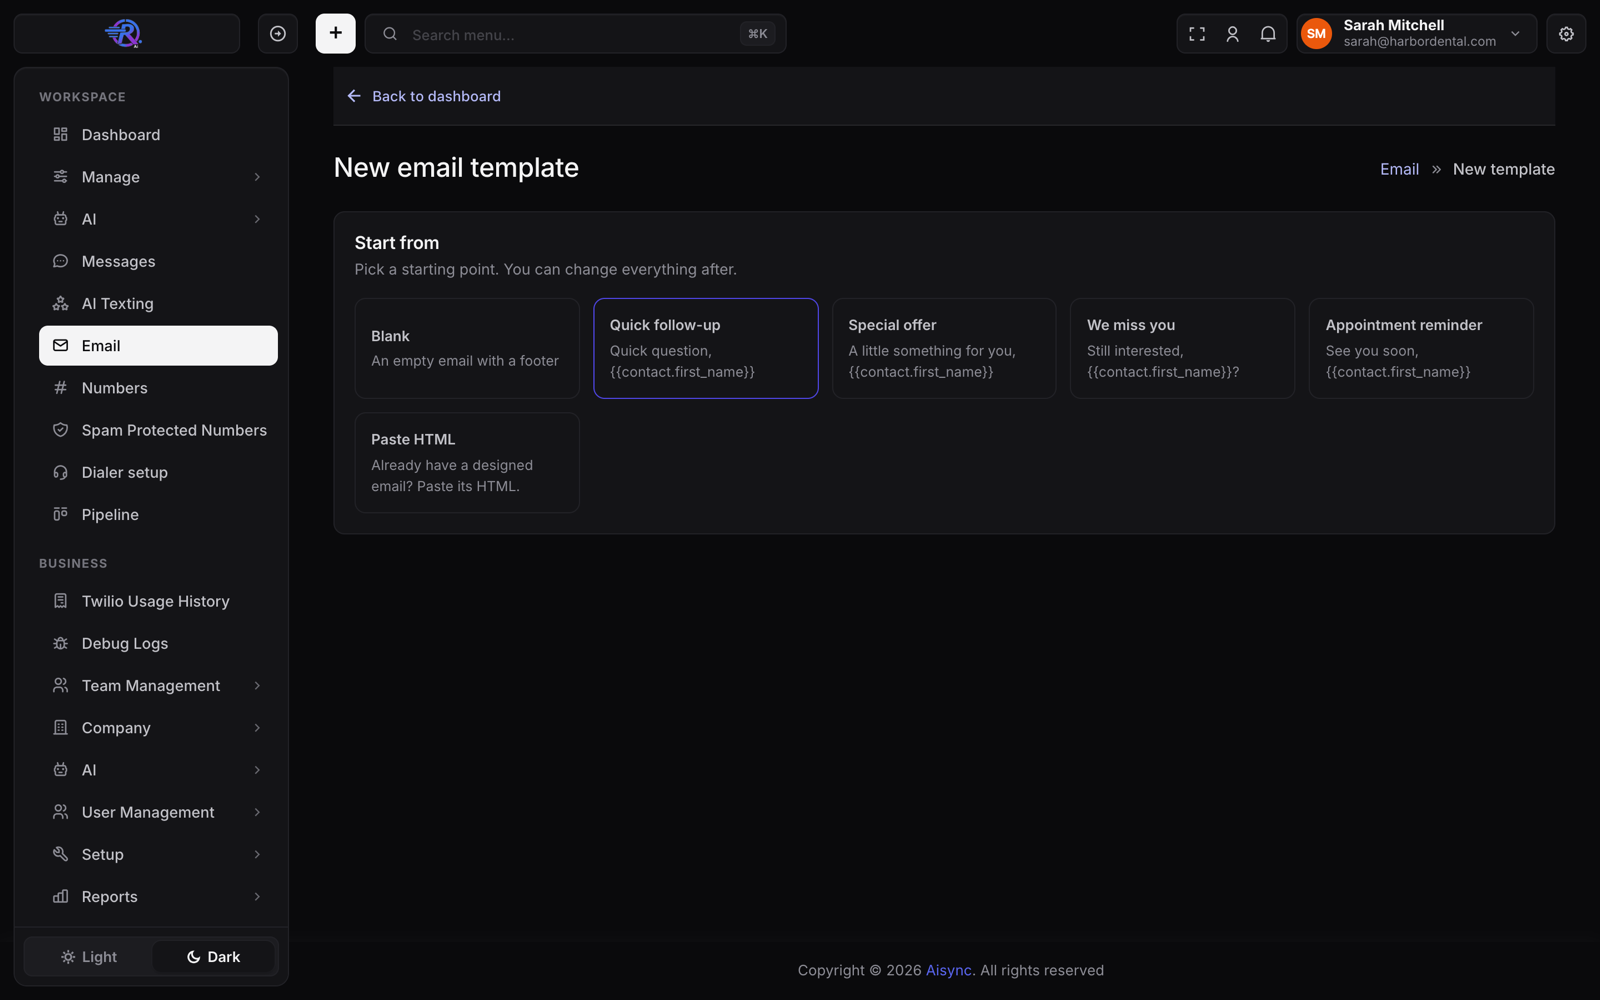
Pick a starting point
Start from a ready-made email (Quick follow-up, Special offer, We miss you, Appointment reminder), a Blank one, or Paste HTML if the client already has a designed email.
Write it
Set the template name (what your team sees), the subject line and the preview text (the grey line after the subject in the inbox). Click any block on the left to edit it. Add blocks with the buttons at the top: Heading, Text, Button, Image, Divider, Space, HTML, Footer.
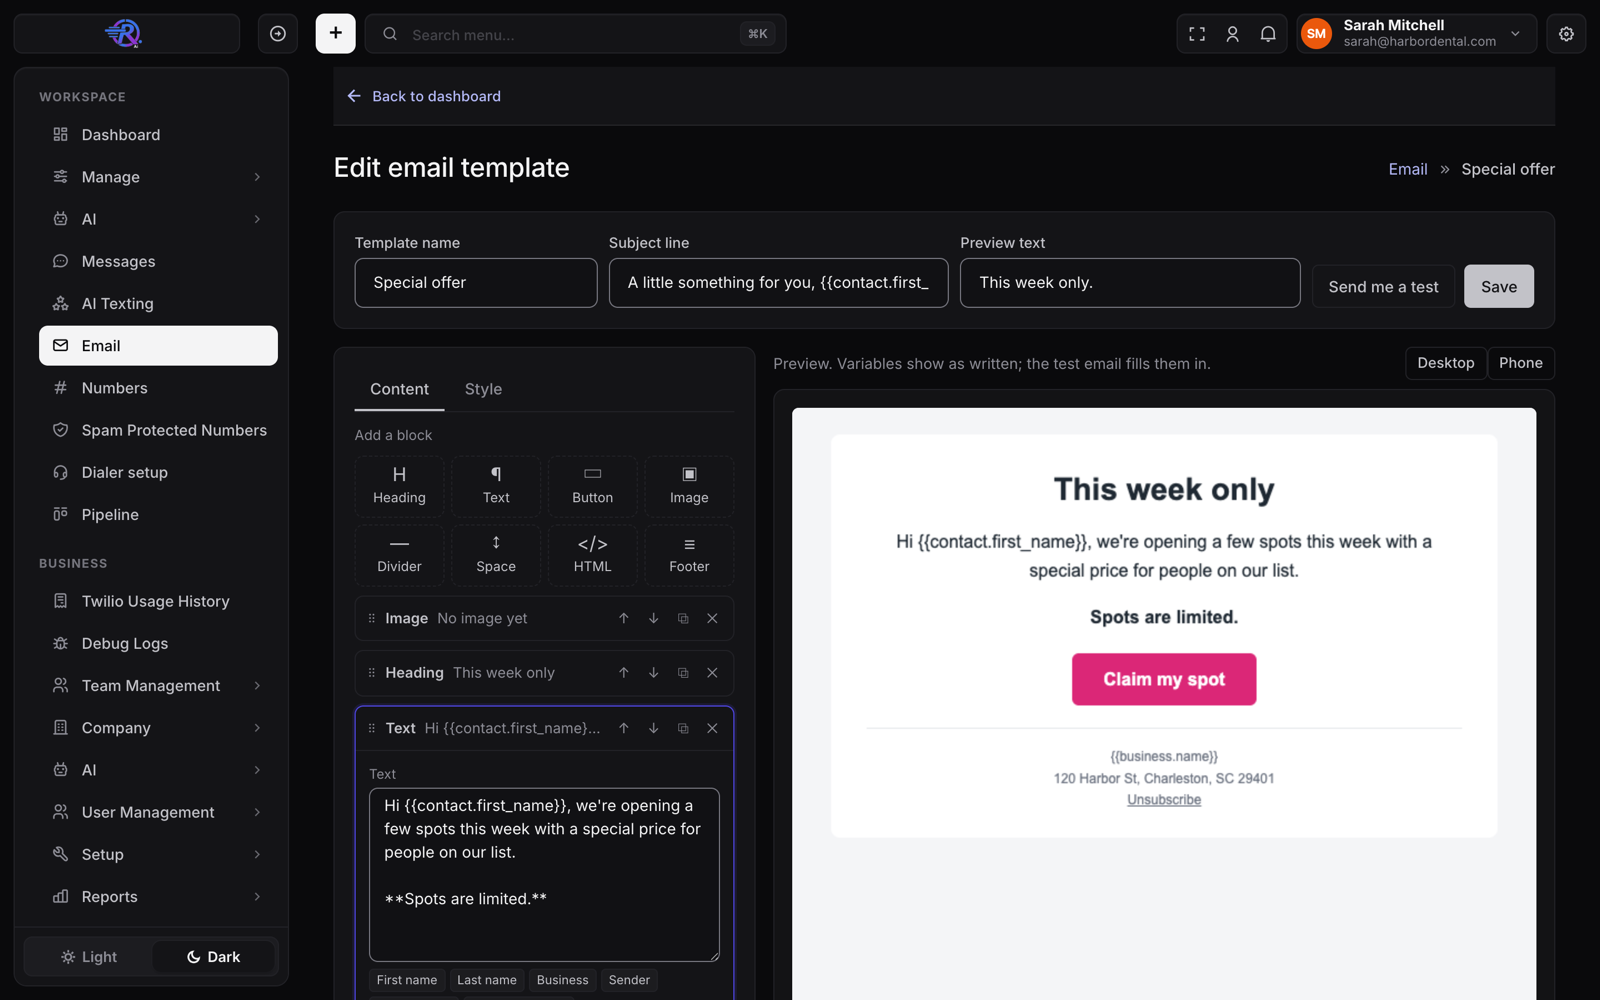
Names: use the variable buttons under a text box to insert the lead's first name, the business name or the sender's name.
Logo: put it in an Image block. It must be a link that starts with
https:// (for example from their website).
Footer: keep it. Put the business name and postal address in it. It holds the Unsubscribe link.
Match their brand
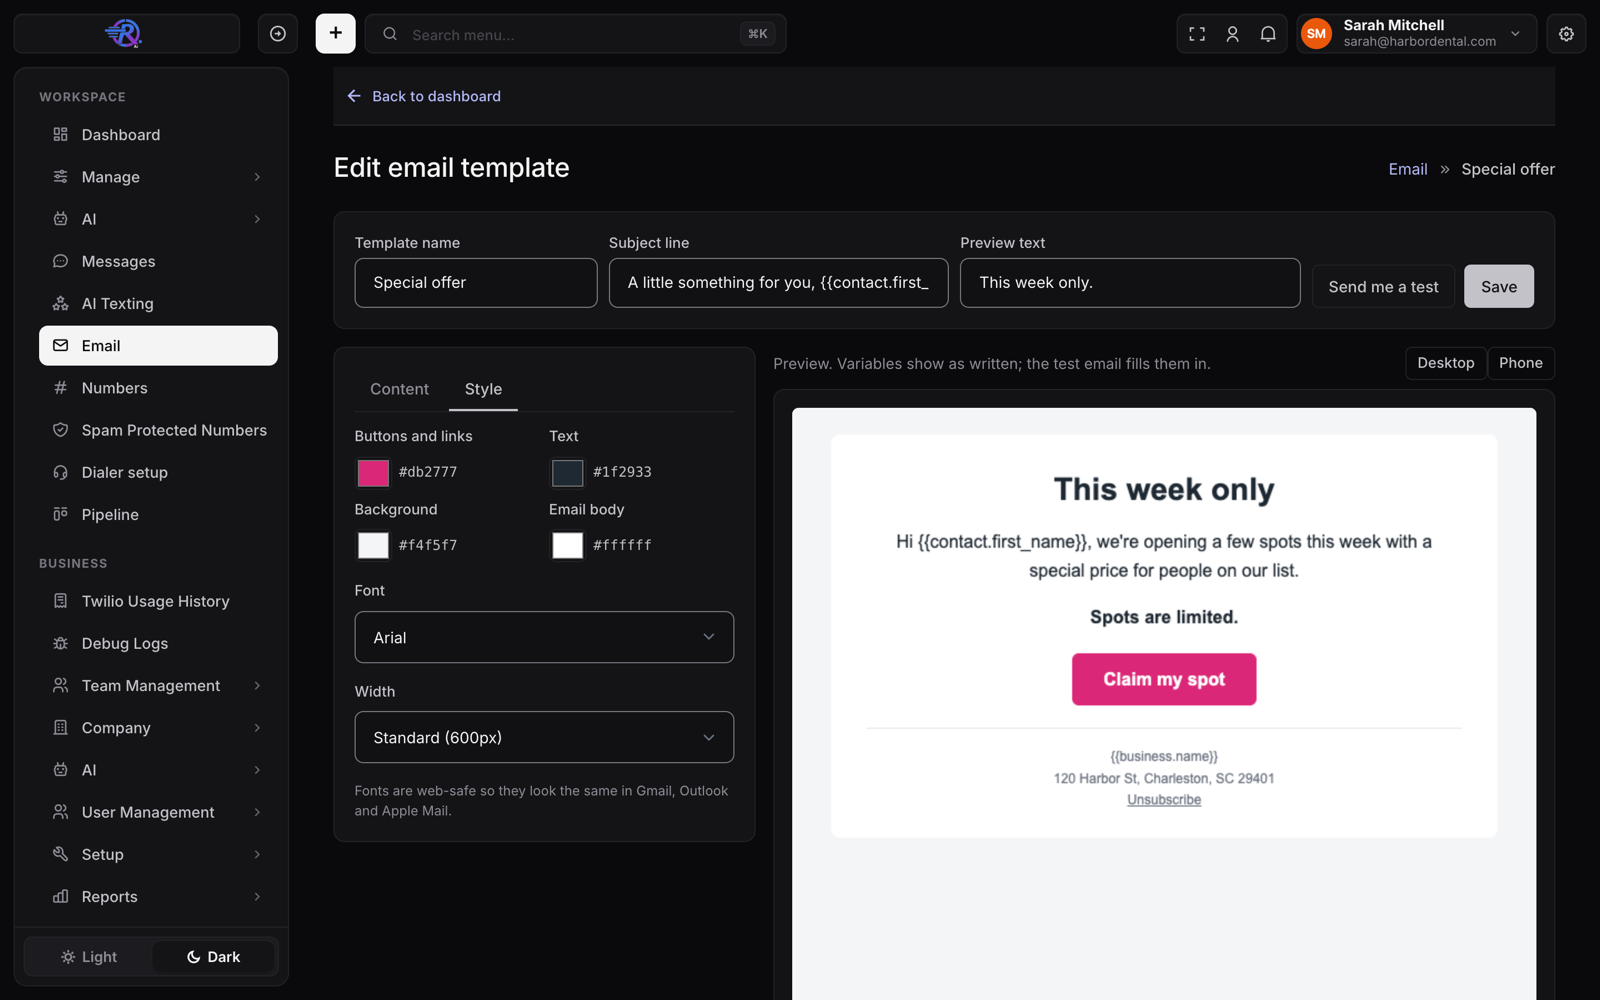
Open Style and set the button color, text color, backgrounds, font and width.
Check it on a phone, then save and test
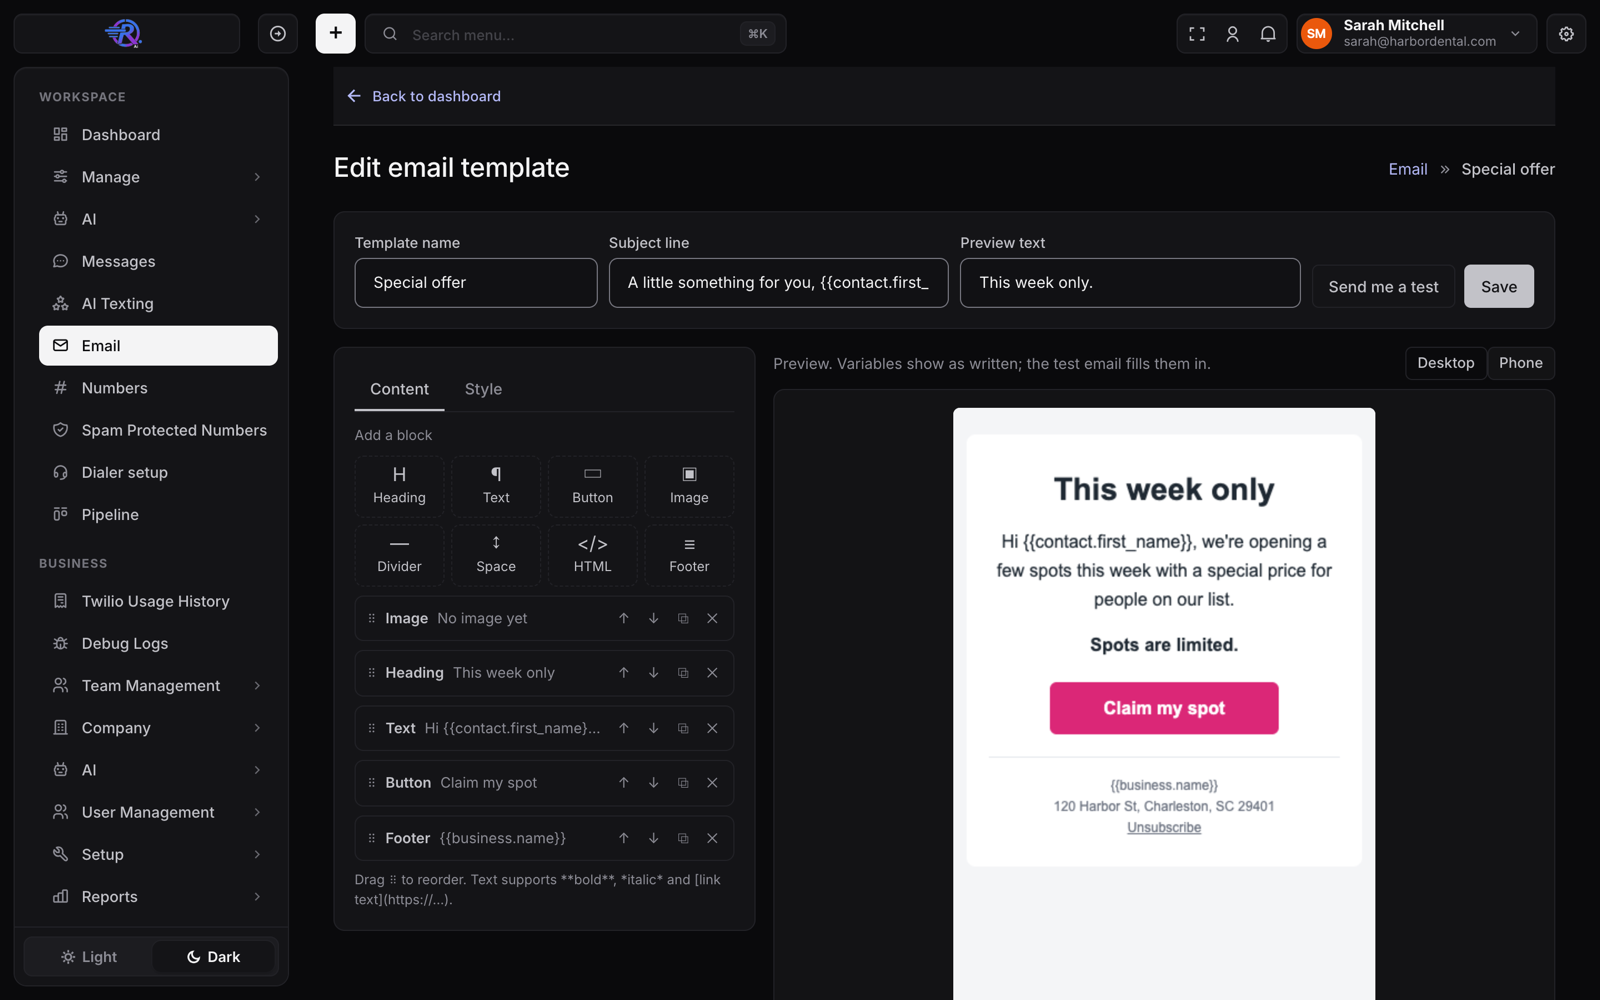
Switch the preview to Phone. Click Save, then Send me a test to get it in your inbox with sample values filled in.
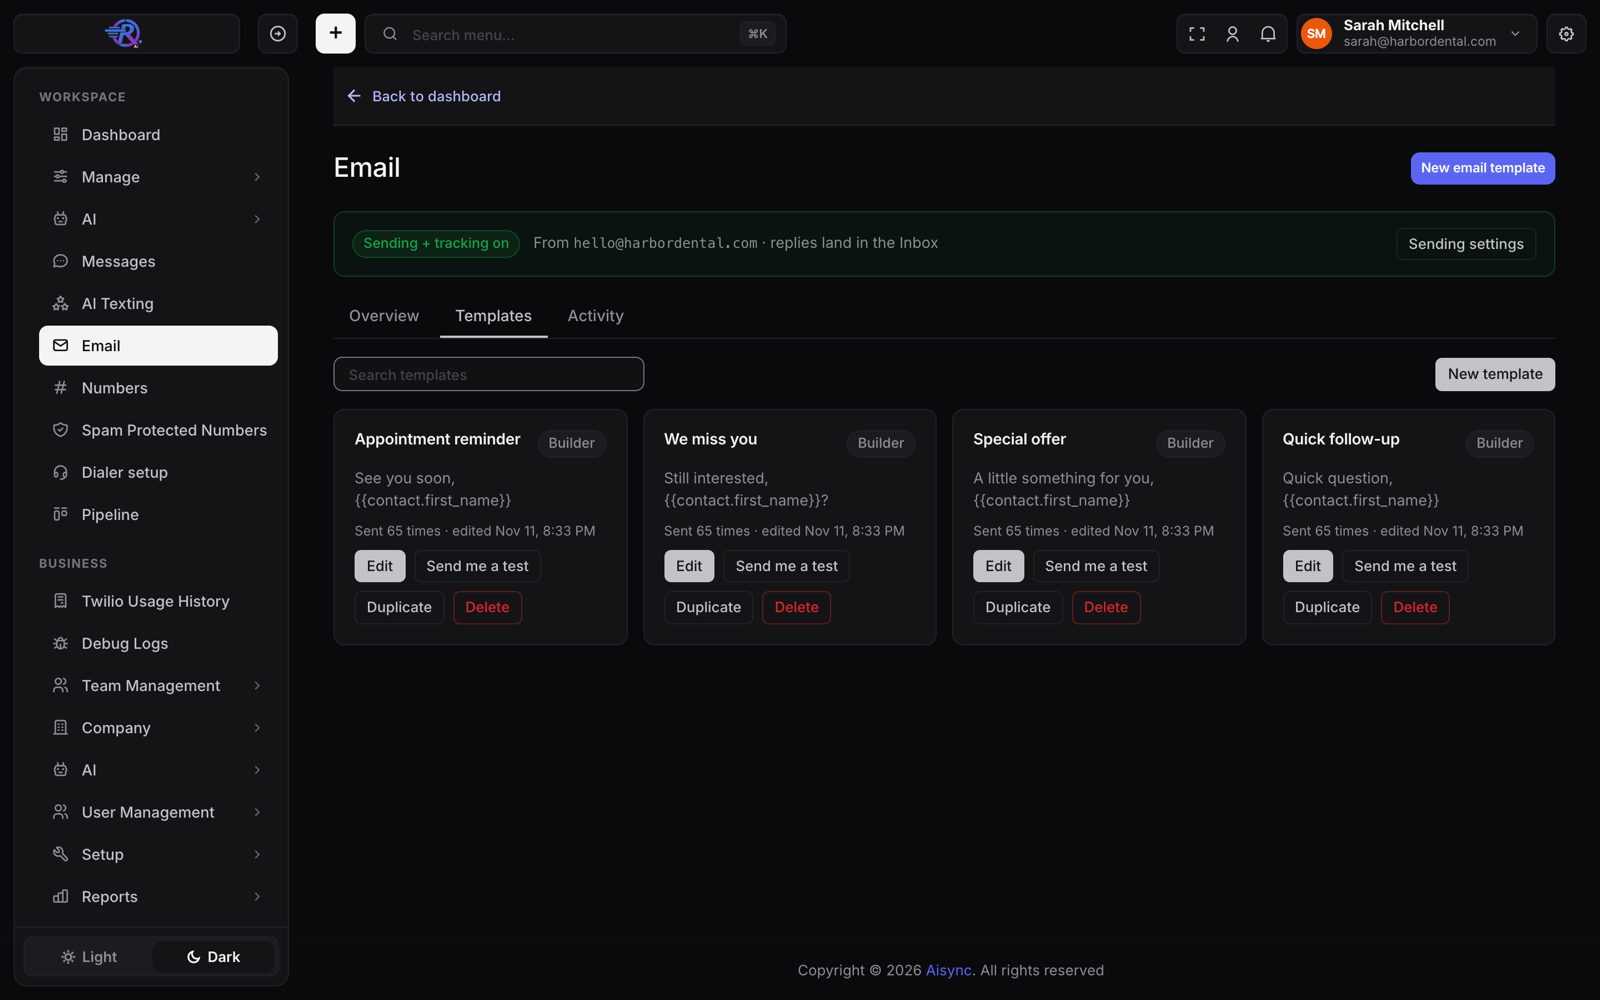
All templates live under Email → Templates, with how many times each was sent.
⚙️ 4. Put the templates in their workflows#
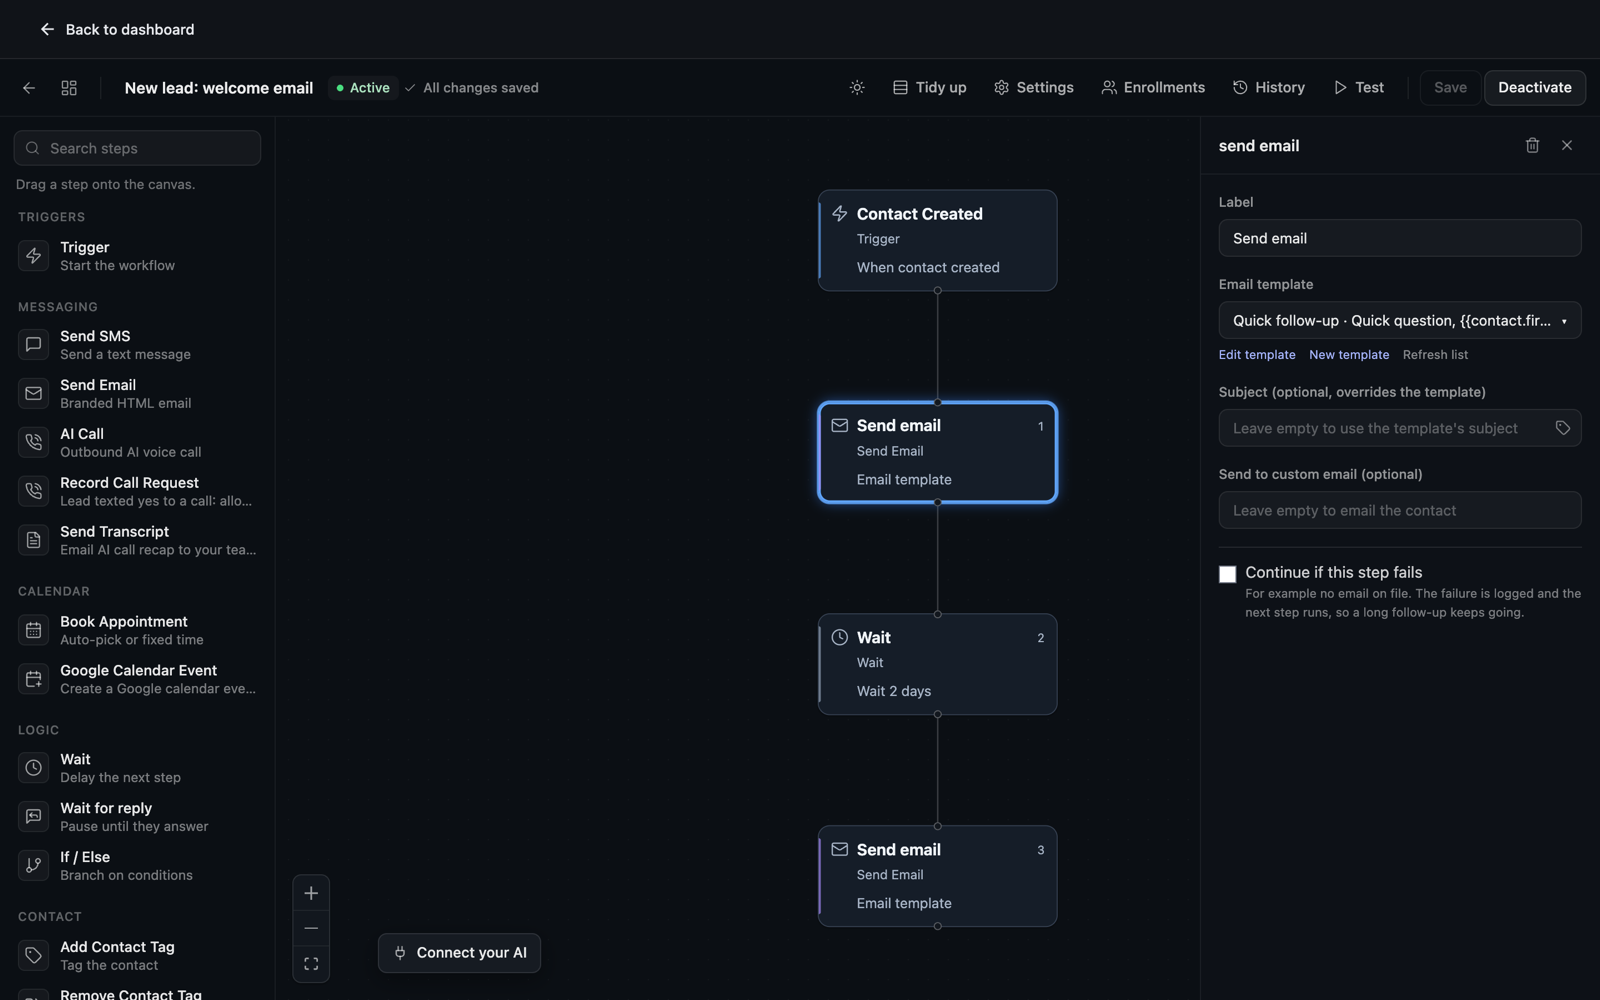
Open Workflow in the menu, open the workflow and click its Send email step (or drag Send Email in from the left).
- Under Email template, pick the template. The message box disappears because the template is the email.
- Leave Subject empty to use the template's subject.
- Leave Send to custom email empty so it goes to the lead.
- Click Save.
Follow up when a lead clicks#
This is the workflow that books appointments. Add a new workflow with the
Email activity trigger, filter it to Email event = clicked and
Clicked link contains /book, then wait a few minutes and send a text.
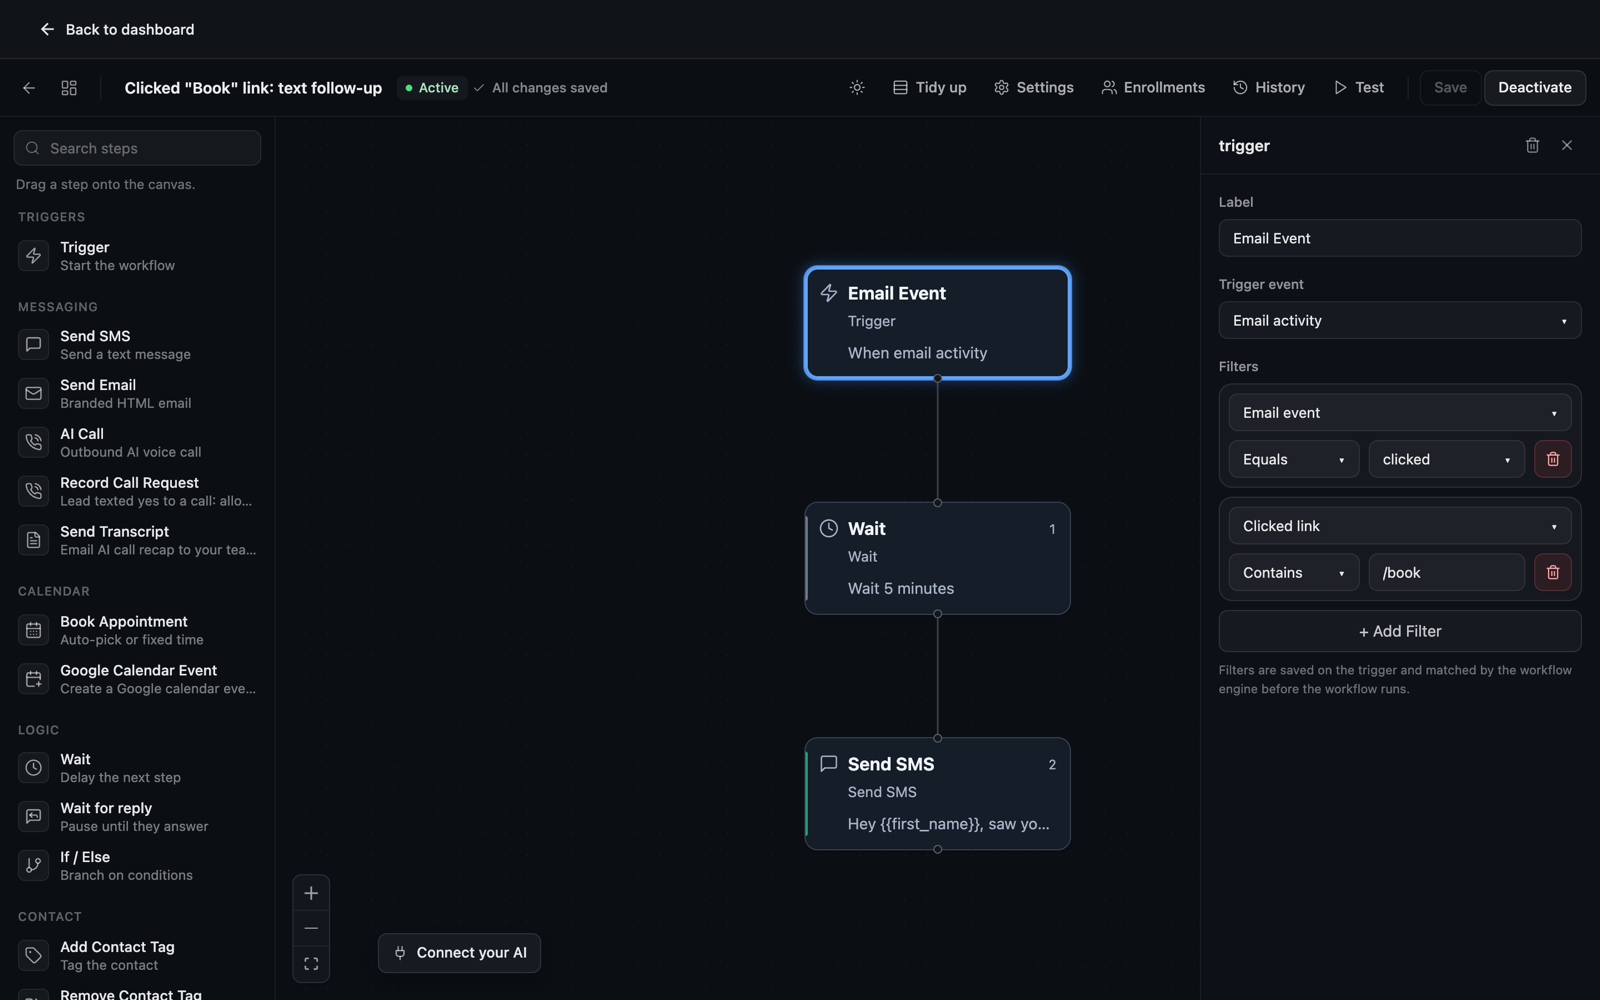
Other events you can start from: opened, bounced, complained (marked as spam) and unsubscribed.
✅ 5. Prove it works (don't skip)#
- Reply to the test email and check that the reply shows up in the Inbox on that conversation.
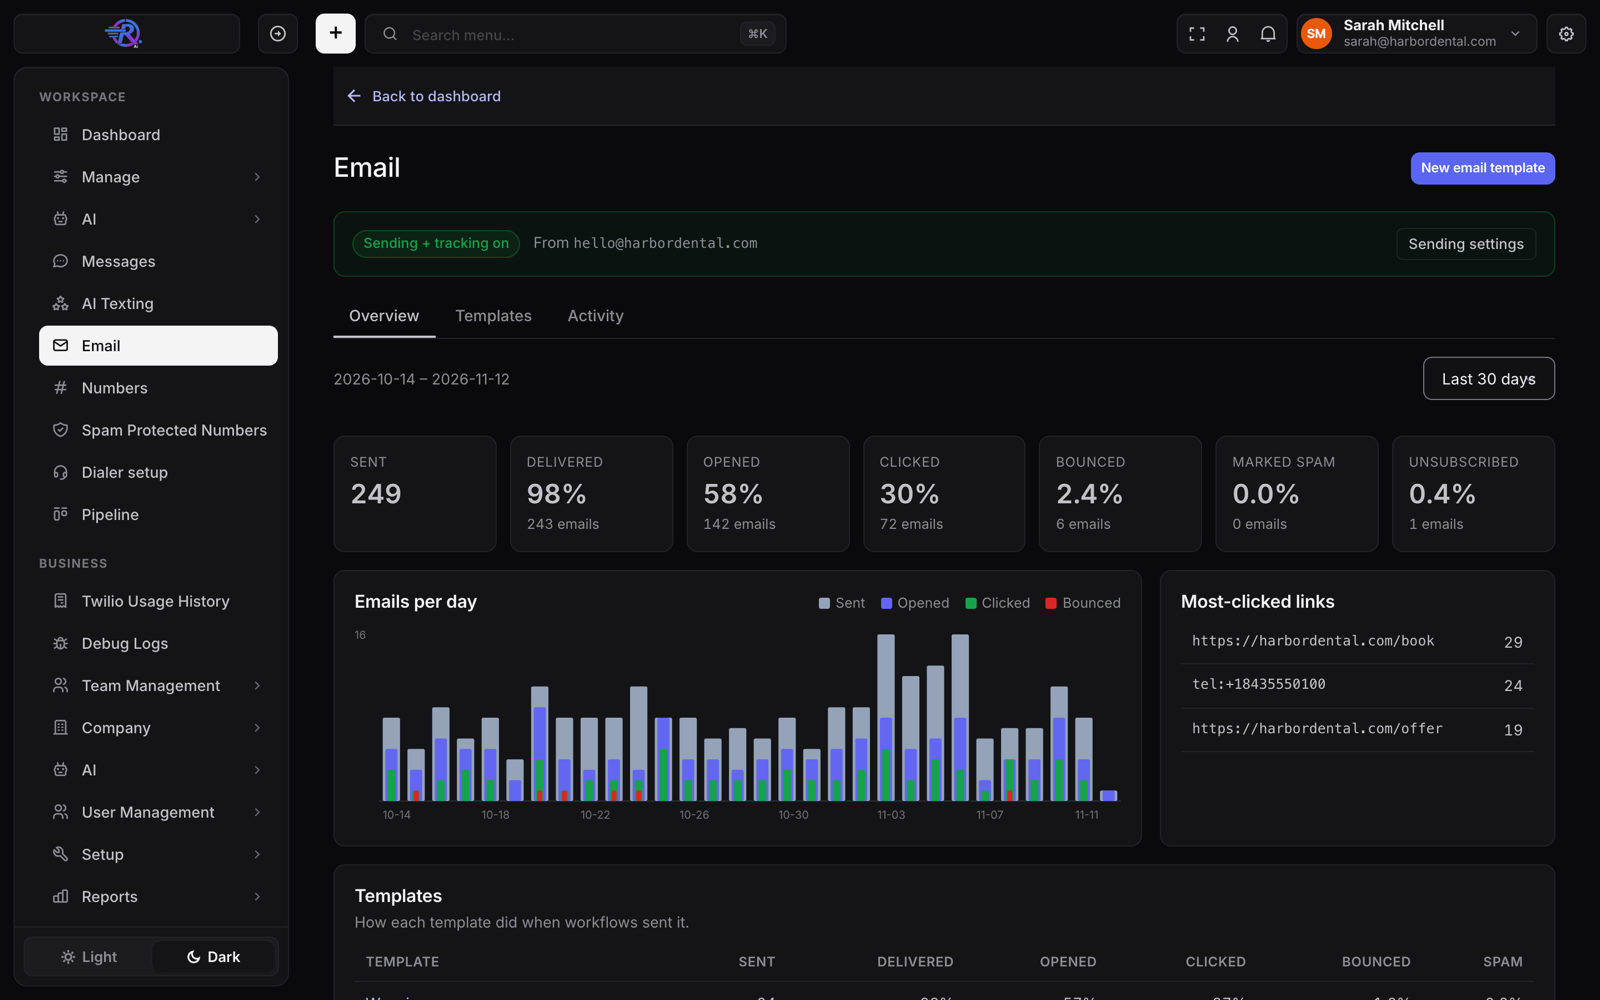
- Open Email. The banner at the top says Sending + tracking on.
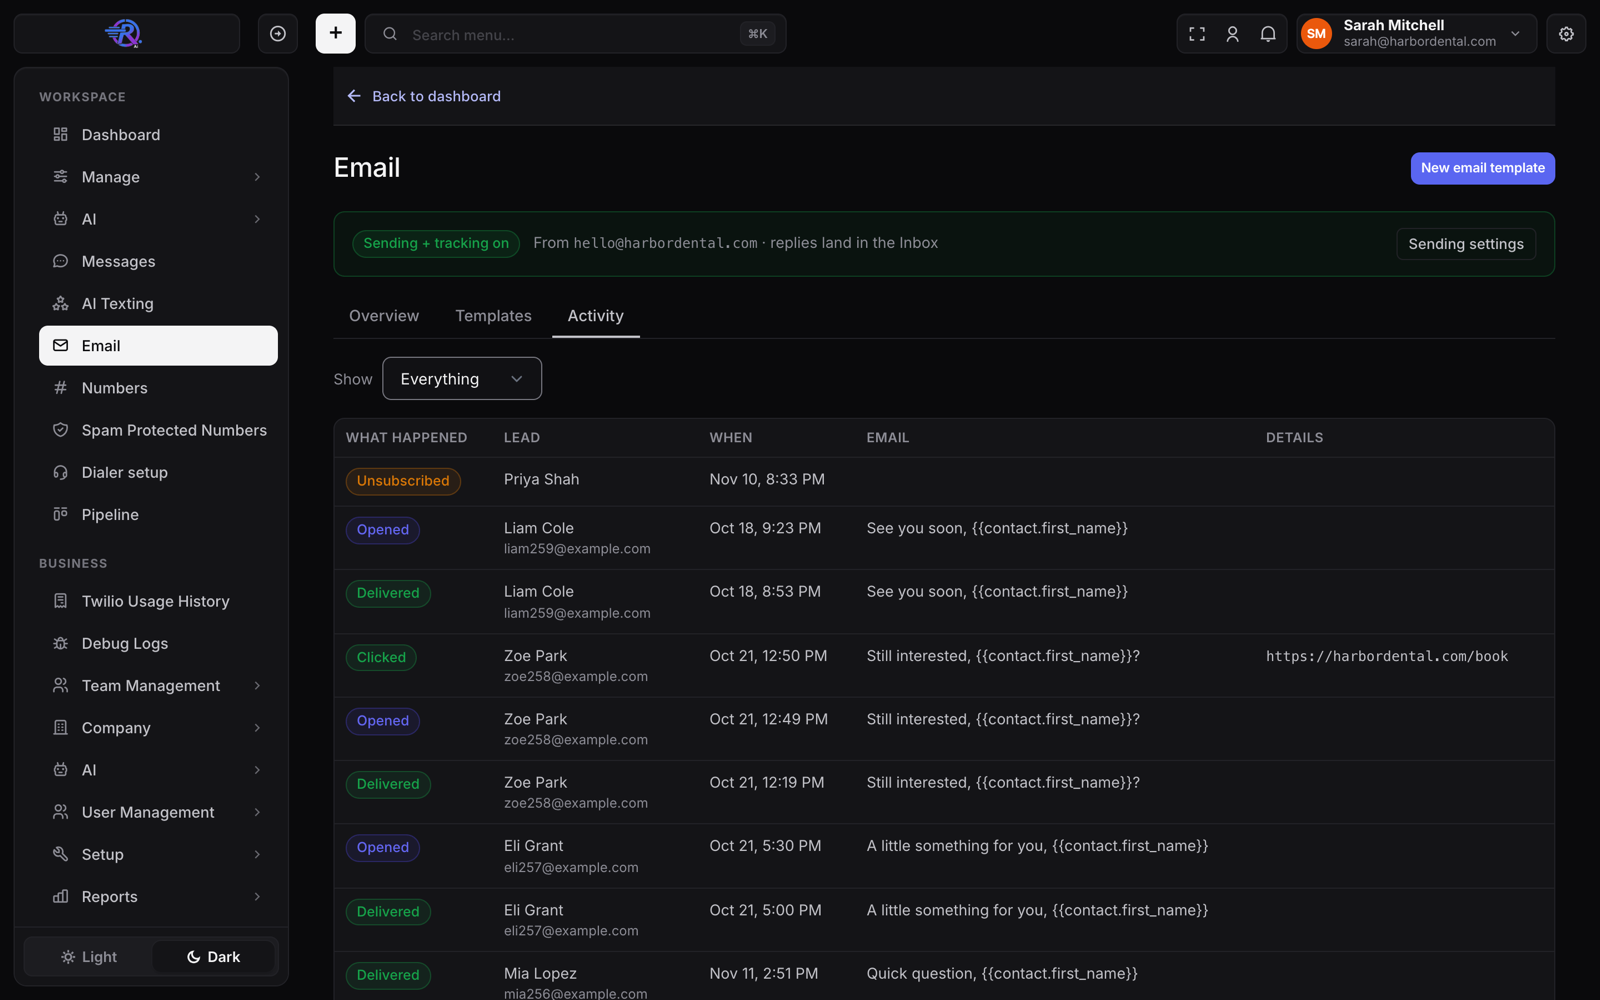
- After the first real send, Email → Activity shows Delivered within a minute.
- Then do step 6 below so it lands in the inbox, not spam.
📬 6. Make sure it lands in the inbox, not spam#
Do this once per client, right after setup. It takes 10 minutes.
Add a DMARC record
Gmail and Yahoo check three records: SPF and DKIM (already added in step 2)
and DMARC. At the client's DNS host, look for a TXT record named
_dmarc.
No _dmarc record yet? Add one: type TXT, name _dmarc, value
v=DMARC1; p=none;
Already has one? Leave it. Never add a second _dmarc record: two of them
break both.
Check the three passes in Gmail
Send a test email (step 2) to a Gmail address. Open it, click the three dots ⋮ next to Reply, then Show original. At the top you should see SPF: PASS, DKIM: PASS and DMARC: PASS.
Anything that isn't PASS: recheck that record at the DNS host, wait an hour, and test again. Don't send to leads until all three pass.
Score a real template
Open mail-tester.com and copy the address it shows. In AI Sync, add a contact named Spam test with that email. Make a workflow with just one Send email step using the client's template, click Test, pick the Spam test contact and run it. Back on mail-tester, click Then check your score.
Aim for 9/10 or higher. The report says exactly what to fix. Delete the test workflow and contact when you're done.
Check it landed in the inbox
Send the test to a Gmail, an Outlook and an iPhone (iCloud) address you control. It should land in Primary or the main inbox. If it lands in spam, open it, click Not spam, and check the content rules below.
Content that stays out of spam#
Write like a person. Short, plain, one main link. Avoid ALL CAPS, lots of exclamation marks and words like "FREE!!!" or "Act now".
Use the client's own links. Link to their website, not to link shorteners like bit.ly.
One button, one goal. Book, call, or claim. Not five.
Images help, they don't replace words. An email that's only a picture looks like spam.
Keep the footer. Business name, postal address and Unsubscribe. AI Sync also adds the one-click unsubscribe Gmail and Yahoo require, so people unsubscribe instead of marking you as spam.
Only email people who asked to hear from the client. Leads who filled in their form, booked or bought. Never bought lists.
🛡️ 7. Protect their sending reputation#
- New domain: stay under about 100 emails a day for the first week, then double each week. Don't send to a whole old list on day one.
- Old lists: clean them before a big send. Above 5% bounces or 0.3% spam reports, Gmail and Yahoo start blocking the sender. The Overview warns you before that.
- Anyone who bounces, marks the email as spam or unsubscribes is set to Do not email automatically. Don't turn that back on.
- Check the client's Email numbers after the first week.
❓ If something's wrong#
| You see | Do this |
|---|---|
| "This key can only send email" | Make a new key with Full access |
| DNS records stuck on Not found yet | Check the Name box has send, not send.domain.com. Wait up to an hour |
| Opens and clicks are 0%, but delivered is fine | Add the tracking subdomain (step 2, Turn on tracking) |
| Banner says Finish email setup | Open Sending settings and do the step it shows |
| Replies don't show in the Inbox | Check the receiving address in step 3 ends in .resend.app |
| Bounce or spam warning on the Overview | Pause big sends and clean the list before sending again |
| Test email lands in spam | Check Show original for SPF, DKIM and DMARC PASS (step 6), then run mail-tester and fix what it lists |
| Show original says DMARC: FAIL | Make sure there's exactly one _dmarc TXT record, then wait an hour |
Related: Email section · Send email from your own domain · Moving email off GoHighLevel